

Good Halloween decor doesn’t depend on a big budget. It depends on a few strong choices: one dramatic porch moment, a mantel with a clear color story, and some glow after dark. Most of the projects below start with things you may already own, like glass jars, cardboard, black paint, cheesecloth, and twigs from the yard. Others use a few inexpensive craft-store or dollar-store finds.
The 28 DIY Halloween decor ideas are grouped loosely by where they work best: the porch and yard, the front door, the mantel and shelves, the table, and the windows. Some take twenty minutes. Others fill a weekend afternoon. Pick two or three that suit your space and skill level, and build the rest of the look around them.
1. Cheesecloth Ghosts Floating From a Porch Ceiling
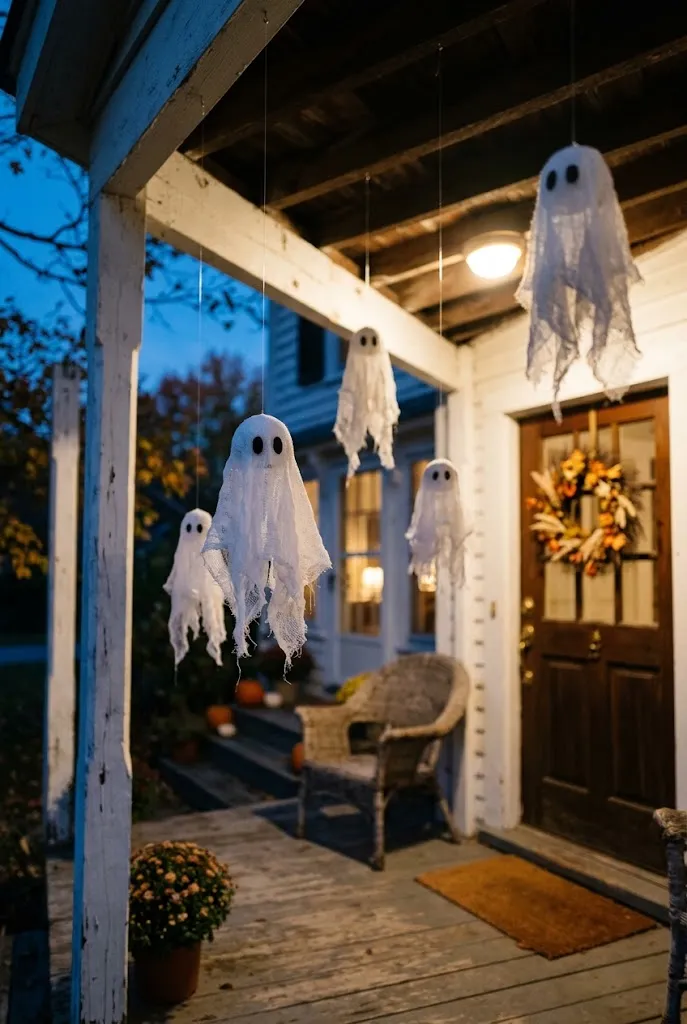
Cheesecloth stiffened with fabric stiffener or liquid starch dries into a ghost shape with soft, ragged edges. Drape the cloth over an inflated balloon or a tall jar, let it dry fully, then remove the form. Hang the ghosts at staggered heights from clear fishing line so they appear to hover.
Tips & Tricks
- Cut the cloth into uneven, tattered hems before draping.
- Use small black felt ovals for eyes and mouths. Black paint tends to bleed into the gauze.
- Hang them under a covered porch ceiling so wind and rain don’t wear them down.
Keep these away from any real flame. Cheesecloth and stiffener are flammable.
2. Bat-Silhouette Mason Jar Luminaries
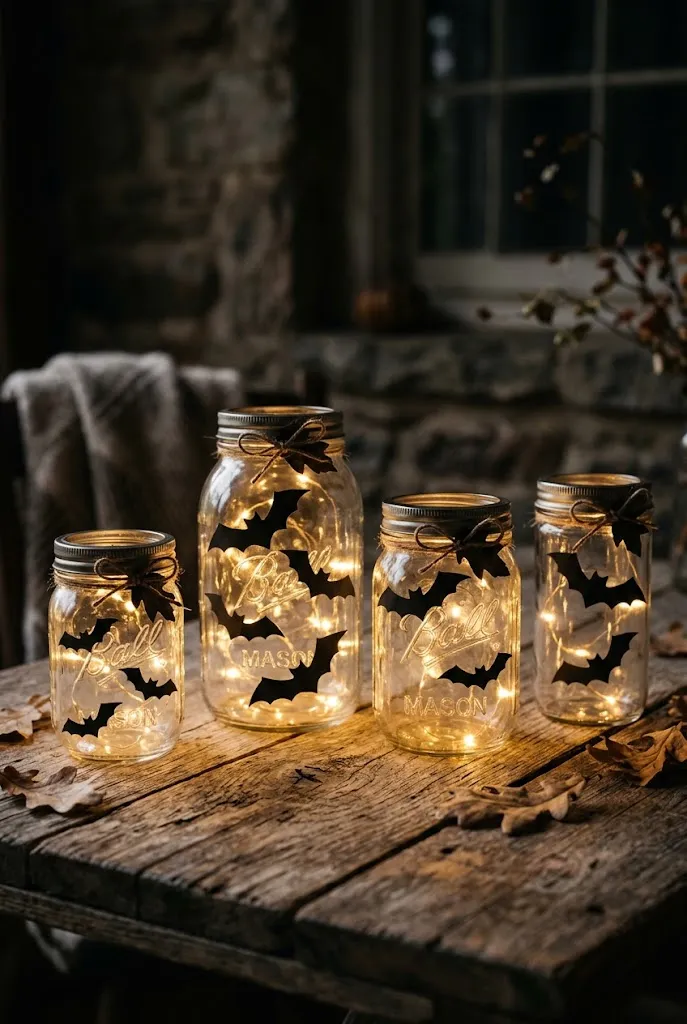
Cut bat shapes from black cardstock or adhesive vinyl and press them onto the outside of clean glass jars. Drop in a battery-operated LED tea light and the bats glow against an orange or amber backdrop. Vary the bat sizes and wing positions so the set feels like a flock rather than a repeating stamp.
| Jar Treatment | Effect | Best Fit |
|---|---|---|
| Clear glass with black vinyl bats | Crisp silhouette, warm glow | Porch steps, mantels |
| Jar brushed with thin orange paint | Deeper color, softer light | Dining table, shelves |
Use LED lights only. Paper and vinyl shouldn’t sit near an open flame.
3. A Paper Bat Swarm Climbing the Wall
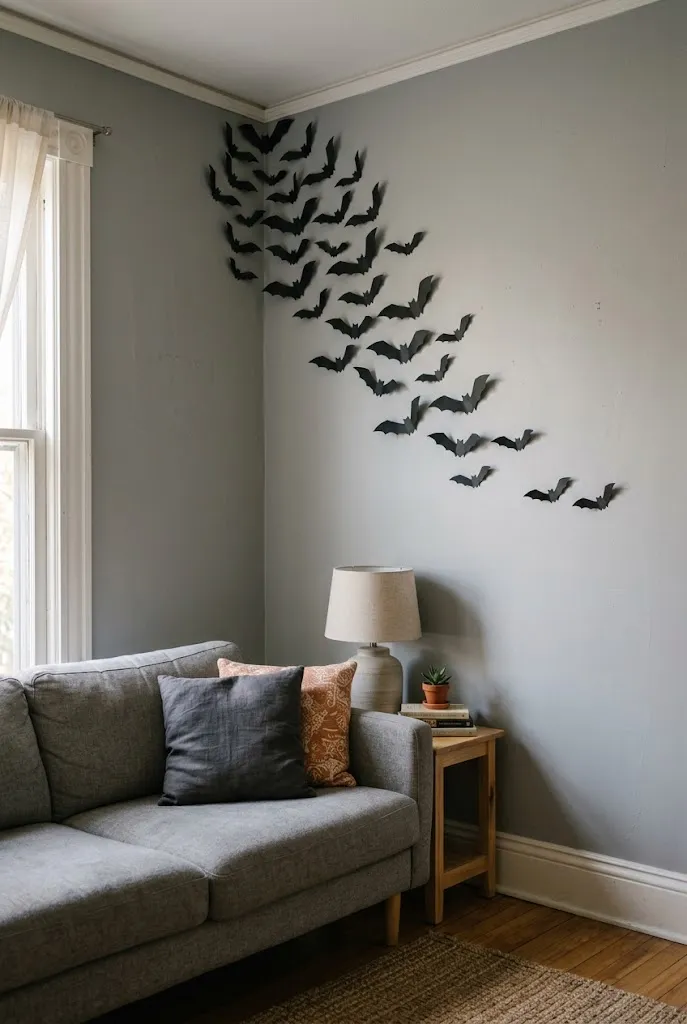
A bat swarm reads as drama, not craft-project clutter, when the placement is planned. Cut 25 to 40 bats from black cardstock in three sizes. Start with a tight cluster near a corner or doorway and let the bats spread outward in a loose spiral, with the largest ones closest to the cluster.
Common Mistake: Spacing bats evenly across the wall like wallpaper.
Better Approach: Group them densely at one point and thin them out as they fly away. The uneven rhythm suggests movement. Removable poster putty or small pieces of painter’s tape keeps this renter-friendly.
4. Giant Yarn Spiderweb Over the Front Door
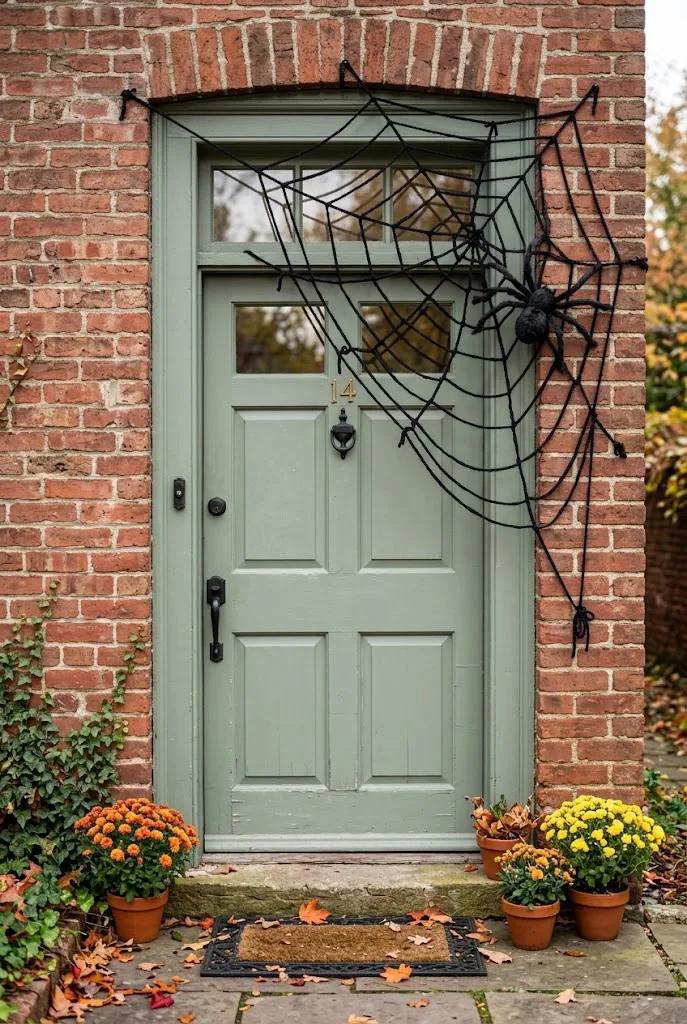
A web made of black yarn or twine looks more intentional than store-bought stretch cobweb. Tape or tack six to eight “spokes” radiating from a center point on the door frame, then wrap yarn from spoke to spoke in an outward spiral, tying a loose knot at each crossing. A web that sags slightly looks more natural than a perfectly taut one.
Quick Facts
Best For: Front doors and covered entries
Investment: Accessible
Visual Effect: Graphic, high contrast against a light door
Add a single oversized plastic spider near one edge rather than crowding the web with several.
5. Matte Black Pumpkins With Gold Accents
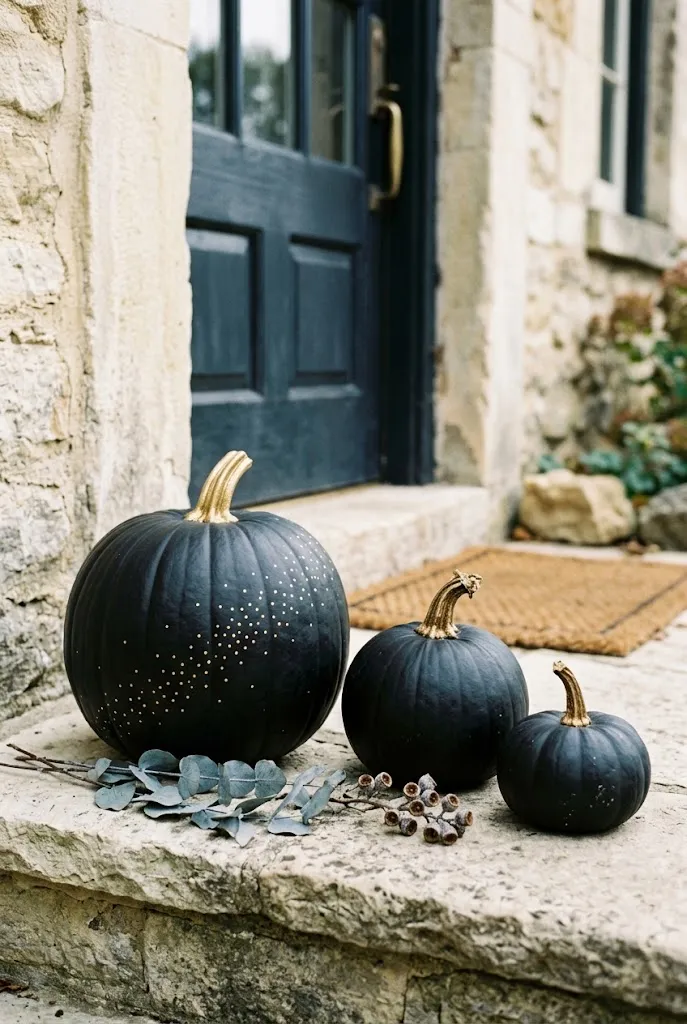
Spray real or craft pumpkins with matte black paint, then add a restrained detail: a gold-painted stem, a thin gold band, or a small cluster of dots. The look is moody and modern, and it stays tidy without carving. Craft foam pumpkins last for years, and real ones need a coat of clear sealer to resist rot indoors.
- Spray outdoors or in a well-ventilated garage.
- Apply thin coats and let each dry before the next.
- Keep metallic details minimal so the black stays dominant.
6. Foam Board Tombstones for the Front Yard
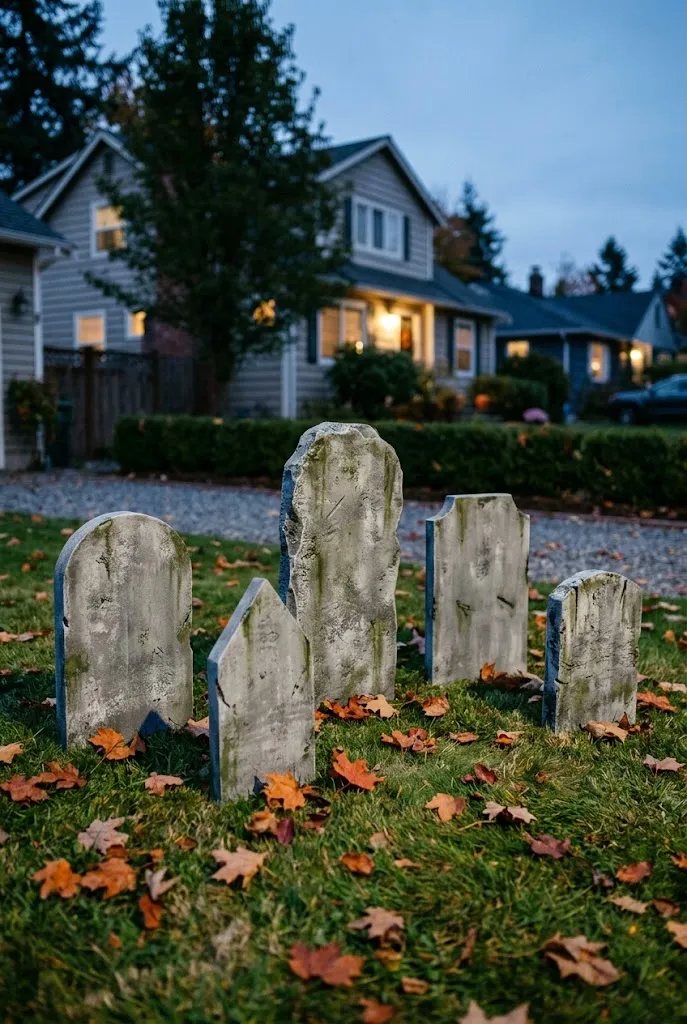
Rigid foam insulation board is lightweight, cuts cleanly with a utility knife, and takes paint well. Cut tombstone shapes, carve edges with a rough sponge for a weathered look, and paint with layered gray, black, and a dry-brushed hint of moss green. Press long dowels or tent stakes through the bottom to anchor them.
Do: Stagger heights and angles, and tilt one stone slightly.
Don’t: Paint them solid gray. Layering and dry-brushing makes them look like stone.
Anchor them well. Foam catches wind easily.
7. A Thrifted Apothecary Potion Shelf

Collect mismatched glass bottles and jars from thrift stores or your recycling bin. Soak off the labels, fill the containers with tinted water, colored sand, dried herbs, or rolled paper scrolls, and seal them with corks. Tie tags to the necks and set them on a shelf in a mix of heights.
- Tea or coffee staining makes paper tags look aged.
- A few real stems of dried lavender or rosemary add texture.
- Group in odd numbers for a more natural look.
Editor’s Note: Avoid filling bottles with anything that could be mistaken for a drink if kids or pets are around.
8. A Witch’s Broom Wreath
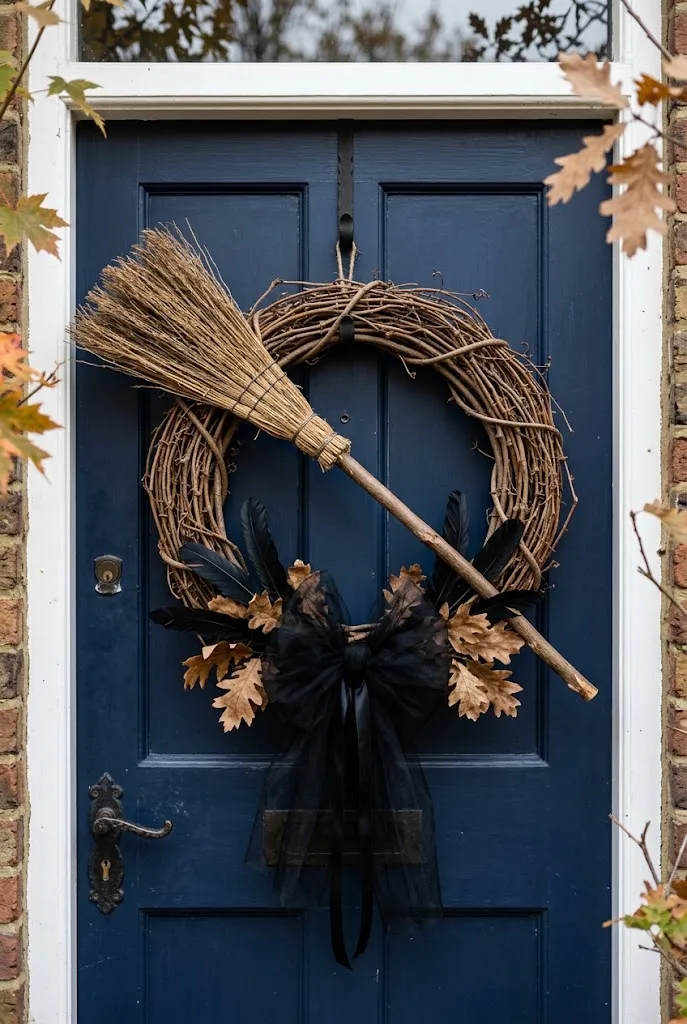
Bundle straw or raffia around a dowel to make a broom shape, and attach it diagonally across a grapevine or twig wreath form. Add a few faux black feathers, a small tulle bow, and a handful of dried leaves. The diagonal broom gives the wreath a shape that sets it apart from standard autumn wreaths.
Quick Facts
Best For: Front doors, interior doors
Investment: Accessible to moderate
Visual Effect: Playful with a rustic feel
9. Black-Painted Branch Arrangement
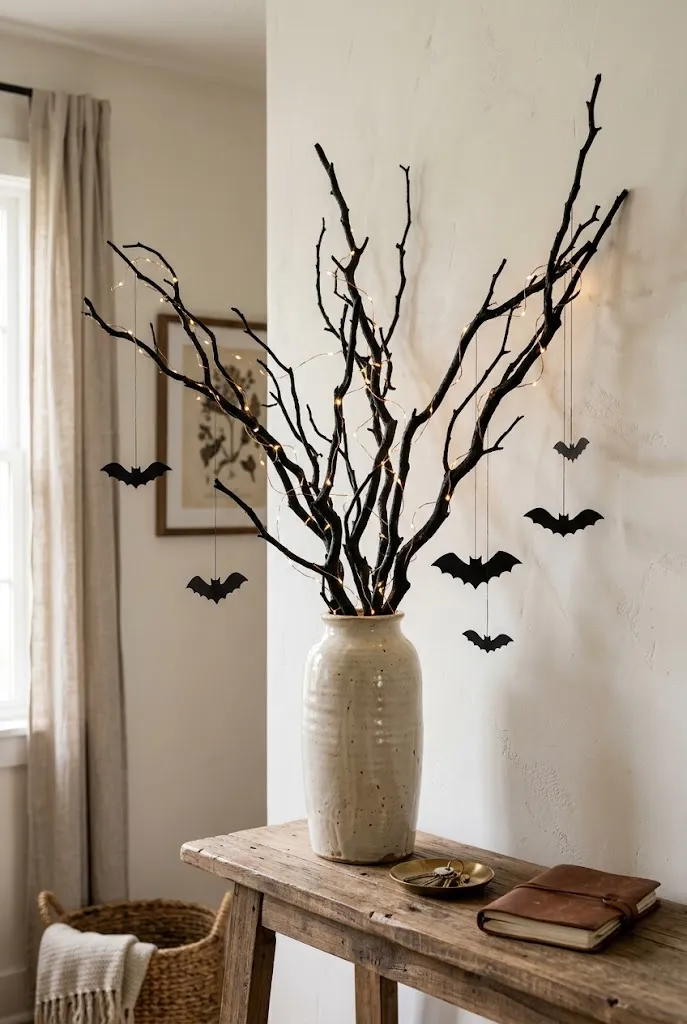
Branches from the yard are free and can be arranged in a tall vase for height. Spray them matte black, let them dry, then arrange them in a heavy vase or pitcher. Add a few hanging details: small paper bats on thread, tiny black feathers, or bare-bulb string lights wound inside.
Steps
- Collect branches of varying lengths and shake off loose bark.
- Spray in thin coats outdoors and let them dry fully.
- Weight the vase with stones or sand, then arrange the tallest branch first.
10. LED Taper Candelabra With Wax Drips
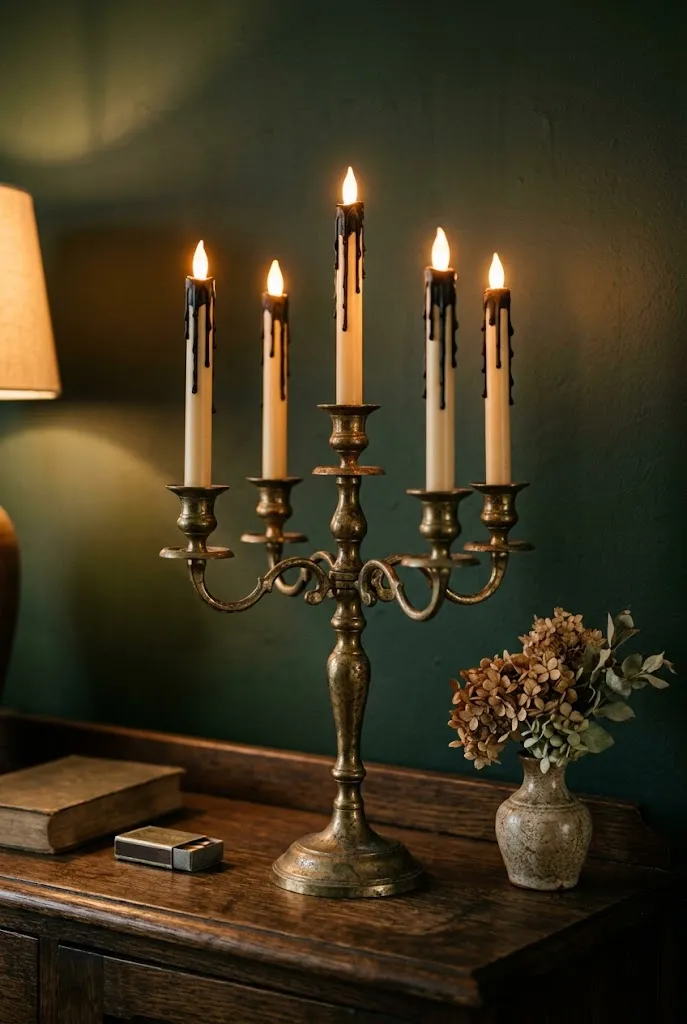
Use a thrifted brass or silver candelabra and swap in LED taper candles. Add faux drips with white or black hot glue, painted to match. This reads as gothic without the fire risk. The effect comes from uneven drips of different lengths.
Common Mistake: Making every drip the same length.
Better Approach: Vary lengths and let a few overlap, then paint with a dry brush for a waxy sheen.
Keep hot glue away from your skin. It burns quickly.
11. Paper Bag Jack-o’-Lantern Luminaries
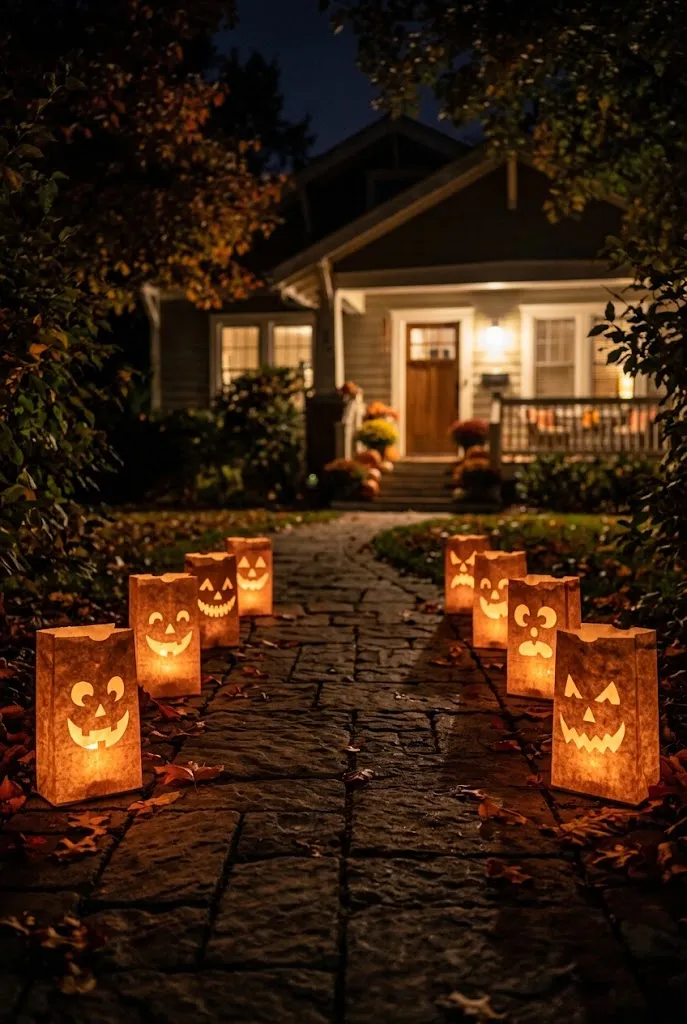
A plain brown or white paper bag, a marker, and scissors are enough. Draw jack-o’-lantern faces, cut them out with a craft knife, and put a battery-operated light inside. Weigh down the base with a bit of sand or a rock in a small bag so wind doesn’t tip it.
| Bag Style | Look | Best Use |
|---|---|---|
| Brown kraft | Rustic, warm glow | Walkways |
| White | Brighter, cleaner | Steps and railings |
12. Felt Ghost Mantel Garland
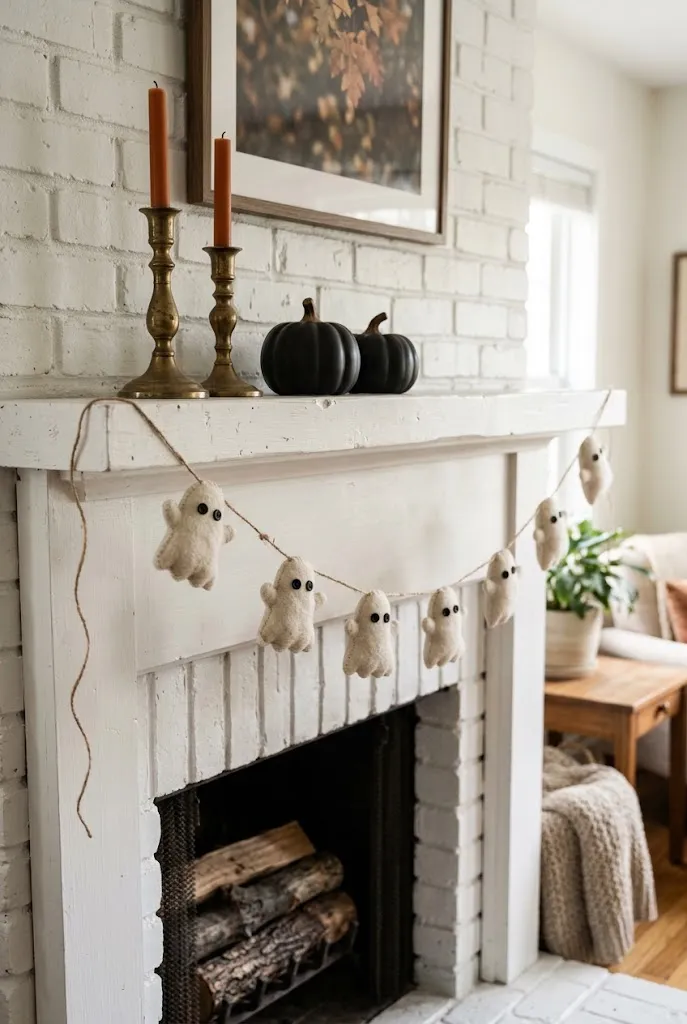
A garland of small felt ghosts strung on twine is one of the quickest wins. Cut about twelve ghosts in two sizes from white felt, add button or felt eyes, and glue or stitch them to a length of twine. Vary the sizes and let the twine drape in a loose swag across a mantel.
Quick Tip: Slip a small piece of cardboard inside each ghost before gluing so it stays flat.
13. Faux Spell Book Stack

Cover old hardcovers or thrifted books with brown kraft paper or leather-look craft paper, then add tea-stained edges, a faux leather strap, and a small trinket or key. Stack three or four in descending sizes and top with a candle or a small jar.
- Tea-stain pages by brushing on strong black tea and letting them dry.
- Choose a worn color palette: brown, burgundy, and dark green.
- Leave titles blank or hand-draw a symbol rather than words.
14. Stacked Pumpkin Topiary
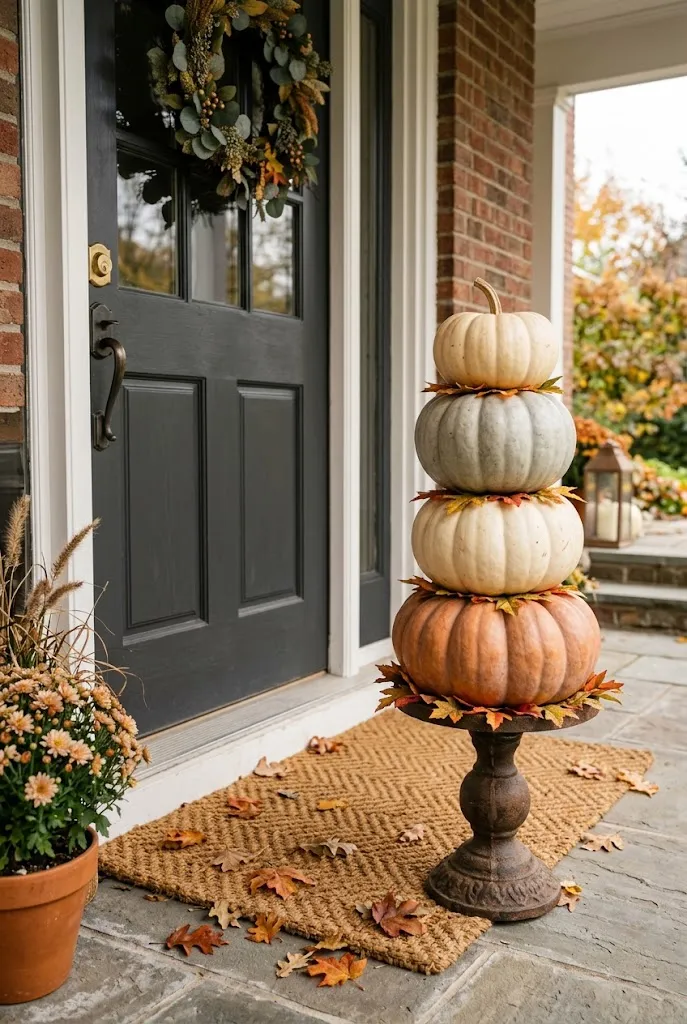
Stack three or four pumpkins of graduated sizes on a sturdy base to create a tall topiary. Use real or craft pumpkins and secure them with a wooden dowel through the center. Finish with a real stem or a twig on top, and keep the colors tonal for a more modern effect.
Steps
- Pick a flat-bottomed base pumpkin.
- Drill a hole through the centers and thread a dowel through the stack.
- Test stability before moving it outdoors.
15. Black Cauldron Planter With Mums
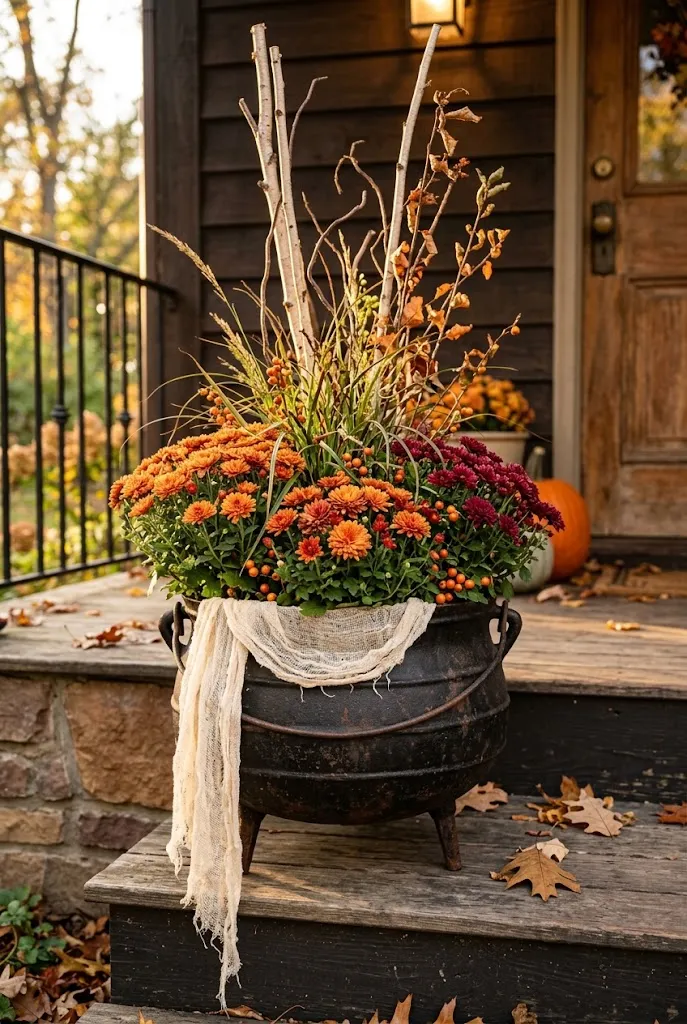
A cheap plastic cauldron or an old black bucket becomes a seasonal planter when filled with potted chrysanthemums, with a few dried branches poking out. Add a cheesecloth strip draped over the edge for a spooky feel. Real plants add color that plastic decor can’t.
Do: Keep the mums in their nursery pots and set them inside, so you can swap them out.
Don’t: Fill the cauldron with soil unless it has drainage holes.
16. Haunted House Window Silhouettes
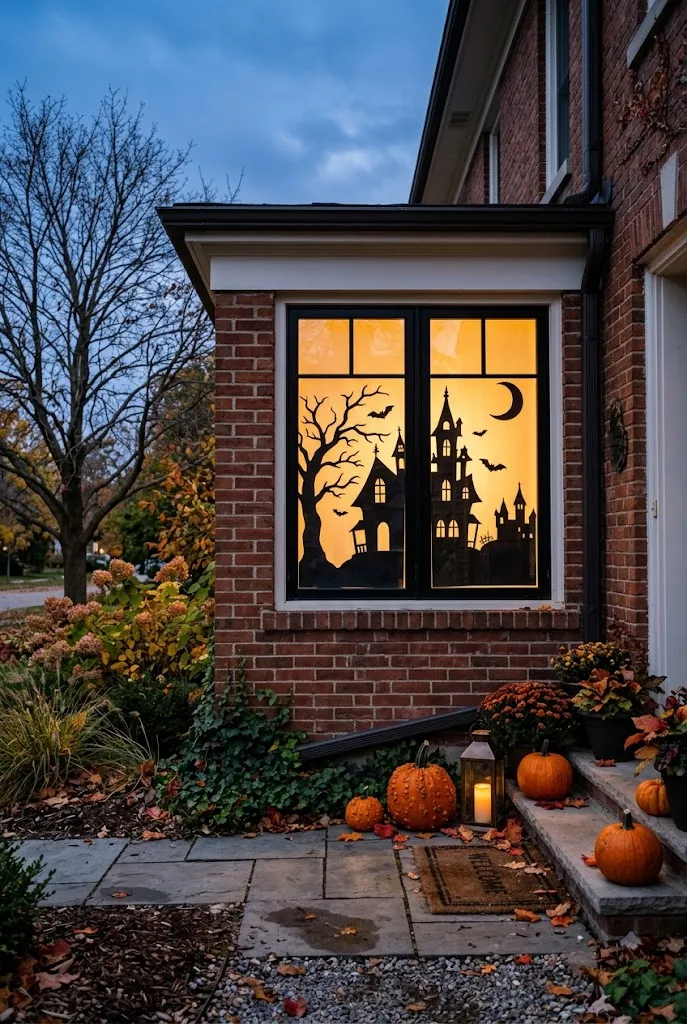
Cut a haunted house skyline from black cardstock and tape it to the inside of a window. Backlit by a lamp or LED strip at night, it reads as a spooky scene from the street. Add small cutouts for a witch, a tree, or a cat on the roofline.
Editor’s Note: Tape it to the glass rather than the frame so the light shows evenly, and keep the lamp bulb cool to the touch.
17. Crepe Streamer Doorway Curtain
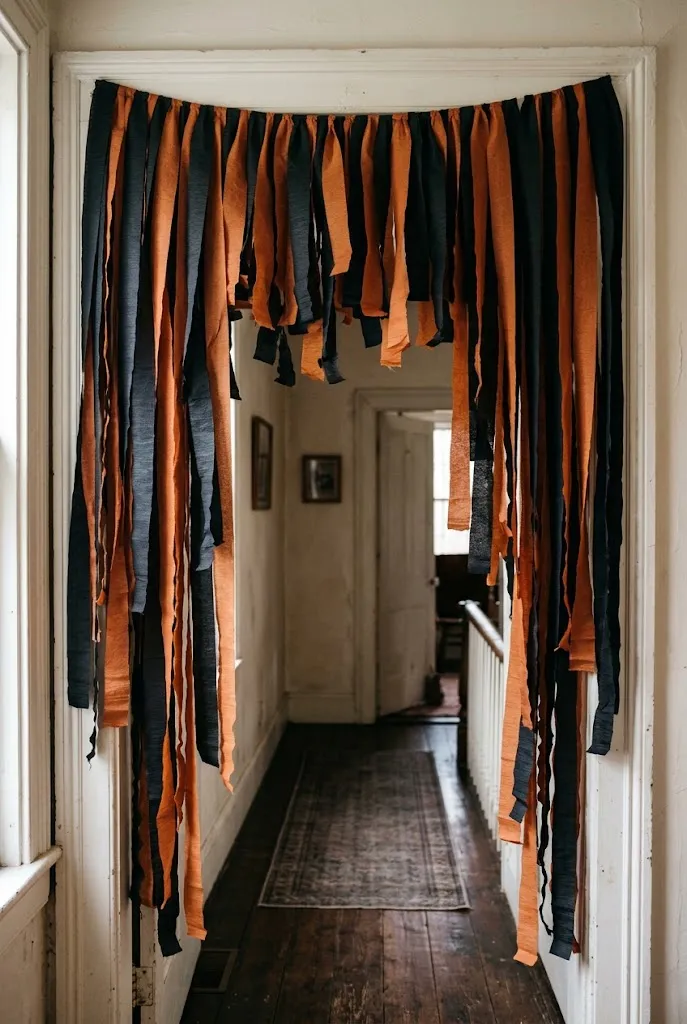
Hang strips of black and orange crepe paper from a tension rod or doorway for an inexpensive entry. Mix long and short strips and twist some for texture. It works for a party entrance or as a hallway accent.
- Twist some strips and leave others flat.
- Use a tension rod for a no-damage setup.
- Keep it away from heaters or candles.
18. Eyeball Jar Display
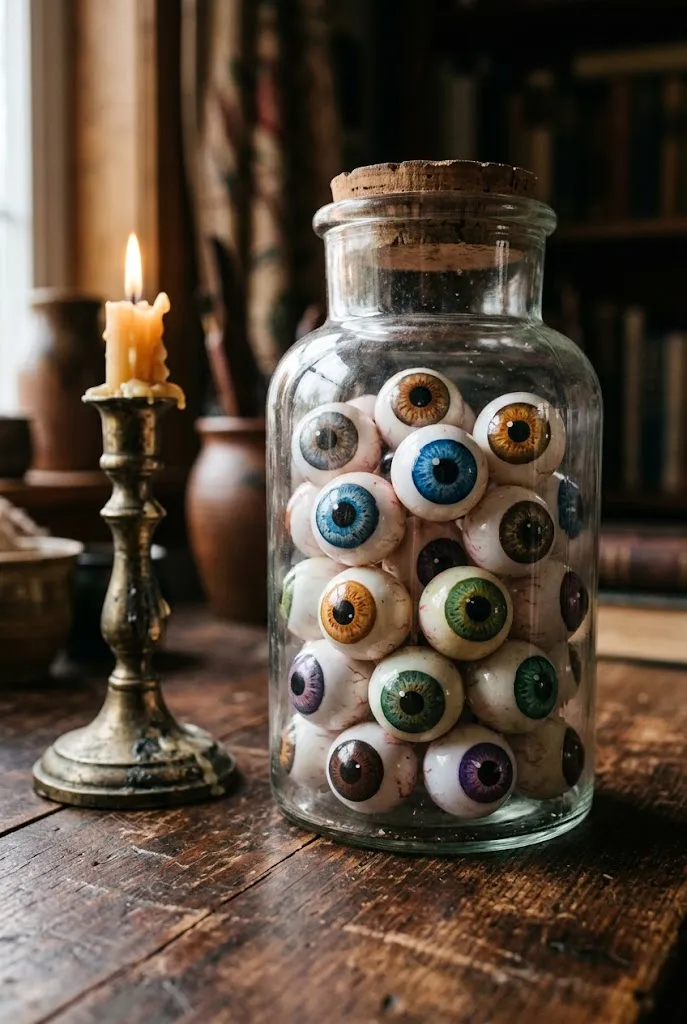
Paint ping pong balls with white paint, add an iris and a pupil, and fill a glass jar or apothecary bowl with them. Add faint red veins with a fine marker. A dozen eyeballs in a clear jar looks creepier than a single large one.
Quick Tip: Seal with a clear gloss spray so the eyes look wet.
19. Skeleton Hand Planter
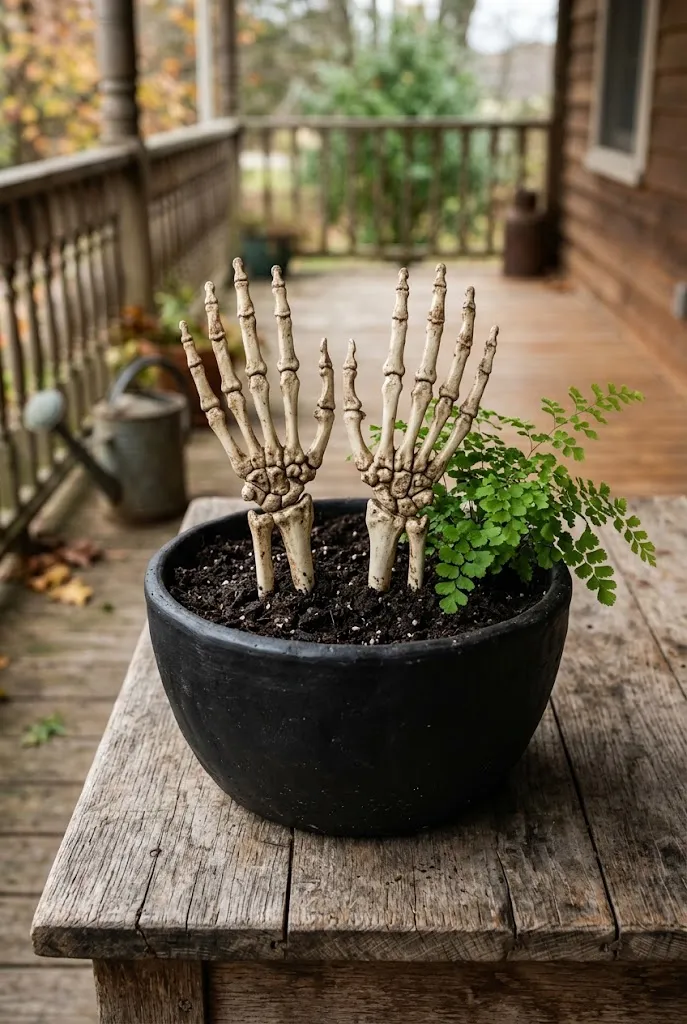
Dollar-store skeleton hands can be pushed into a potted plant so they appear to reach out of the soil. Use a plain black or terracotta pot, add a bit of faux moss, and plant a small succulent or fern next to the hands. It works indoors or on a covered porch.
Common Mistake: Overcrowding the pot.
Better Approach: Use two hands and one plant so the skeleton remains the focus.
20. Pierced Tin Can Lanterns
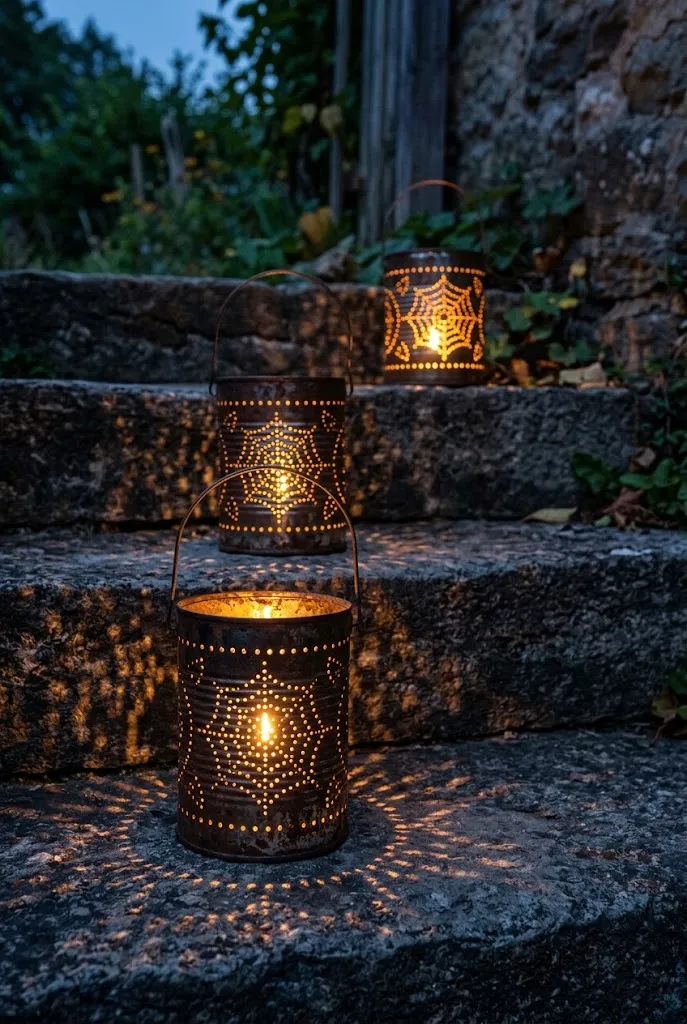
Fill an empty can with water and freeze it, then use a hammer and nail to punch a pattern, such as a spiderweb or stars, through the metal. The ice keeps the can from denting. Once the ice melts, drop in an LED light and set the lantern on steps or hang it with wire.
Steps
- Remove the label and fill the can with water; freeze overnight.
- Mark the pattern with a marker.
- Punch holes with a nail and hammer, then thaw.
File or fold down any sharp edges at the rim.
21. A Branch-Runner Halloween Table
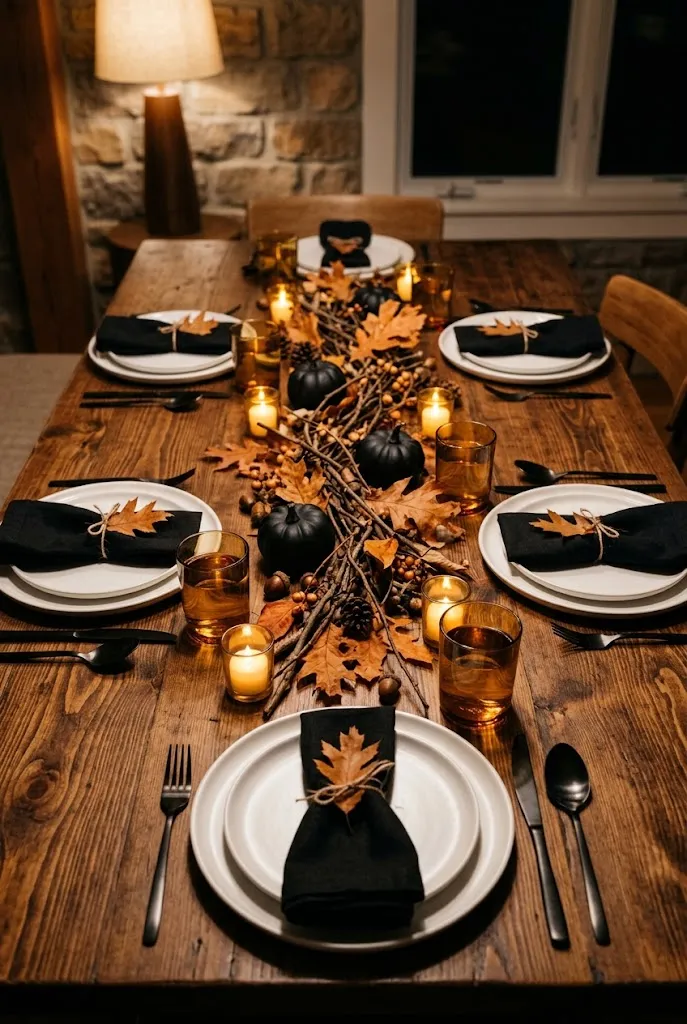
For a dinner table, lay a runner of twigs, dried leaves, and small black pumpkins down the center. Use black napkins, simple white plates, and a few LED votives. The branches add height and texture without much cost.
| Element | Effect | Budget Note |
|---|---|---|
| Foraged branches | Height and texture | Free |
| Black napkins | Visual contrast | Low cost |
| LED votives | Warm glow | Reusable |
22. Glowing Eyes in the Bushes
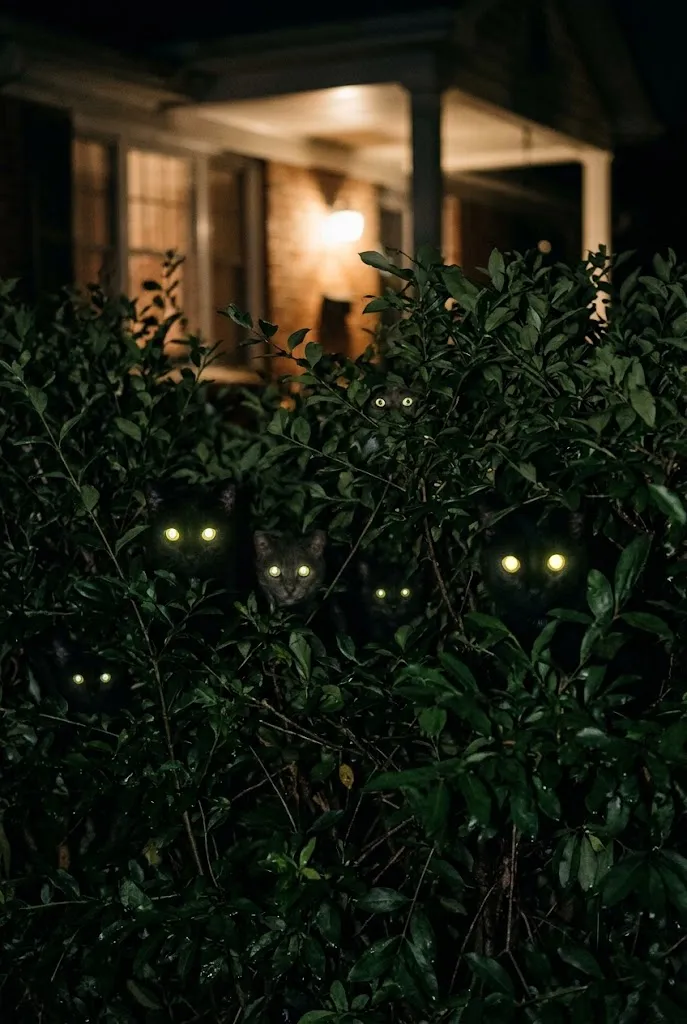
Cut eye shapes from yellow or green cardstock, tape them inside cardboard tubes or toilet paper rolls, and add a small LED light. Tuck them into shrubs or under the porch so the eyes peer out after dark.
Tips & Tricks
- Vary the eye sizes and shapes.
- Use cool-colored lights for an eerie effect.
- Keep batteries dry with a small plastic bag around each light.
23. A Black-Framed Silhouette Gallery Wall
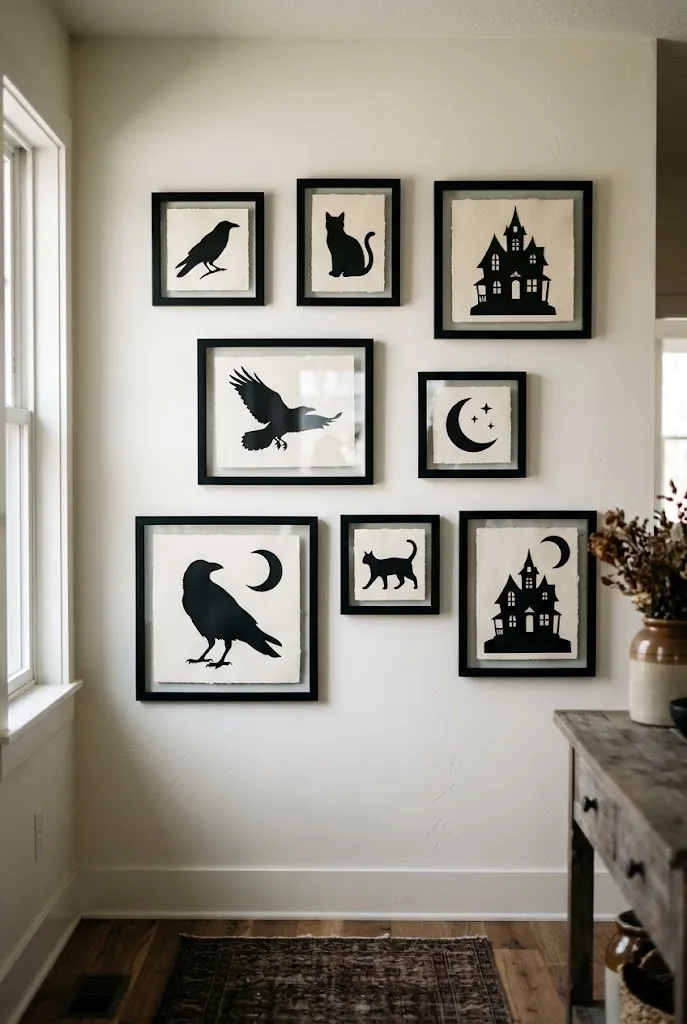
Paint thrifted frames matte black and fill them with cut-paper silhouettes: a raven, a cat, a house, a skull, a moon. Use white or cream paper behind the black shapes for contrast. Mix frame sizes and hang them in a cluster.
Quick Facts
Best For: Hallways, living rooms
Investment: Accessible
Visual Effect: Graphic, cohesive
24. Cardboard Black Cats Along the Railing
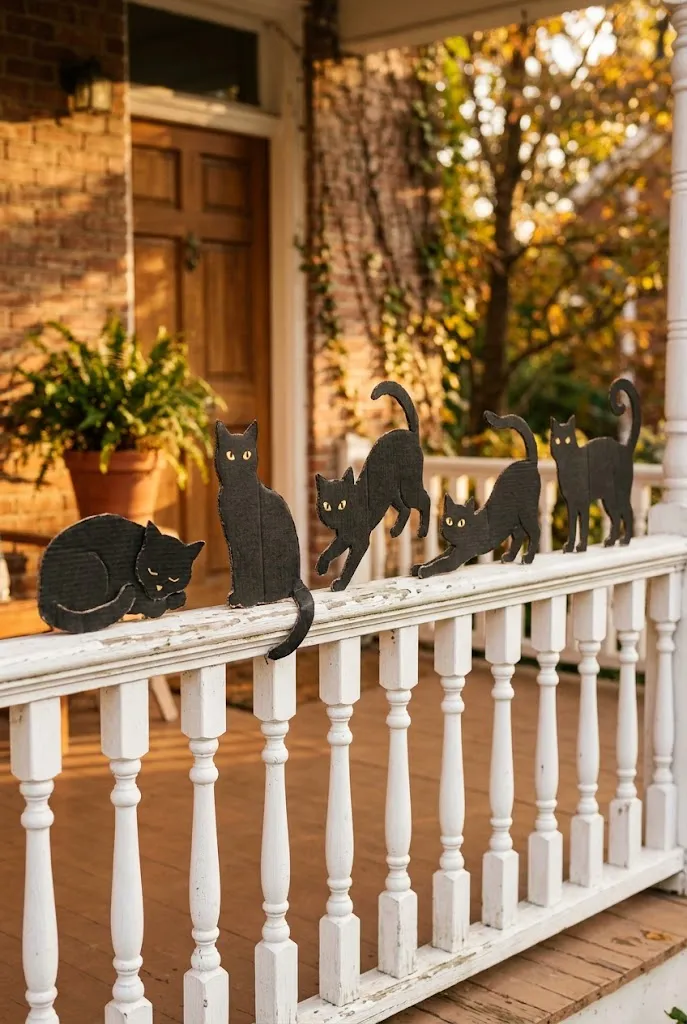
Trace a cat silhouette onto cardboard, cut it out, and paint it matte black. Add small yellow eyes cut from paper. Set cats along a porch railing or stair rail in different poses: sitting, stretching, arching. Seal them if they’ll be outdoors.
Do: Vary the poses.
Don’t: Use the same stencil at the same size for each one.
25. Hand-Painted Skull Pumpkins
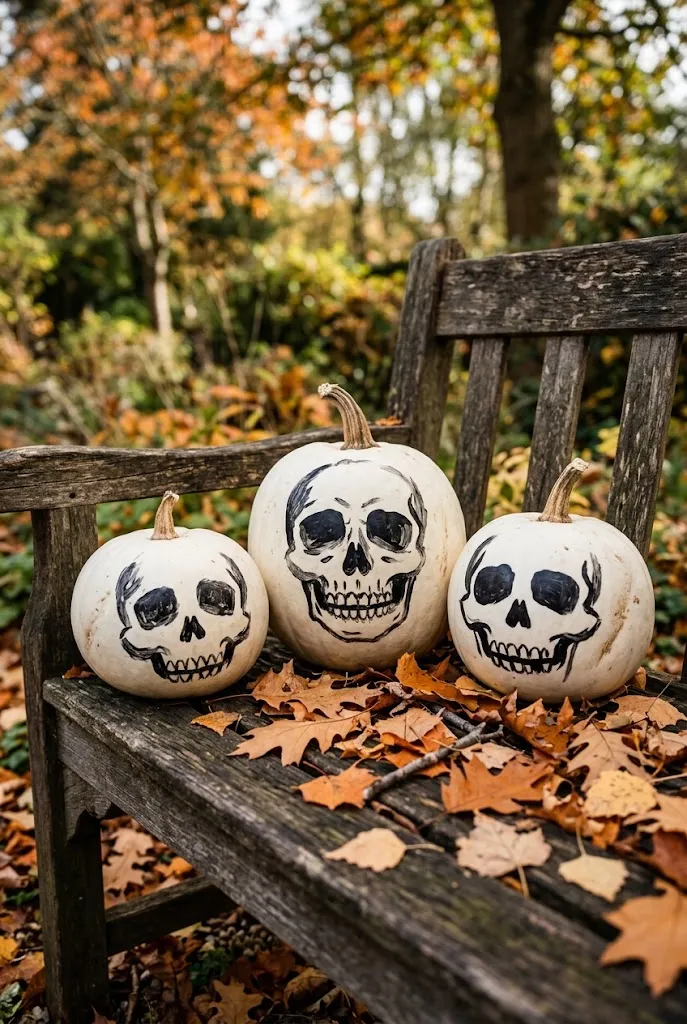
Paint skull faces on white craft pumpkins with black acrylic paint. Start with two large eye sockets, a small nose triangle, and a row of vertical lines for teeth. White pumpkins give a clean base for the contrast.
Steps
- Paint the eyes and nose first.
- Add teeth with a thin brush.
- Shade the cheeks with diluted gray paint.
26. Crow-Perched Banister Garland
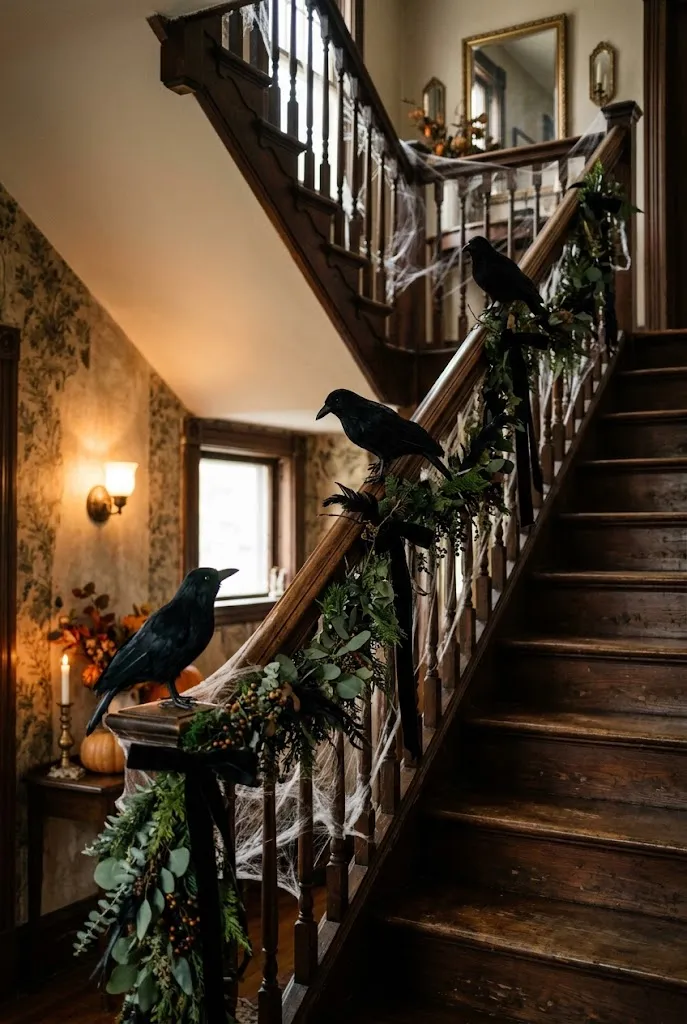
Wrap a faux greenery or black feather garland around a stair banister and perch two or three faux crows along it. Add black ribbon and a few cobwebs. The scale of the birds relative to the stairs makes it look dramatic.
Editor’s Note: Secure the garland with zip ties or floral wire so it doesn’t slide when someone grabs the rail.
27. An Aged “Haunted” Mirror
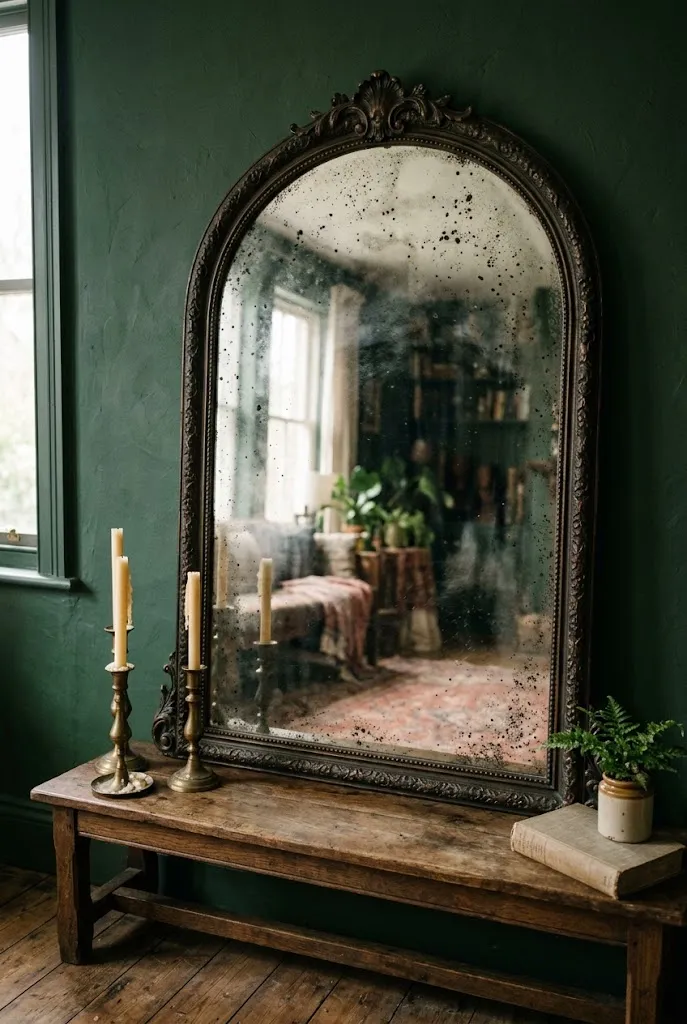
Spray an old mirror with a mix of equal parts water and vinegar, then mist it with black spray paint and blot with a paper towel. The paint reacts to create a cloudy, aged finish. Frame it with a thrifted frame painted black or bronze.
Common Mistake: Applying too much paint at once.
Better Approach: Build the finish in light layers, letting each dry.
Work outdoors or in a ventilated space.
28. A Cardboard Haunted Village
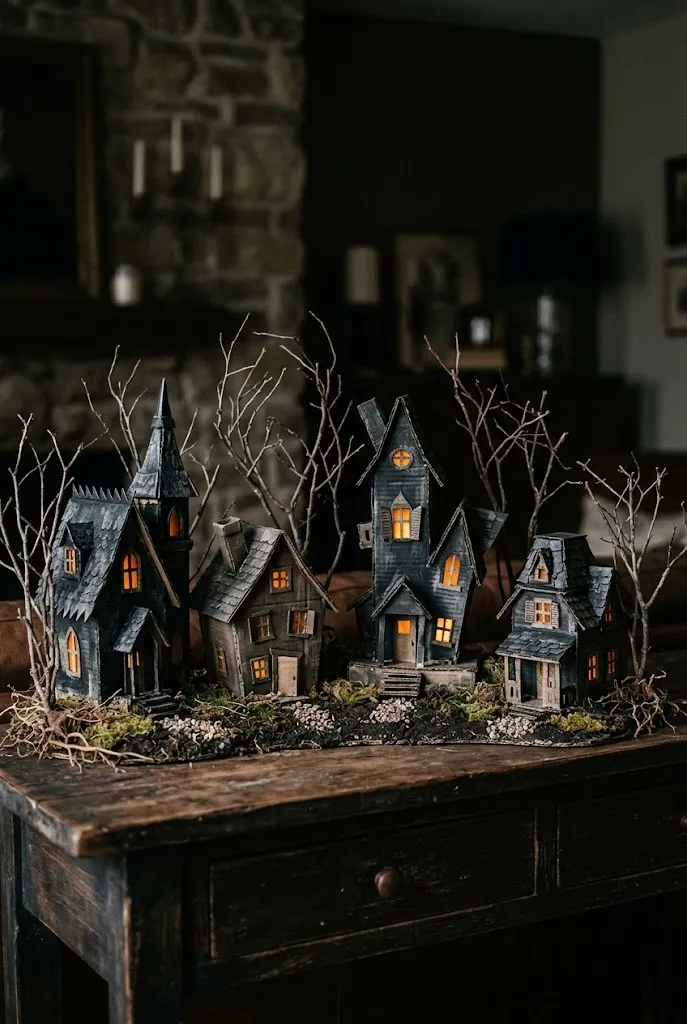
Use cardboard boxes to build a few small haunted houses, then paint them black and gray. Cut out windows and backlight them with LED lights. Group three or four on a console or mantel, with varying roof shapes, and add faux moss and bare twig trees.
Quick Facts
Best For: Consoles, mantels, sideboards
Investment: Accessible
Difficulty: Moderate; takes patience
Where to Start
If you’re short on time, choose one project for outside, one for the entry, and one for an indoor surface. The cheesecloth ghosts, the bat swarm, and a branch arrangement cover all three and use mostly materials you can find at home. Build the rest over a few evenings, and keep a consistent palette of black, bone white, and one accent color so the pieces look intentional together.