

A porch with a few handmade pieces feels more personal than one filled with boxed sets, and most of the projects below start with supplies from a hardware store, a craft aisle, or your own backyard. These DIY outdoor Christmas decorations range from a one-evening lantern grouping to weekend builds with plywood and paint, so there’s a starting point whether you rent a townhouse with a small stoop or own a house with a long fence line.
You’ll find ideas for doors, steps, walkways, yards, mailboxes, and trees, along with notes on weatherproofing, lighting, and scale so the finished pieces hold up to rain, wind, and cold. Pick two or three that suit your space, build them carefully, and let simple greenery and warm light do the rest.
1. Stack Scrap Boards Into a Tall Rustic Tree
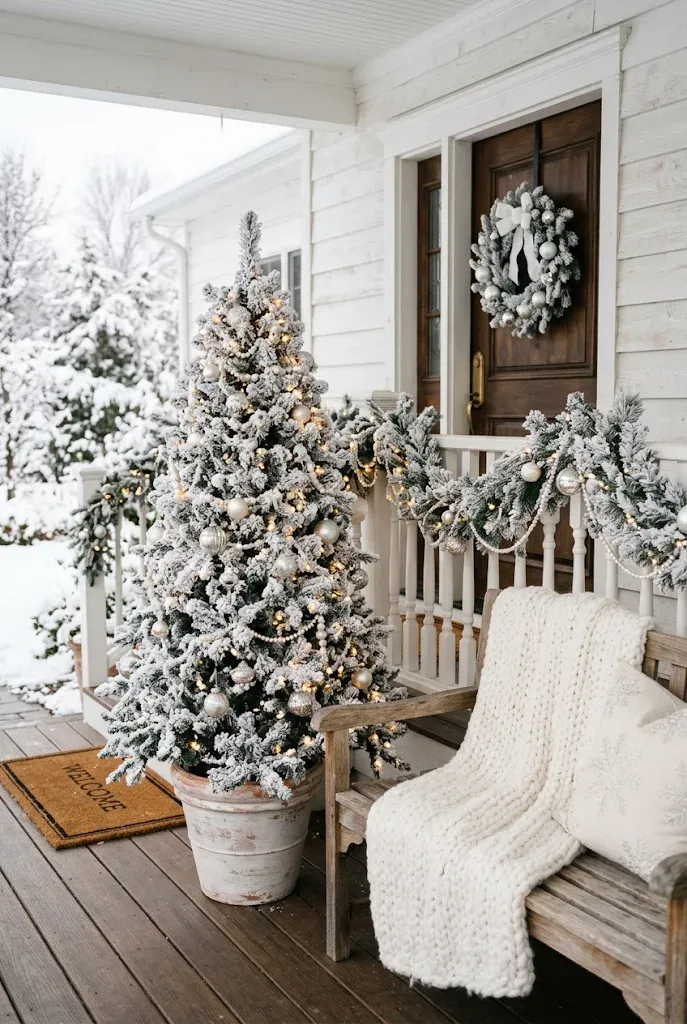
A tree built from graduated boards reads as a Christmas tree from the street, yet it’s really just a stack of lumber. Because the silhouette comes from the board lengths, you don’t need to hide the wood under greenery, which makes this one of the more forgiving builds here.
- Cut seven to nine boards from 1×4 or 1×6 lumber, starting with a bottom piece around three feet long and shortening each by a few inches as you go.
- Screw a center 2×4 upright to a wide base so the tree can’t tip in wind.
- Attach the boards to the upright, one per level, leaving a small gap between each.
- Seal with an exterior stain or clear outdoor sealer, then weave a strand of outdoor-rated warm white lights through the gaps.
Quick Tip: Top the tree with a small wooden star cut from a leftover piece rather than a store-bought topper, so the proportions stay light.
2. Turn Tomato Cages Into Light-Up Trees
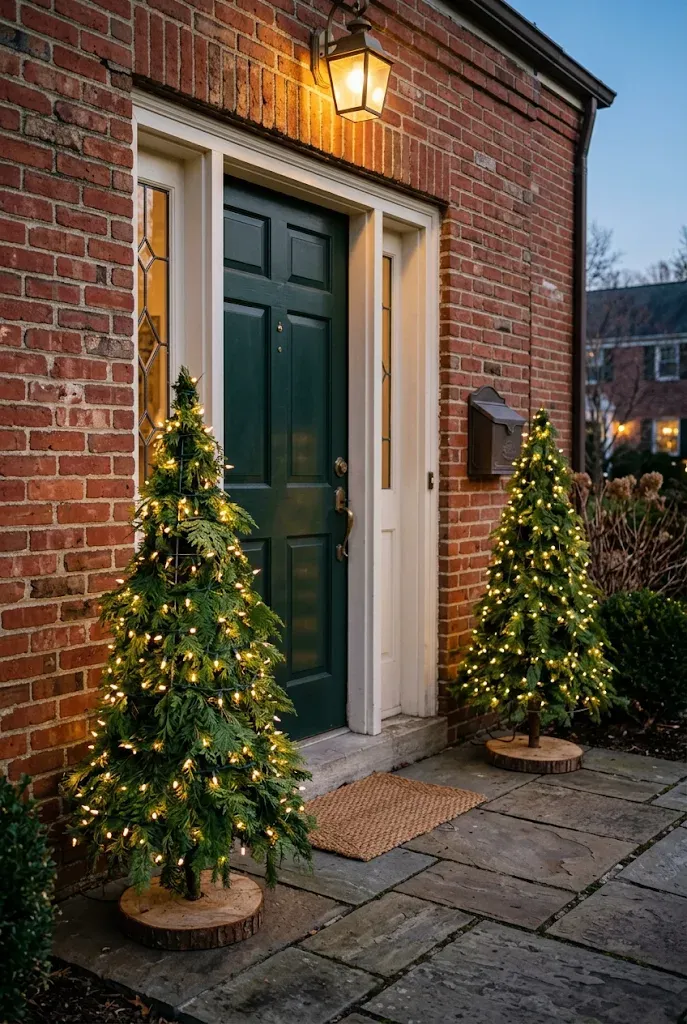
Inexpensive garden cages make a conical frame in a few minutes, and a pair flanking the front door looks surprisingly tailored. Start with the sturdiest cages you can find, since thin wire will lean once lights and ribbon add weight.
- Flip the cage so the wide ring sits on the ground and the narrow end points up.
- Cinch the top legs together with floral wire, then trim the points.
- Wrap outdoor-rated string lights from the base upward in an even spiral.
- Weave in cut evergreen stems or a faux garland for fullness.
- Anchor each tree with a stake or set it in a weighted planter.
A white or silver wire cage keeps the look light and airy, while a painted-black cage feels more graphic against brick. Either way, the lights do most of the work after dark.
3. Fill Galvanized Buckets With Layered Greenery
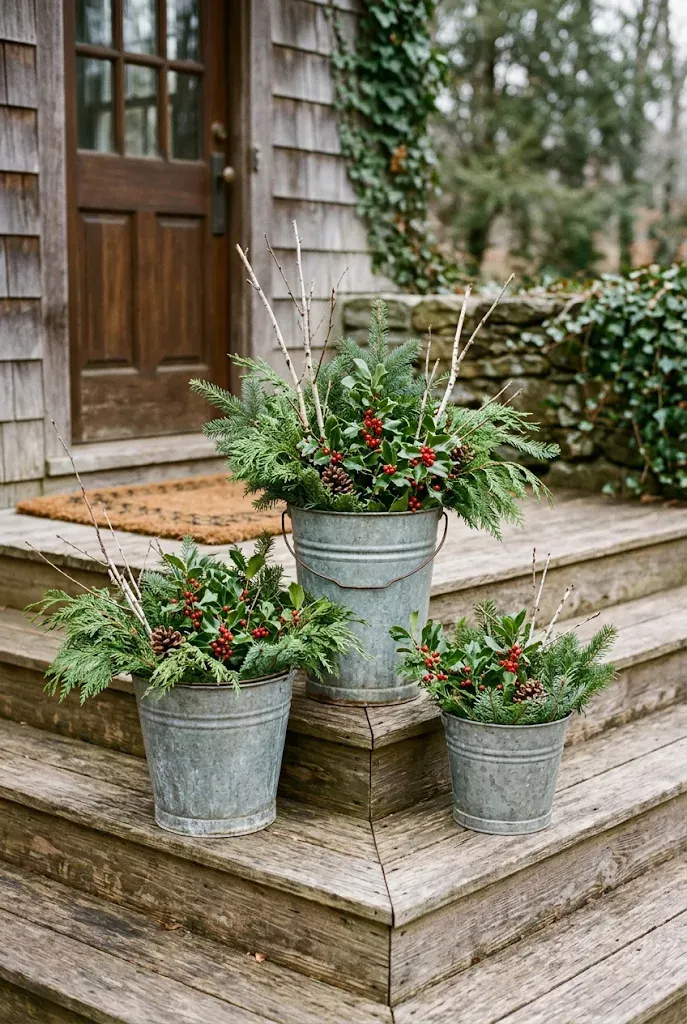
Galvanized pails give porch arrangements a farmhouse feel, and they’re easy to find in several sizes. A trio of different heights looks more natural than three matching buckets, especially if you stagger them along the edge of the steps.
Punch a few drainage holes in each bucket, add a base of gravel or crumpled landscape fabric, and fill with soil or wet floral foam depending on whether you’re using live or cut stems. Build height first with tall branches such as dogwood or birch, add mid-level fir or cedar, then tuck holly or pine cones at the front. Fresh cuttings dry out faster in sunny, windy spots, so a shaded porch will keep the arrangement fuller for longer.
Do: Mix at least two textures of evergreen so the buckets read as designed.
Don’t: Fill them to the rim with only one type of branch, which can look like a bundle rather than an arrangement.
4. Build an Oversized Hula Hoop Wreath
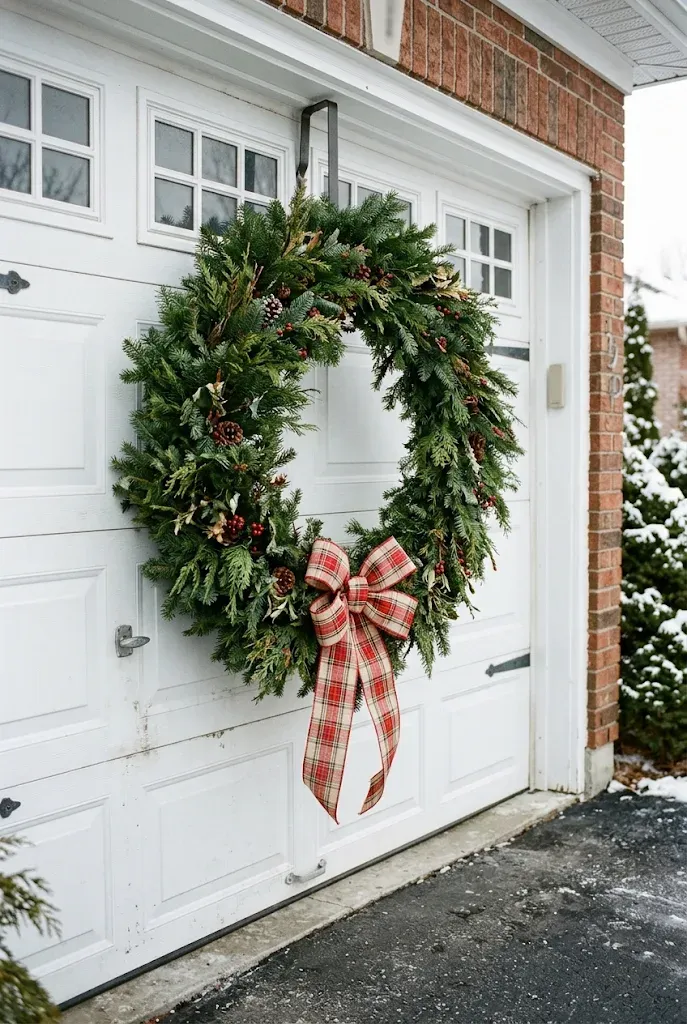
A standard wreath can disappear on a garage door or a long wall, but a hoop-based version holds its own at that scale. The base is a hula hoop, which is lightweight and already perfectly round.
Wire bundles of cut greenery to the hoop in one direction so each bundle covers the stems of the one before it. Work around the entire ring, then add a few pinecones or faux berry picks on one side for an off-center focal point. Finish with a wide outdoor ribbon bow, tied loosely so it doesn’t look stiff.
Do:
- Hang it from two points so it sits flat against the surface.
- Choose a ribbon labeled for outdoor use if the wreath will get rain.
Don’t:
- Use a hook alone on a heavy wreath, since a gust can lift it off.
- Skip a second wire at the back that keeps the hoop from rotating.
5. Group Lanterns With Evergreen Collars
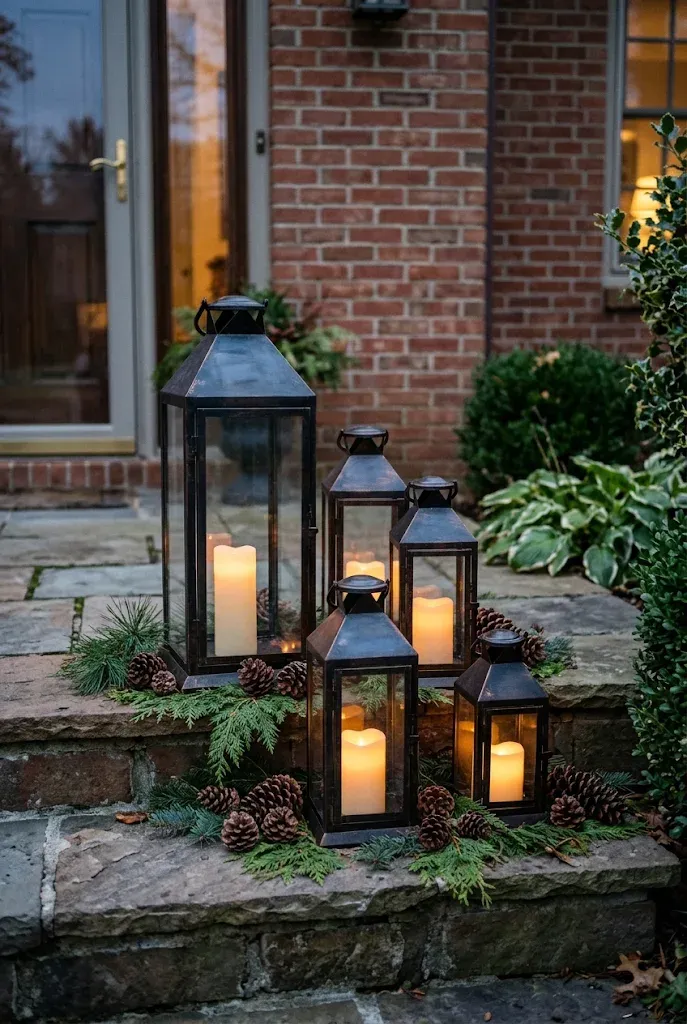
Clustering lanterns of different sizes on one side of the steps creates an instant landing-style display. Metal or wood lanterns work well, and the greenery tucked around each base hides cords and battery packs.
The light source is the big decision outdoors, so it helps to compare the common options:
| Light Source | Effect | Best Fit |
|---|---|---|
| Battery LED candle | Soft, steady glow without heat | Covered porches and stoops |
| Flickering LED candle | Closer to a real flame, still safe near greenery | Mixed groupings next to wreaths |
| Plug-in mini lights | Brighter, longer-lasting light | Uncovered steps near an outlet |
Set the largest lantern at the back and the smallest in front, then add a few pinecones and a short pine branch around the base.
6. Make a Fresh Greenery Door Swag With Plaid Ribbon
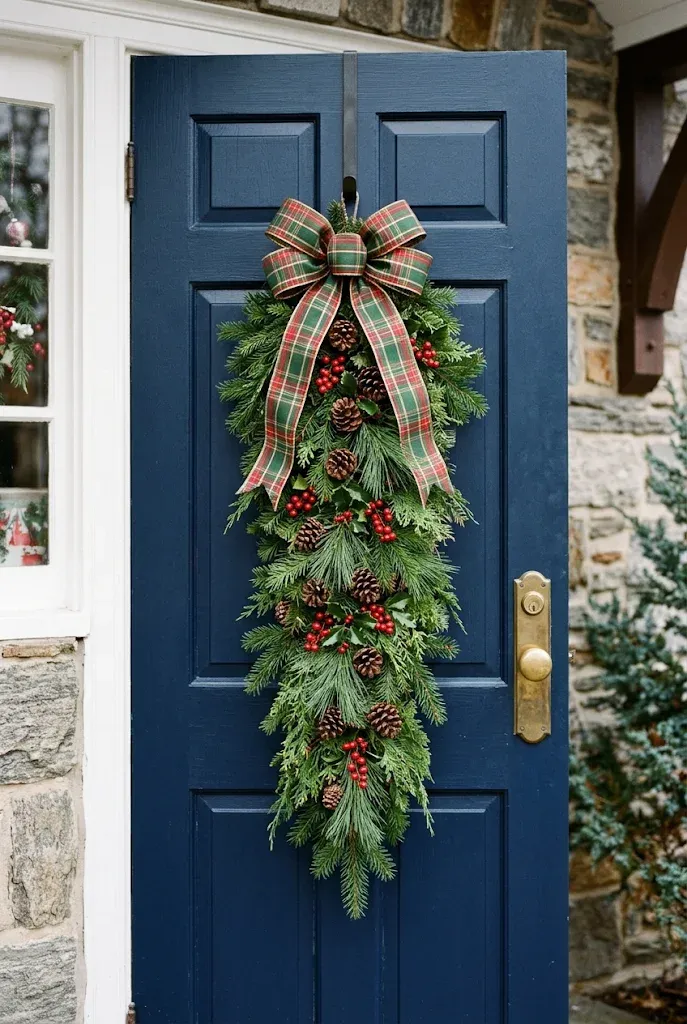
A swag is longer and narrower than a wreath, which suits slim entry doors and sidelights better. It’s also quick to make: a handful of cut branches, floral wire, and ribbon.
- Lay a long fir branch as the spine, then layer shorter cedar and pine clippings on both sides, pointing downward.
- Bind each layer with wire at the center and trim the ends neatly.
- Add three or four pinecones and a few berry stems in the lower third.
- Finish with a plaid ribbon bow at the top and let the tails fall naturally.
Hang it with a wreath hanger over the door or a loop of wire around a nail. Doors that face direct afternoon sun will dry the greenery faster, so make it as late as you can before the weekend you want it to look its best.
7. Wrap the Stair Railing in Pinecone Garland
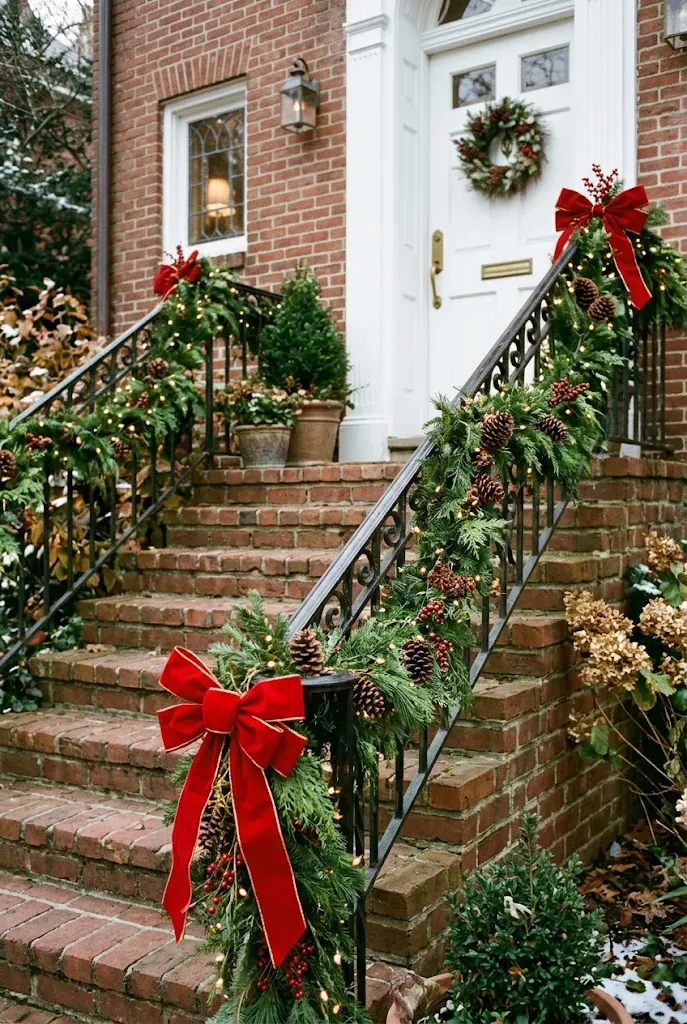
Railings are one of the easiest places to add decoration, but a plain garland can sag or slip if it isn’t fastened every few feet. Planning the attachment points first saves a lot of frustration.
Common Mistake: Draping the garland loosely over the rail and expecting it to stay put.
Better Approach: Secure it every 12 to 18 inches with floral wire or zip ties, then fluff the branches to cover the fasteners.
Once the garland is attached, tuck in pinecones and a few picks of dried berries. Add a bow where the rail meets the post, and leave a gap in the pattern at the top so the display doesn’t crowd the walkway. If you add lights, choose a strand rated for outdoor use and keep the plug end close to the outlet.
8. Line the Walkway With Mason Jar Luminaries
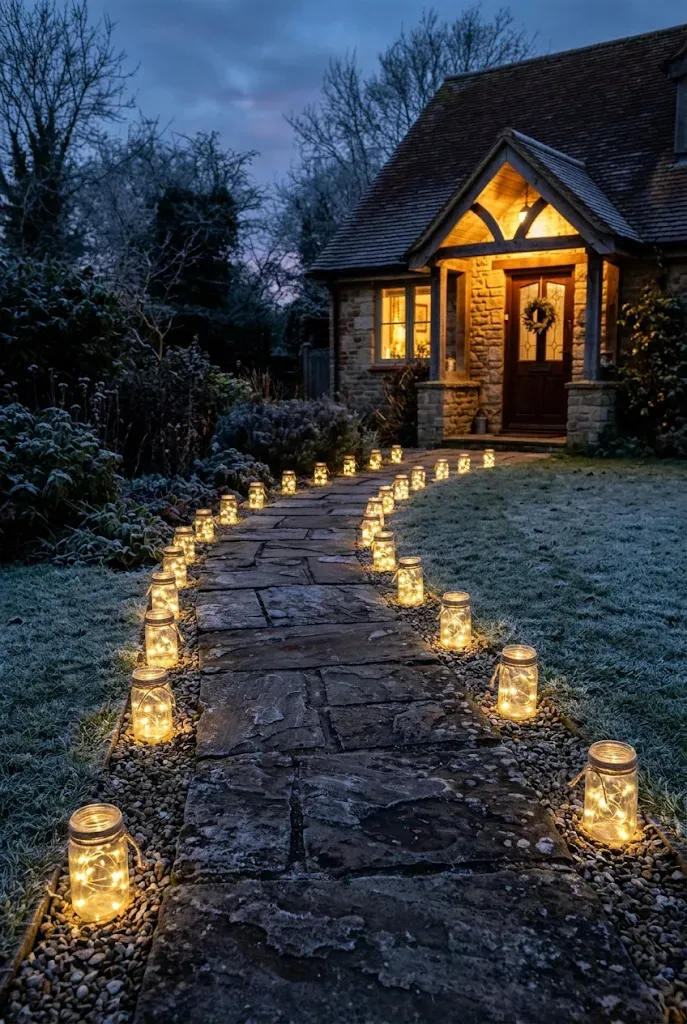
Glass jars filled with battery tea lights make a simple, repeatable border that guides guests to the door. The glow looks best when the jars are spaced evenly and set at the same distance from the path.
- Choose pint or quart jars with their lids removed.
- Line the bottom with a layer of faux snow, epsom salt, or small pebbles for stability.
- Place a battery LED tea light in each jar.
- Tie twine or a short ribbon around the neck for a handmade finish.
- Set the jars in a row along the walkway, pressing them slightly into the ground so they don’t tip.
LEDs are the safer choice outdoors, especially if dry leaves or evergreens are nearby.
9. Bend PVC Pipe Into Giant Candy Canes
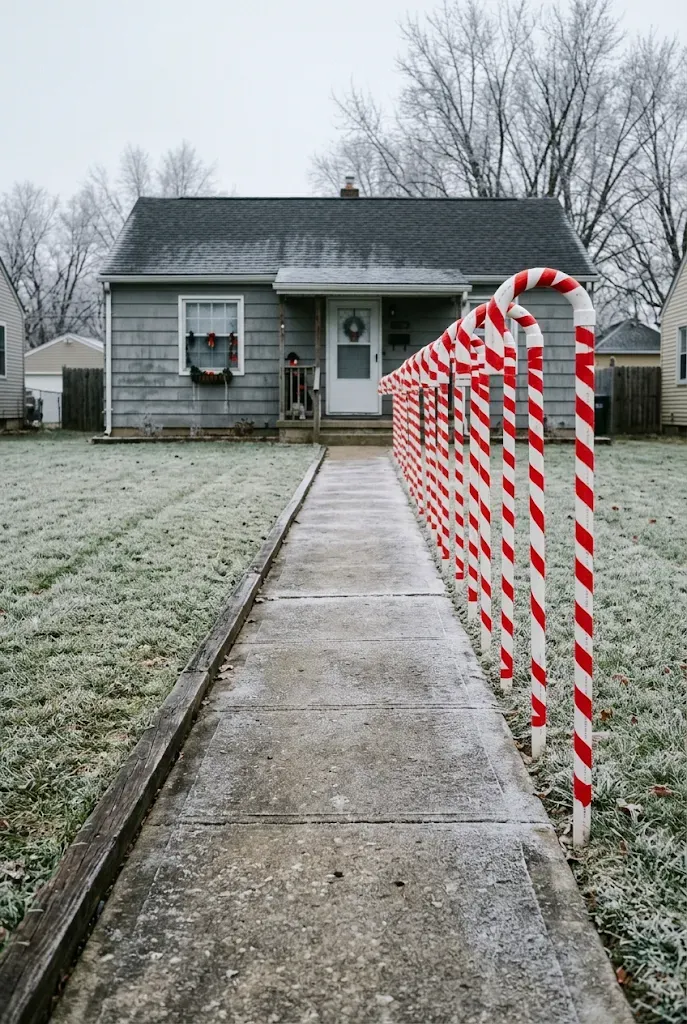
Oversized candy canes are easy to make from white PVC pipe, and they stand up well to weather. They’re also a good project for beginners because the pipe is easy to cut and the only real challenge is the curve.
Tips & Tricks
- Warm the pipe gently with a heat gun while bending it so it doesn’t kink, and wear heat-resistant gloves.
- Wrap red outdoor tape or waterproof vinyl tape in a diagonal spiral, keeping the angle consistent.
- Push a length of rebar or a wooden stake into the pipe’s bottom to anchor it in the ground.
- Space the canes evenly along a walkway for rhythm, rather than clustering them.
A coat of clear sealant over the tape helps edges stay down in rain.
10. Cut Log Slices Into Little Reindeer
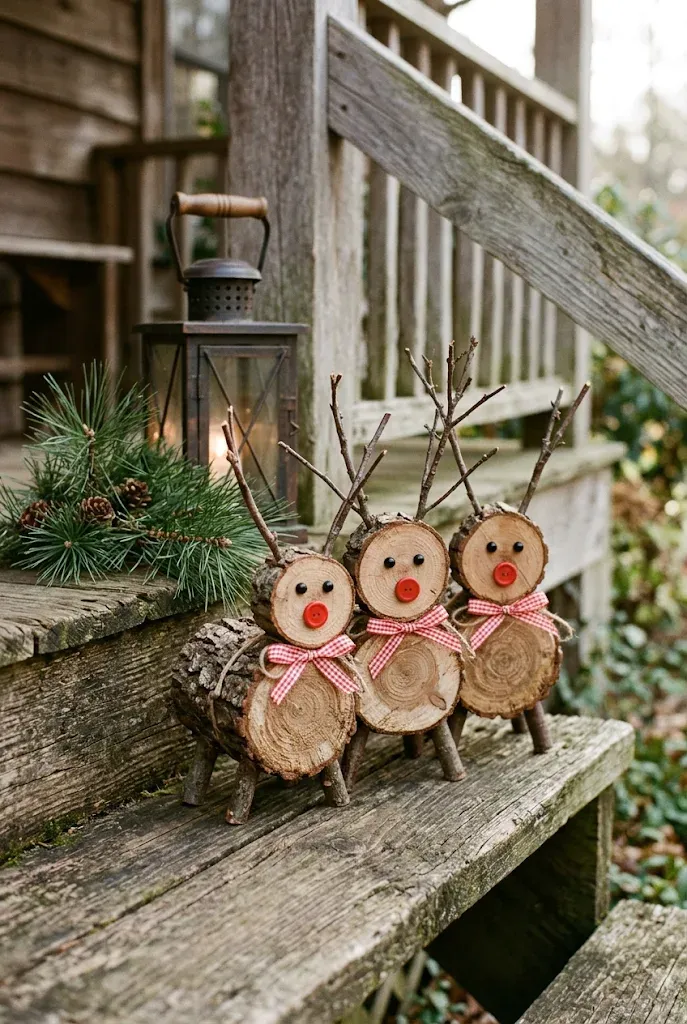
A handful of small wooden reindeer on the porch rail or next to the steps adds charm without taking much space. The trick is a clean, flat slice for the body and well-chosen twigs for the antlers.
Start with a log round about six to eight inches across, either from firewood you already have or cut from a fallen branch. Sand the cut face lightly, drill small holes for the twigs, and glue in a pair of forked branches. A red button nose and a pair of painted dots for eyes finish the face. Keep the faces small and the lines simple, and avoid glitter or glue-heavy details that won’t last outdoors.
Editor’s Note: Slices dry and crack as they age. If you want them to last more than one season, seal both faces with an exterior sealer and keep them off the ground.
11. Stack Terra-Cotta Pots Into a Snowman

Clay pots stack naturally into a rounded form, and a coat of white paint turns them into a charming snowman. The look is rustic rather than polished, which suits a garden bed or a front stoop.
- Choose three pots in descending sizes and clean them thoroughly.
- Paint with outdoor-rated white paint and let each coat dry before adding a second.
- Stack the pots rim to rim, securing each with exterior adhesive.
- Top with a small pot as a hat and add a scarf cut from plaid fabric.
- Add buttons from painted wood circles and a carrot nose made from a small cone of orange craft foam or painted wood.
Clay is porous, so let the pots dry thoroughly and avoid leaving the snowman on soggy ground during wet weeks.
12. Build Oversized Wooden Gift Boxes
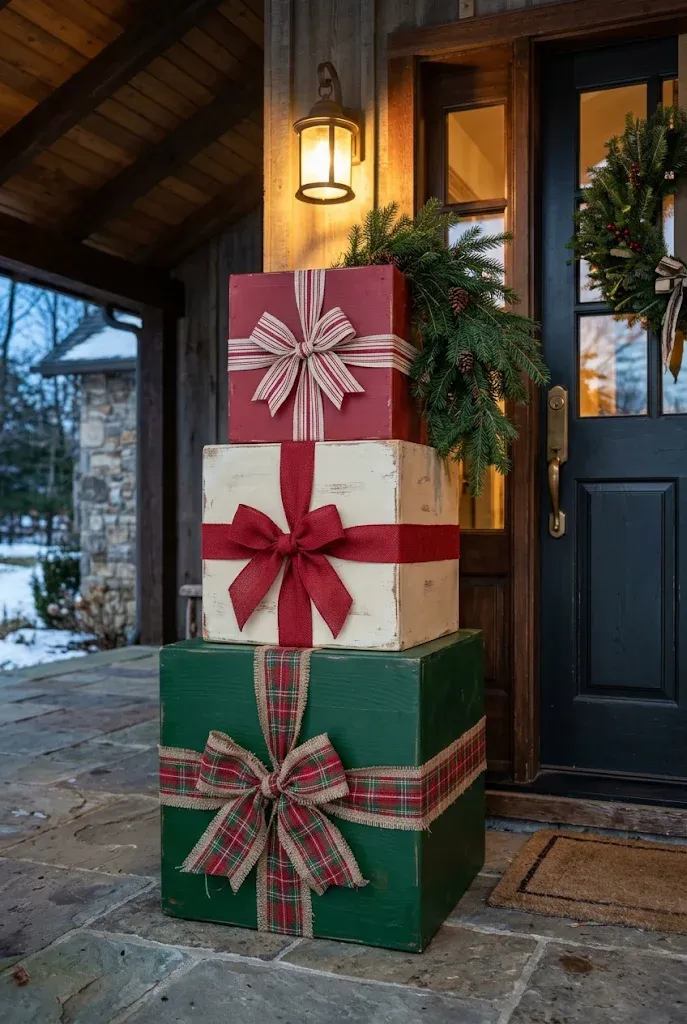
Painted wooden boxes placed on the porch or beside the front door read as gifts without the risk of weather damage. They also last for years if stored well, so the effort pays off.
Quick Facts
Best For: Porches, steps, and entry landings
Investment: Accessible to moderate, depending on lumber
Visual Effect: Bold geometric shapes that add structure to soft greenery
Build the boxes from plywood or cedar fence pickets, leaving the bottoms open so water drains. Paint each in a solid color with an exterior paint, then add ribbon cut from outdoor fabric or painted wood strips, fixed with staples and weatherproof adhesive. Stack two or three boxes in graduated sizes and tuck a pine branch behind the top one.
13. Cut Plywood Reindeer Silhouettes for the Lawn
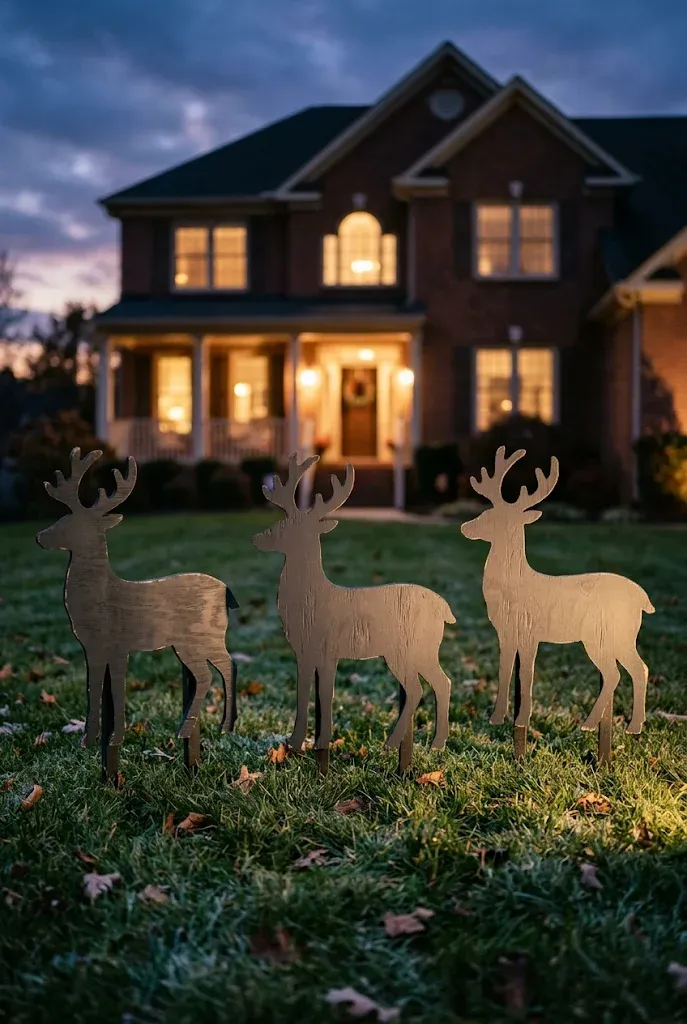
Flat silhouettes are one of the most effective yard pieces because they read clearly from the street, even in low light. A single reindeer is charming, but a small group of two or three at different poses makes the display feel like a scene.
Trace a simple reindeer outline onto a sheet of exterior-grade plywood, cut it with a jigsaw, sand the edges, and paint both sides with a matte exterior paint. Dark brown, charcoal, or white all work well. Attach stakes to the back or screw the piece to a small wooden foot, then aim a pair of outdoor-rated spotlights at the figures from the side to give them depth.
Editor’s Note: Anchor each figure firmly. A flat panel catches wind like a sail, so stakes should be driven deep or the feet weighted.
14. Hang a Wooden Lath Starburst From the Gable
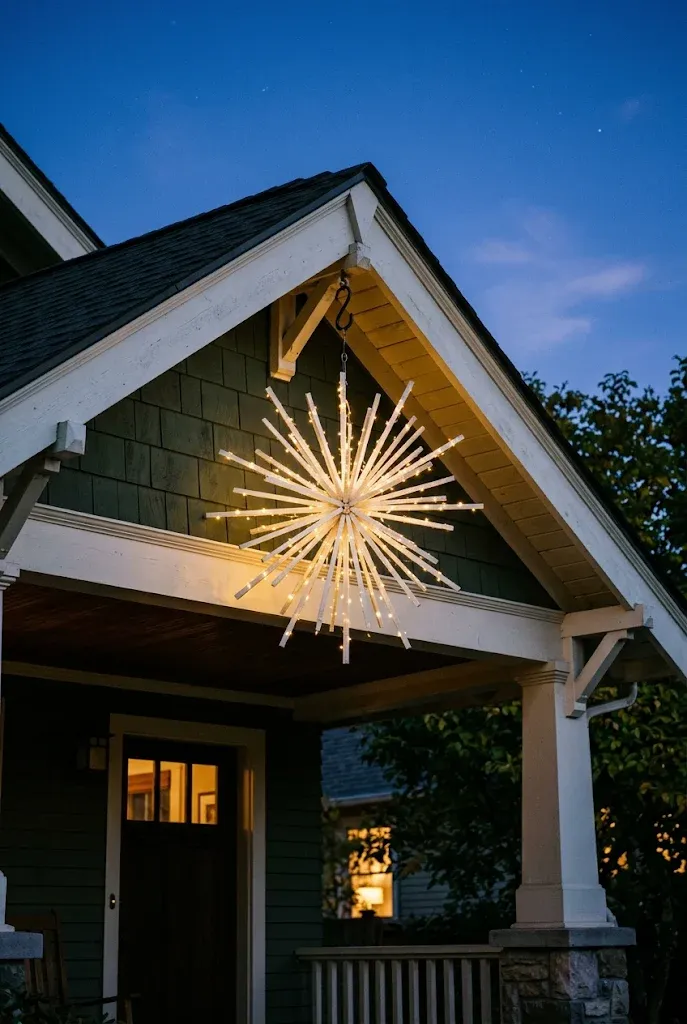
A star on the front of the house draws the eye upward, which is unusual in a season when most decoration sits at ground level. Thin lath strips or paint stirrers make a lightweight frame that won’t strain a hook.
- Cut eight strips of equal length and lay them in a radial pattern, like spokes.
- Join them at the center with a washer and a short screw, or a dab of exterior adhesive plus a staple.
- Paint white, gold, or leave natural for a weathered look.
- Add a short strand of warm white lights along each spoke with clear fishing line or small zip ties.
- Hang from a sturdy hook, not a staple, so it can be taken down easily.
Keep it modest in scale. About two feet across is plenty for most gables, and a larger star can overwhelm a smaller facade.
15. Bundle Birch Logs With Greenery and Ribbon
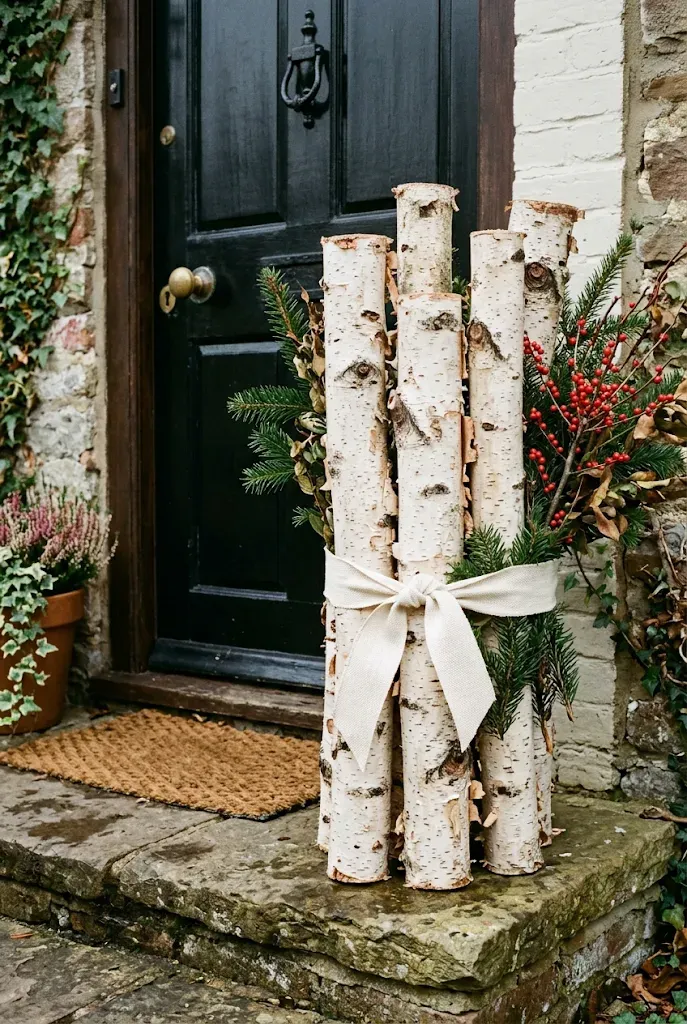
Birch bundles bring a clean, pale contrast to dark doors and brick, and they’re an easy way to add height to a landing. If you don’t have birch, similar-diameter logs from a craft store or a lumber yard also work.
Cut several logs to different lengths, then bind them tightly with a ribbon or leather strap. Slip fir branches and a few red or dark berry stems behind the bundle on one side, so the arrangement looks asymmetrical. Set the bundle inside a tall planter or tuck it against the wall so it can’t roll.
The white bark, dark green needles, and a single accent color are enough. Skip heavy ornaments, which compete with the natural texture.
16. Lean a Ladder Against the Wall as a Garland Display
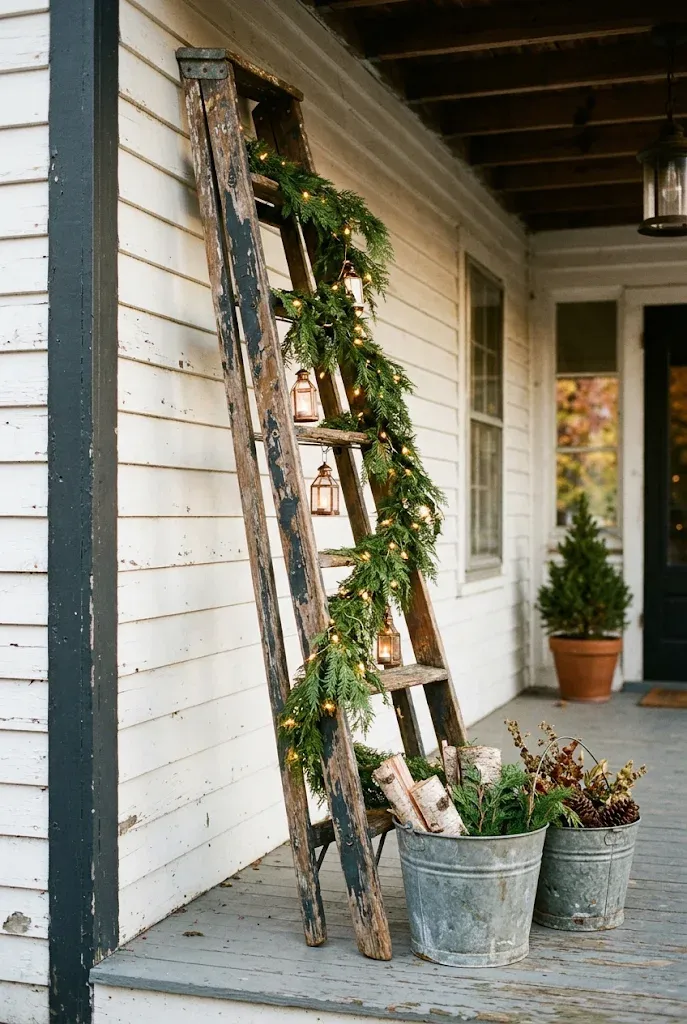
A wooden ladder turns an empty wall into a vertical feature. It works especially well on a long porch or a patio where space is tight.
Do:
- Choose a ladder that’s stable and leaning at a safe angle against a solid wall.
- Drape garland across the rungs, alternating sides, and secure with wire.
- Hang small lanterns or ornaments from the rungs with ribbon or wire.
Don’t:
- Use a ladder you need for other tasks, since decorating it removes the ability to use it quickly.
- Place heavy items on the top rungs that could pull the ladder forward.
A warm white strand of outdoor-rated lights wound through the garland gives the whole display a soft glow after dark.
17. Repurpose a Wooden Sled as a Planter Display
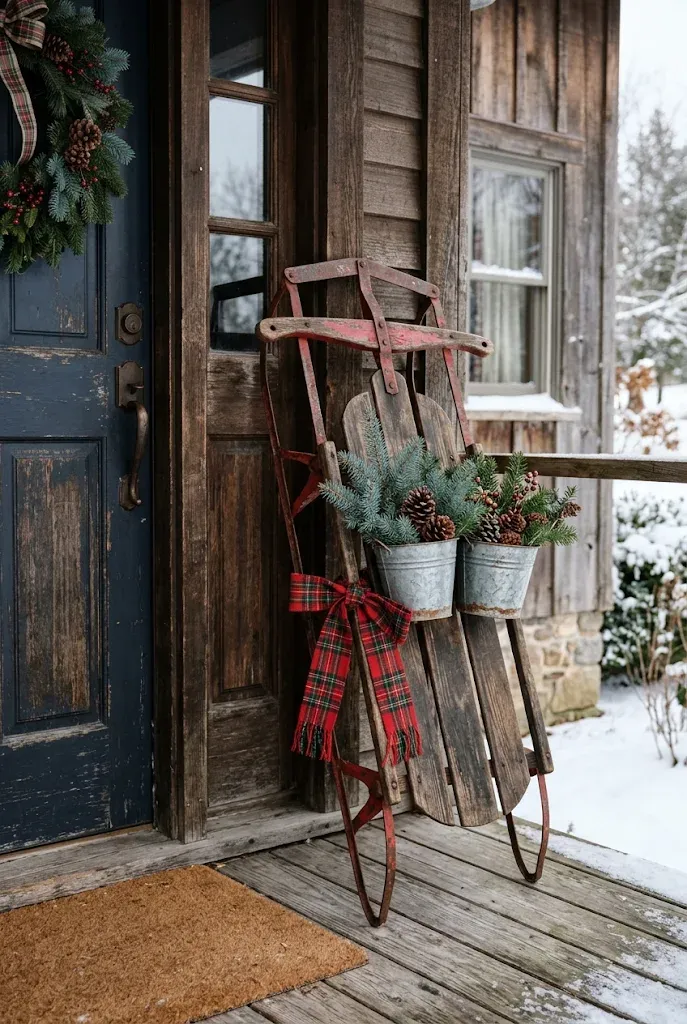
A vintage-style sled is a ready-made display stand, and a secondhand one costs far less than a new piece of porch furniture. Leaning it against the wall or setting it flat on the porch both work.
Place two or three small pots or a shallow wooden crate on the sled, fill them with evergreen cuttings, and add a few pinecones and a strip of plaid ribbon along one runner. If the sled has chipped paint, leave it. The worn finish is part of the charm, and heavy touch-up work can make it look staged.
Quick Tip: If the sled is lying flat, set a thin board under the pots so the weight spreads across the slats instead of bending them.
18. Fill a Window Box With Evergreens and Berries
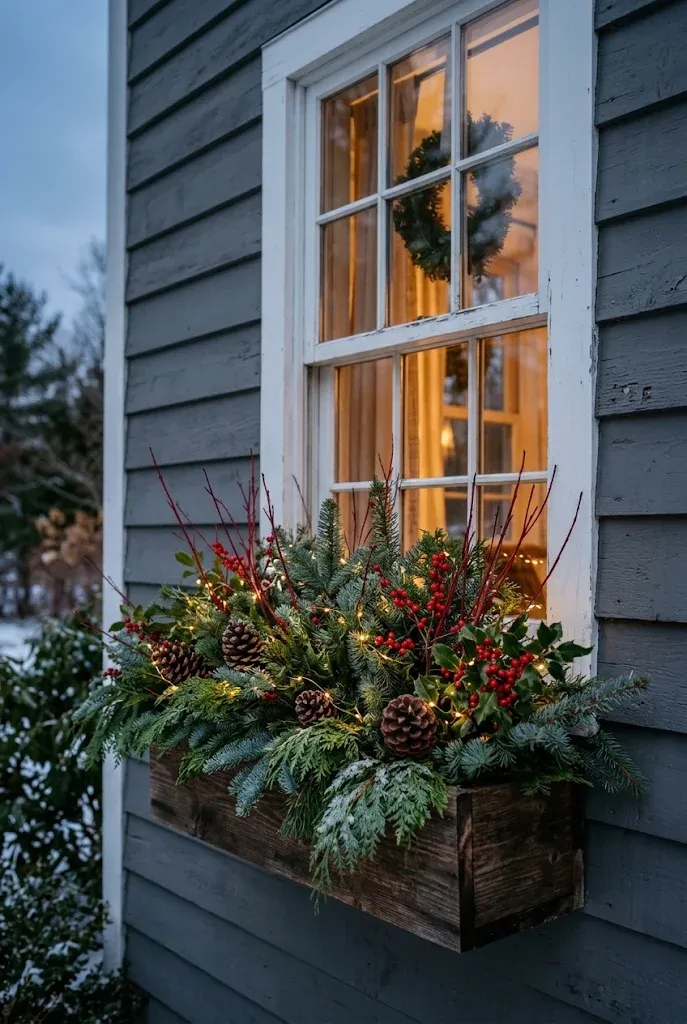
Window boxes usually sit empty in winter, so even a modest arrangement gets noticed. The key is to build the display in layers so it looks full from the street.
- Remove any spent plants and loosen the soil, or insert florist foam to hold the stems.
- Push taller branches of fir or cedar into the back row.
- Add curving dogwood stems or red twigs for movement.
- Place holly, pine, or boxwood clippings at the front edge.
- Finish with a few pinecones and a short strand of outdoor lights tucked among the stems.
Refresh the greenery partway through the season if it begins to brown, particularly on sunny south-facing windows.
19. Wrap the Tree Trunk in Lights and Giant Bows
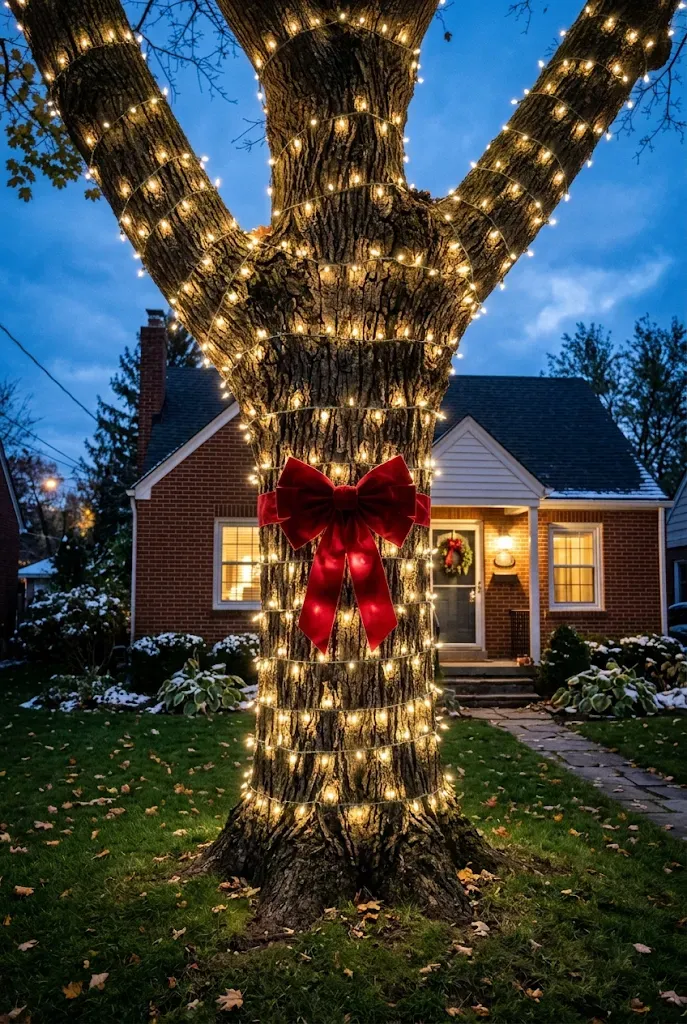
If you have a mature tree near the house, wrapping the trunk gives you a large focal point without adding anything to the yard. It’s a project that looks more complicated than it is.
Start at the base and wind a strand of outdoor-rated lights upward in an even spiral, leaving two to three inches between each wrap. Keep the spacing consistent, because uneven wraps are the first thing people notice. Finish with a large outdoor ribbon bow at about eye level, secured with wire around the trunk.
| Wrap Style | Effect | Best Fit |
|---|---|---|
| Tight spiral | Dense, bright glow | Slim trunks and small yards |
| Wide spiral | Softer, more rustic look | Large, mature trees |
| Vertical strands | Modern, linear effect | Multiple trees in a row |
20. Hang Oversized Ornaments From a Bare Branch
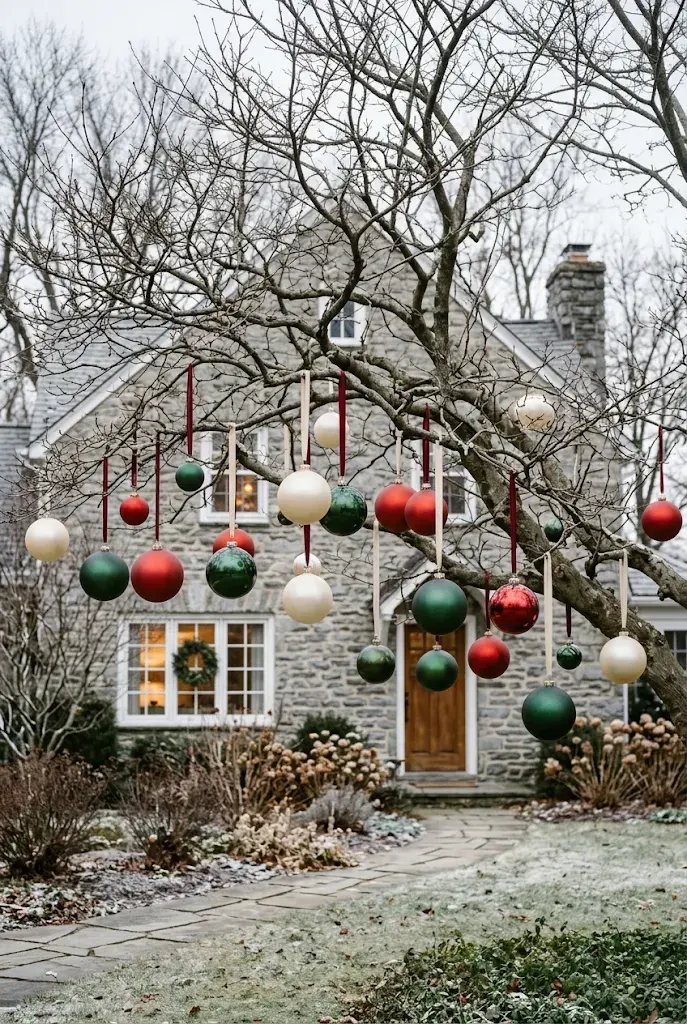
Large ornaments hanging in a leafless tree look like something from a storybook, and they’re easy to make from shatterproof plastic balls. Choose a tree near the front walkway or in the yard where they’ll be seen from the street.
Tips & Tricks
- Use shatterproof ornaments in at least two sizes, with the largest around six inches.
- Pick a limited palette such as red, cream, and forest green so the display looks planned.
- Hang each ornament on a sturdy wire loop and vary the length so they sit at different heights.
- Tie a ribbon at the branch rather than at the ornament, which hides the wire.
Avoid ornaments with delicate coatings that can peel in rain.
21. Make Bird-Seed Ornaments for the Yard Tree

Decorations that feed the neighborhood birds give the yard purpose beyond appearance. They’re also a good project to make with kids, since the supplies are simple.
- Dissolve plain unflavored gelatin in warm water, following the package directions for a thick, sticky mixture.
- Stir in birdseed until every piece is coated.
- Press the mixture into cookie cutters or a muffin tin lined with parchment, with a straw pushed through to leave a hanging hole.
- Let them dry completely, which can take a day or more, then remove from the molds.
- Thread natural twine through the hole and hang from branches.
Avoid adding anything salty, sweet, or flavored, and skip synthetic string or ribbon, which can tangle around small feet.
22. Arch Evergreen Garland Over the Garden Gate
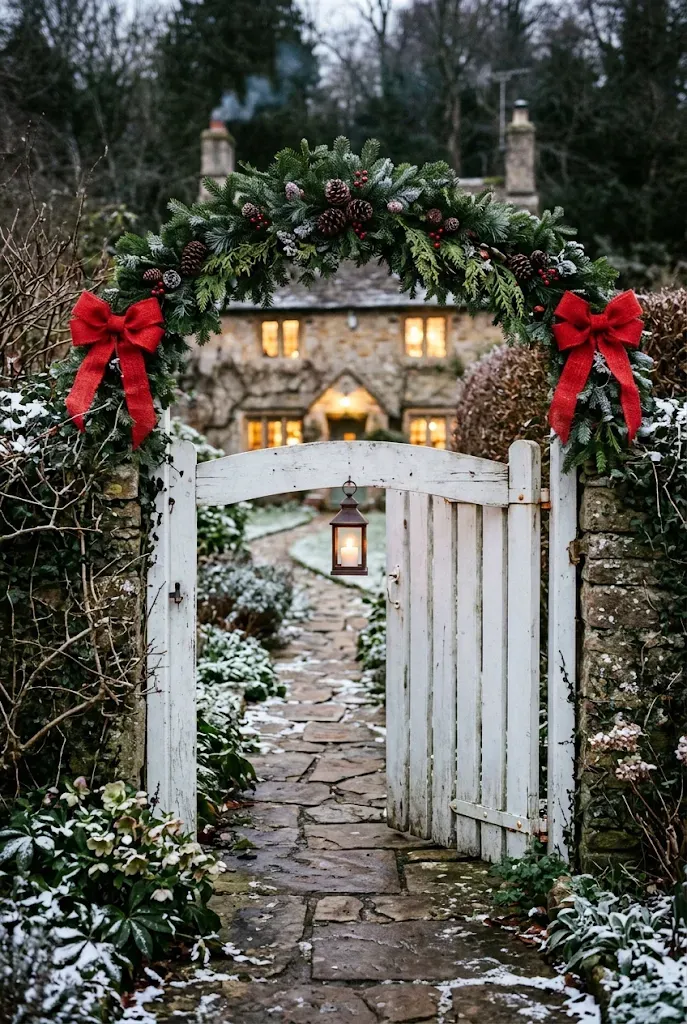
A gate or arbor with greenery gives guests a sense of arrival before they even reach the porch. The arch frames the entrance and works with a wide range of home styles.
Start by measuring the opening so the garland fits with a little room to drape. Attach it with zip ties or floral wire at the top corners and add a few anchor points along the sides. A bow at each end, a few pinecones, and a lantern hung in the center keep the arch balanced.
Common Mistake: Using a garland that’s too thin for the opening, which looks sparse from a distance.
Better Approach: Layer two garlands together, or add loose cut branches at the thickest points.
23. Wrap the Lamp Post in Candy-Stripe Ribbon and Greenery

A lamp post at the end of the driveway or walkway is an easy place to add a festive accent, and a few simple materials go a long way.
- Wind a wide red-and-white striped ribbon around the post in a diagonal spiral, securing the ends with outdoor tape.
- Wire a small bundle of cedar and fir at the base for a fuller look.
- Add a bow at the top, just below the lamp, with tails that fall naturally.
- Tuck a few pinecones into the greenery for texture.
Check that nothing covers the lamp or blocks the light, and keep ribbon and greenery away from any hot fixtures.
24. Dress the Mailbox With a Pinecone and Berry Swag

The mailbox is often the first thing visitors see, so a small, well-made swag adds a nice welcome. Keep it compact and low-profile so it doesn’t get in the way of daily use.
Secure a short bundle of cedar and pine to the post or the side of the box with floral wire. Add three or four pinecones, a few berry stems, and a ribbon bow. Keep the opening of the box fully clear so the mail carrier can use it, and avoid anything that could catch on the door.
Quick Tip: Wrap the wire with a strip of green floral tape so it blends into the greenery and doesn’t scratch the finish.
25. String Dried Orange Slices Into a Covered-Porch Garland
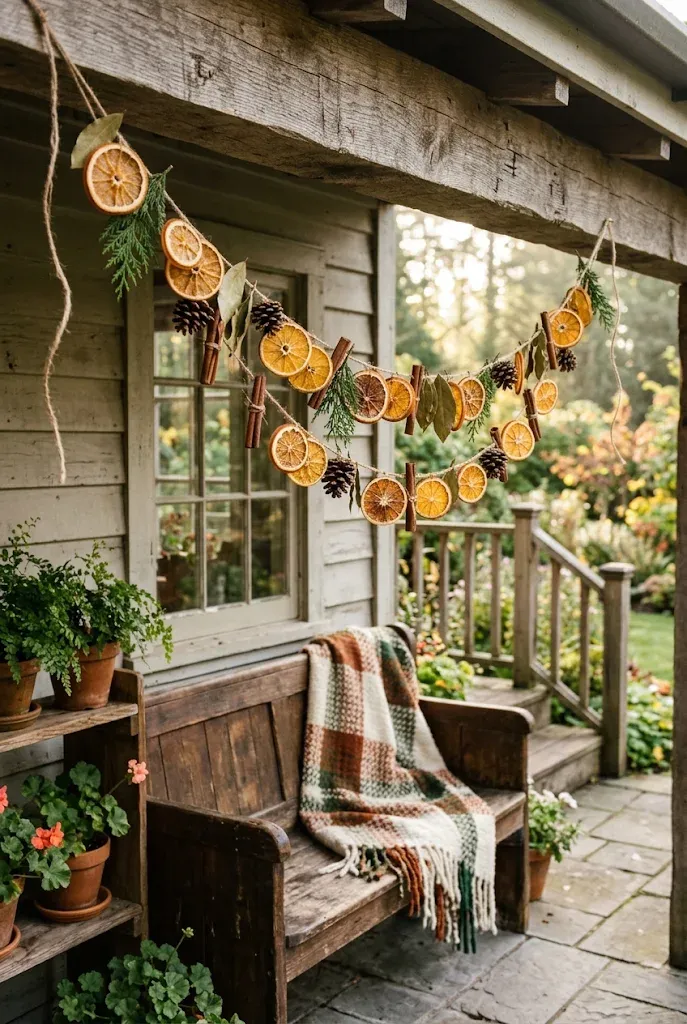
Dried citrus gives a porch garland warmth, and the slices catch the light in a way plastic ornaments can’t. They’re best used on a covered porch where rain won’t soften them.
- Slice oranges about a quarter inch thick and pat dry with a towel.
- Bake on a rack at a low temperature, roughly 200°F, for several hours, flipping occasionally, until the slices are dry but still colorful.
- Let them cool completely, then pierce each with a needle and thread onto twine, spacing them with cinnamon sticks or small pinecones.
- Hang across the porch rail or beam, securing the ends well.
Drying times vary with thickness and humidity, so check the slices regularly. Replace them if they get damp.
26. Hang Mini Wreaths From Every Fence Post
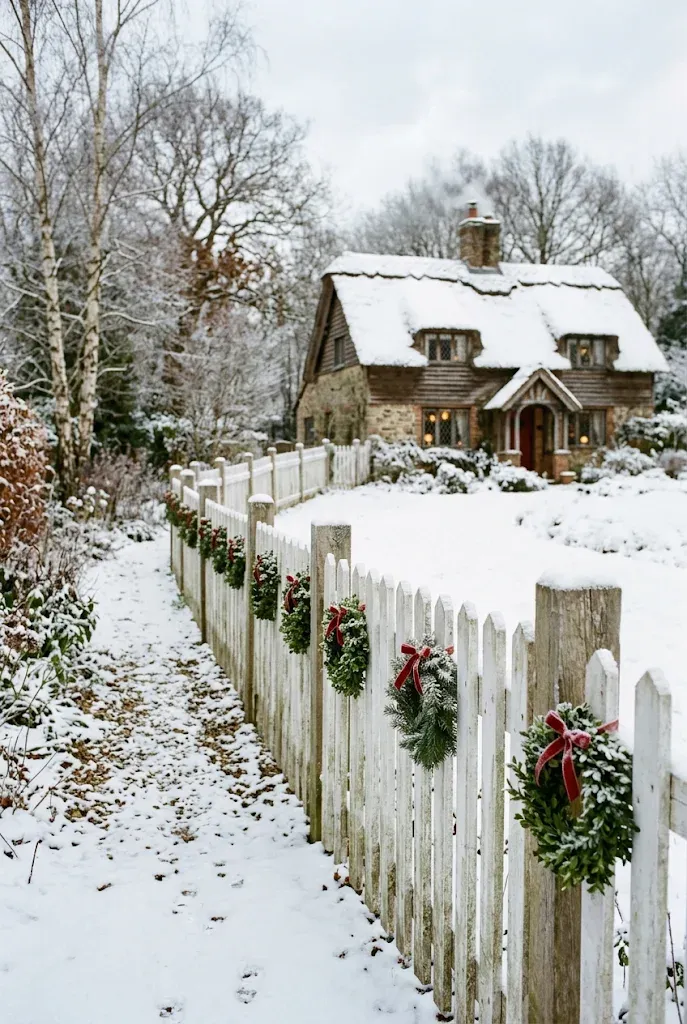
Small wreaths on a picket or rail fence add a repeating detail that carries the eye down the property line. Each one is simple to make, and they’re a good way to use leftover greenery from larger projects.
Start with 8- to 10-inch grapevine or wire wreath forms. Wire short clippings of cedar or boxwood around each form, add a single berry pick or tiny pinecone cluster, and finish with a small bow. Hang each wreath from a hook or a loop of wire over the post cap, keeping the spacing and the height the same along the fence.
A row of identical wreaths looks intentional and tidy, which is the point. If your fence is long, alternate wreaths and plain posts for a lighter touch.
27. Add Painted Gingerbread Trim to Porch Posts
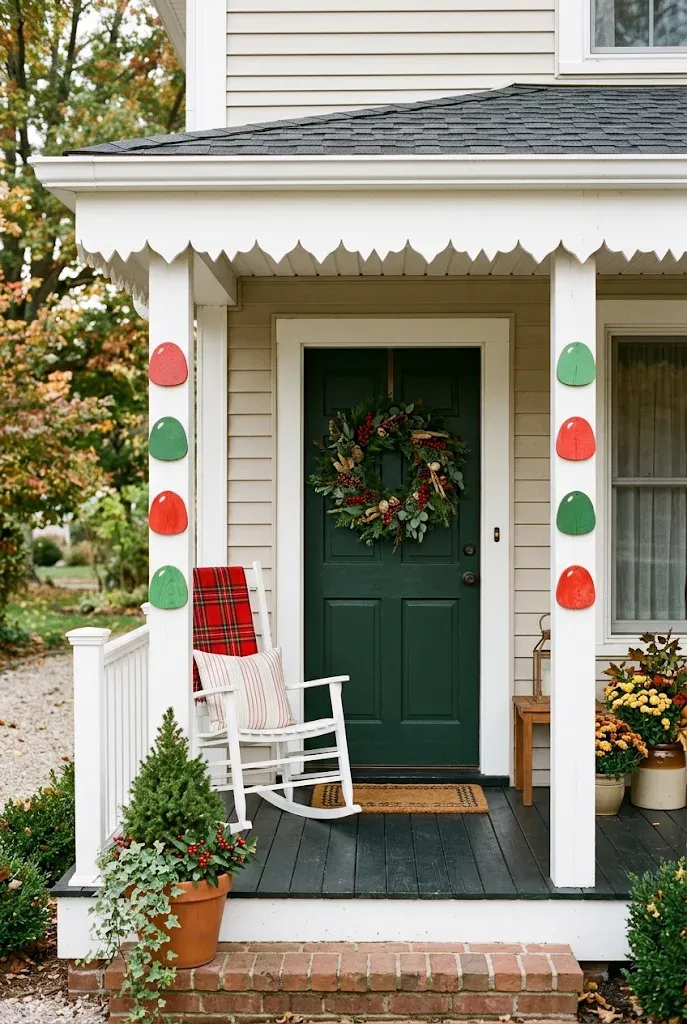
Decorative trim cut from thin plywood gives a plain porch the look of an old-fashioned gingerbread house. It’s one of the more involved projects here, but the result can be reused year after year.
Quick Facts
Best For: Porches with square posts and clear rail space
Investment: Moderate, depending on plywood and paint
Visual Effect: Playful, decorative edge that reads like candy icing
Cut scalloped or zigzag strips from plywood, sand the edges, and paint them white or soft pastel with exterior paint. Attach them to the porch posts or beneath the roofline with removable fasteners rather than nails, so the trim can be taken down in January without damaging the house. Add large round paper-style “gumdrops” cut from painted wood circles for color.
28. Suspend an Ornament Chandelier From the Porch Ceiling
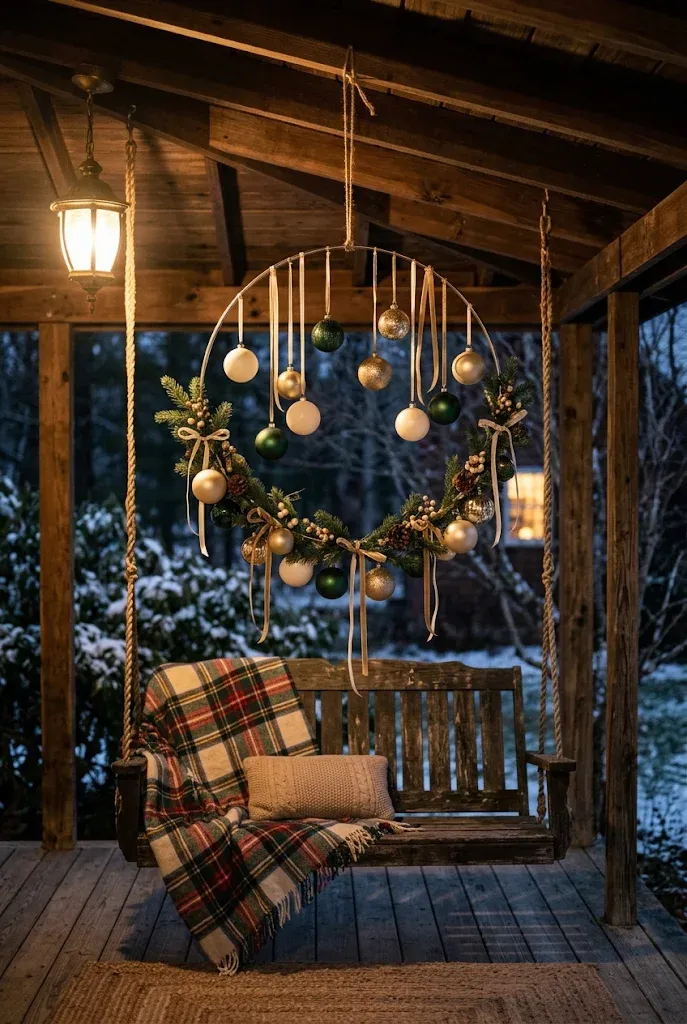
A hoop of ornaments hanging in the middle of a porch ceiling creates a focal point at eye level, and it works especially well above a porch swing or small seating area.
Use a large wreath ring or embroidery hoop as the frame. Attach several lengths of ribbon or wire at varying heights, each holding a shatterproof ornament, a small bundle of greenery, or a pinecone. Suspend the hoop from three evenly spaced lines that meet at a single ceiling hook.
Editor’s Note: Use a hook or hardware rated for the weight, and test it by pulling downward before you hang the piece. A small amount of movement is fine, but the chandelier shouldn’t swing wildly in the wind.
29. Fill a Wheelbarrow With a Holiday Garden Scene
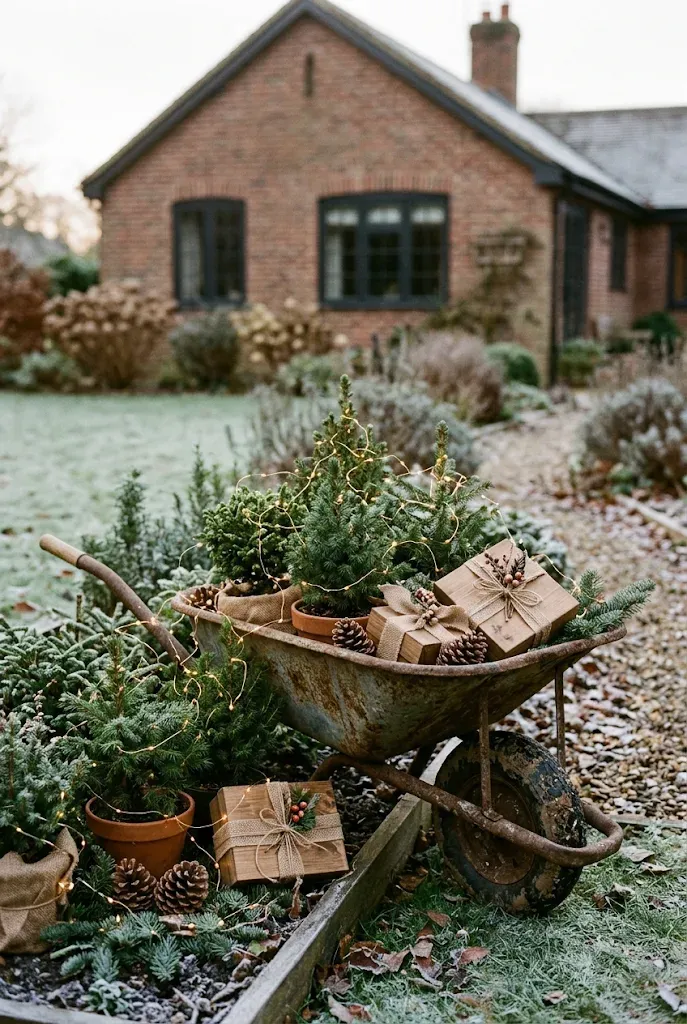
An old wheelbarrow is a natural container for a winter display, and its rustic character fits many home styles. It also moves easily if you want to change the look partway through the season.
| Filling | Look | Best Fit |
|---|---|---|
| Fresh greenery and pinecones | Natural, soft, woodland | Shaded porches and wooded yards |
| Wrapped boxes and ribbon | Festive and bold | Front lawns and wide driveways |
| Potted evergreens and lights | Garden-like, glowing | Patios and side gardens |
Set the wheelbarrow at an angle with a few items spilling slightly over the edge. Keep the heaviest pieces low and tuck in a short strand of outdoor-rated lights for a soft glow after dark.
Outdoor Lighting and Weatherproofing Basics
A few safety and durability habits make every project here last longer and keep your home safer.
- Use lights, extension cords, and timers labeled for outdoor use, and check cords for damage before hanging.
- Plug into outlets protected by a ground-fault circuit interrupter (GFCI) when possible.
- Choose LED candles over open flames near greenery, wood, and fabric.
- Avoid overloading a single outlet or cord, and follow the manufacturer’s limits on connected strands.
- Secure anything tall or flat against the wind, using stakes, weights, or additional anchor points.
- Use exterior-grade paint and sealer on wood, and let each coat dry fully before you display the piece.
- Work carefully on ladders, with someone nearby when possible.
Where to Start
If the list feels large, begin with the spot guests notice first. A fresh greenery swag, a trio of lanterns, or a pair of lit tomato-cage trees will change the look of the entry in a single evening. Then add one larger project, such as plywood reindeer or a stack of wooden gift boxes, when you have a free weekend. Keep your palette limited to two or three colors so handmade pieces look like they belong together, and let the lights, not extra ornaments, supply the sparkle.