

A handmade garland is one of the few Christmas projects that can fill a whole mantel, banister, or window frame with a single afternoon’s work. You don’t need a craft room. Most of these ideas run on twine, scissors, a hot glue gun, and materials from a grocery store, craft aisle, or backyard.
The ideas below run from nearly free (paper, coffee filters, scrap fabric) to slightly more invested (upgraded faux greenery, mixed ornament clusters). Some are fast, and a few, like dried oranges and salt dough, mostly need oven time while you do something else. Pick one for the space you want to decorate, or make two or three and layer them.
1. Dried Orange Slice and Cinnamon Stick Garland
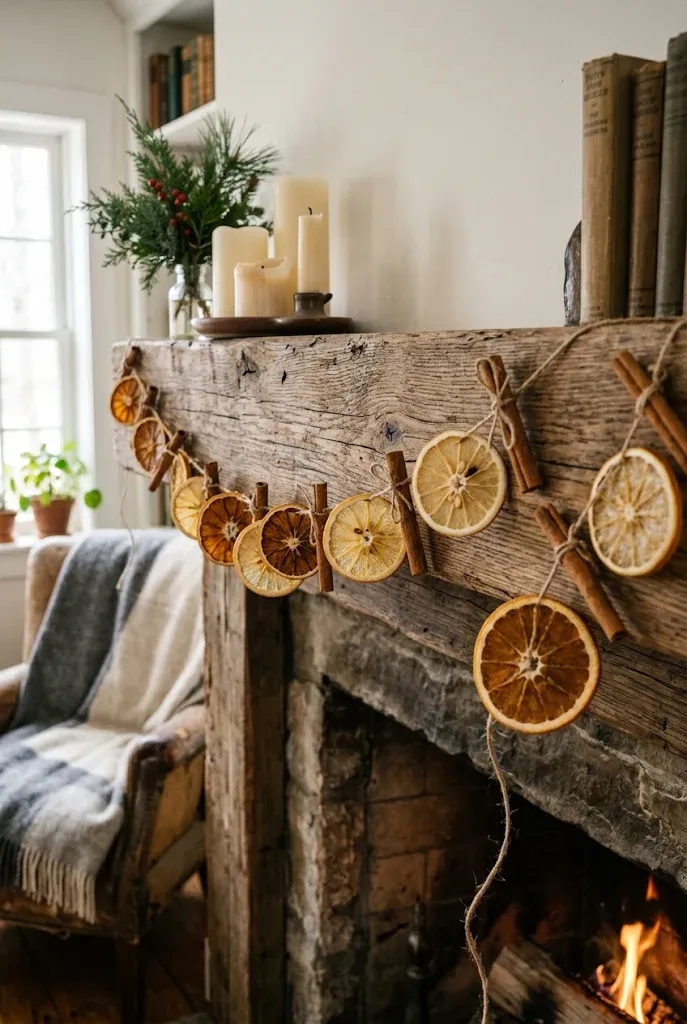
Dried citrus slices catch light like stained glass, and they smell like the season while they bake. Slice oranges about ¼ inch thick, blot them well, and bake on a rack at a low temperature, around 200°F. They usually need roughly 2–3 hours, flipped once, and thicker slices take longer. Thread them onto twine with a needle, alternating with cinnamon sticks tied on with thin string.
- Use navel oranges for large, even rounds.
- Add a few blood orange or grapefruit slices for deeper color.
- Space the slices about 3–4 inches apart so the twine shows.
Quick Tip: Dry the slices until they feel leathery but not tacky. Any moisture left inside can make them soften or spot when they hang.
2. Fresh Greenery Garland on Jute Cord
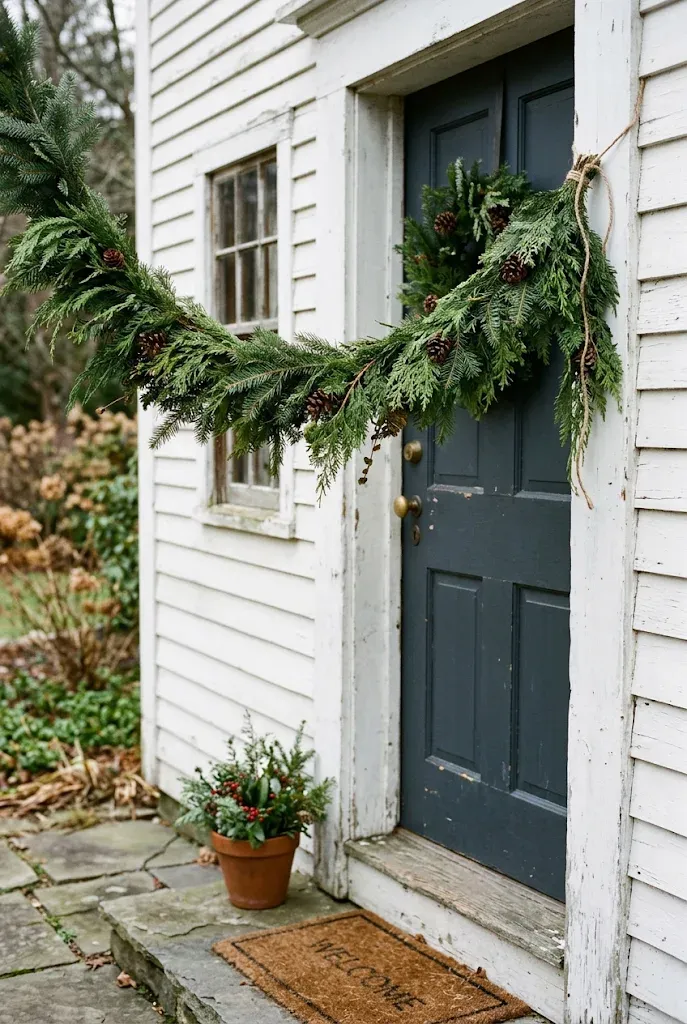
Nothing matches the scent and texture of real evergreen. Cut sprigs of fir, cedar, or pine to about 8–10 inches, then lay them in overlapping bunches along a length of rope or sturdy jute cord. Bind each bunch with floral wire, positioning the next so its tips cover the previous wire. Work in one direction so the garland stays full and even.
- Lay the cord on a table and gather the first bunch of three or four sprigs.
- Wire it to the cord with two firm wraps.
- Overlap the next bunch and repeat, adding a pinecone or two as you go.
Editor’s Note: Keep fresh garland away from open flame and heat sources. Hang it above a working fireplace only if it sits well clear of the firebox and any rising heat.
3. Pom-Pom Yarn Garland in Cream and Forest Green
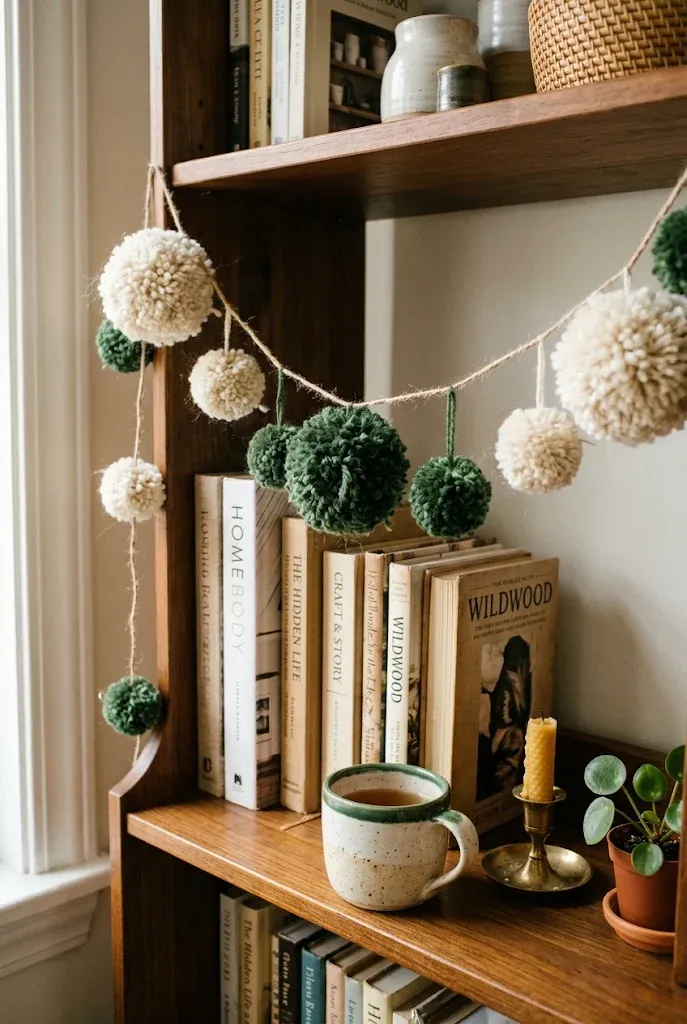
Pom-poms are easy to make and surprisingly forgiving. Wrap yarn around a fork or a piece of cardboard about 20–30 times, tie the center, cut the loops, and trim to shape. Make a mix of sizes in cream, deep green, and a bit of oatmeal wool, then knot each one onto a length of twine at uneven intervals.
| Pom-Pom Size | Effect | Best Fit |
|---|---|---|
| Small (1–1.5 in.) | Delicate, tight rhythm | Shelves, narrow windows |
| Large (2.5–3 in.) | Plush, graphic statement | Mantels, bed canopies |
Mixing sizes keeps the garland from looking like a uniform strand of cotton balls.
4. Paper Star Garland
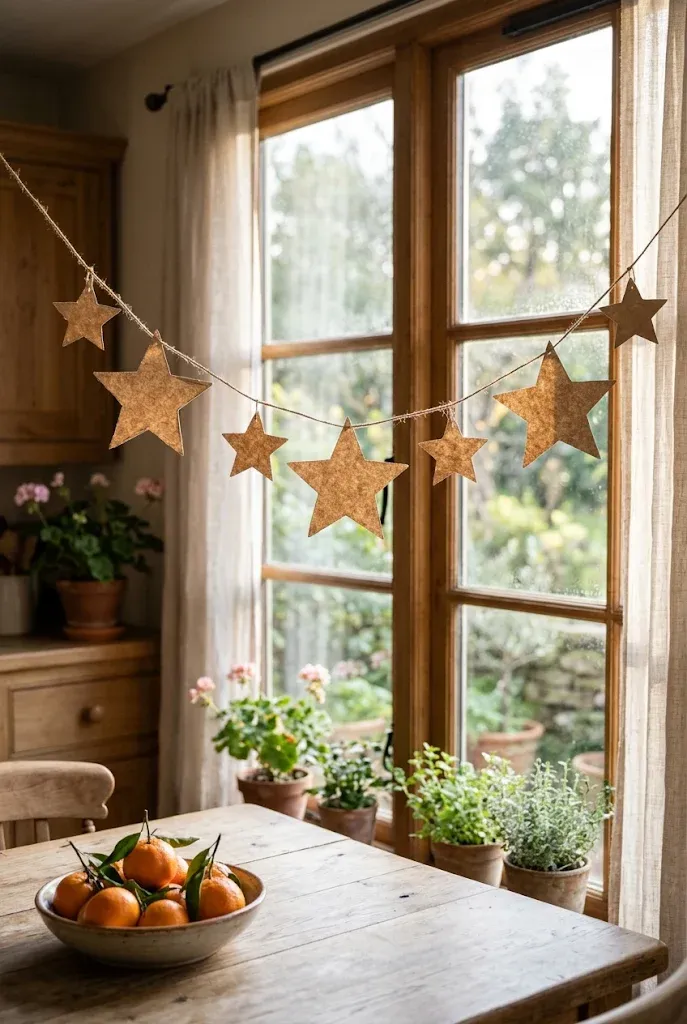
Kraft paper stars have a quiet, Scandinavian look and cost almost nothing. Cut out about 20–25 stars in two or three sizes using a template or a star punch. Layer two stars back to back with a length of thread sandwiched between them, then glue or stitch the pair closed. A sewing machine with a straight stitch can run stars continuously down a single thread, which is faster than gluing.
Common Mistake: Stars cut from thin printer paper curl and sag.
Better Approach: Use cardstock or kraft paper at medium weight. It holds its points and hangs flat.
5. Wooden Bead and Tassel Garland
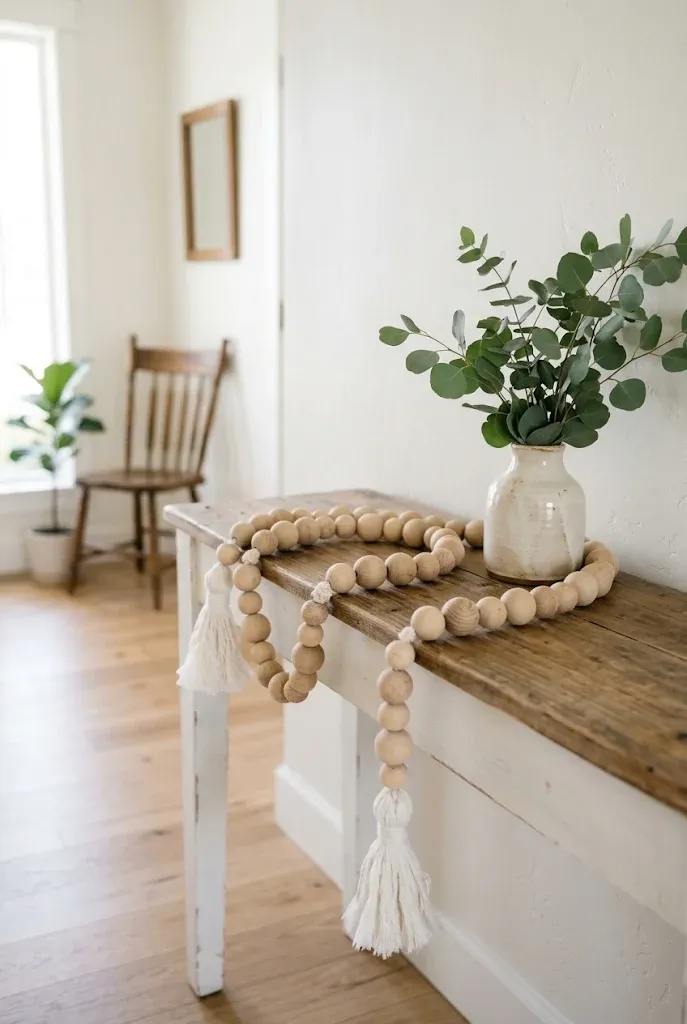
A bead garland reads as modern farmhouse or Scandinavian, depending on color. Thread natural wood beads in graduated sizes onto thick cotton cord, with a cotton tassel at the bottom of each swag or every few feet. Using a firm cord with a stiff tip, like wrapped tape, makes the threading much faster.
- Cord: 3–4 mm cotton cord.
- Beads: 20 mm and 16 mm round wood, plus a few smaller spacers.
- Tassels: cotton embroidery thread wrapped around a book or piece of cardboard.
Best For: Mantels, console tables, shelves
Investment: Accessible
Visual Effect: Warm, textural, quiet
6. Popcorn and Cranberry Garland
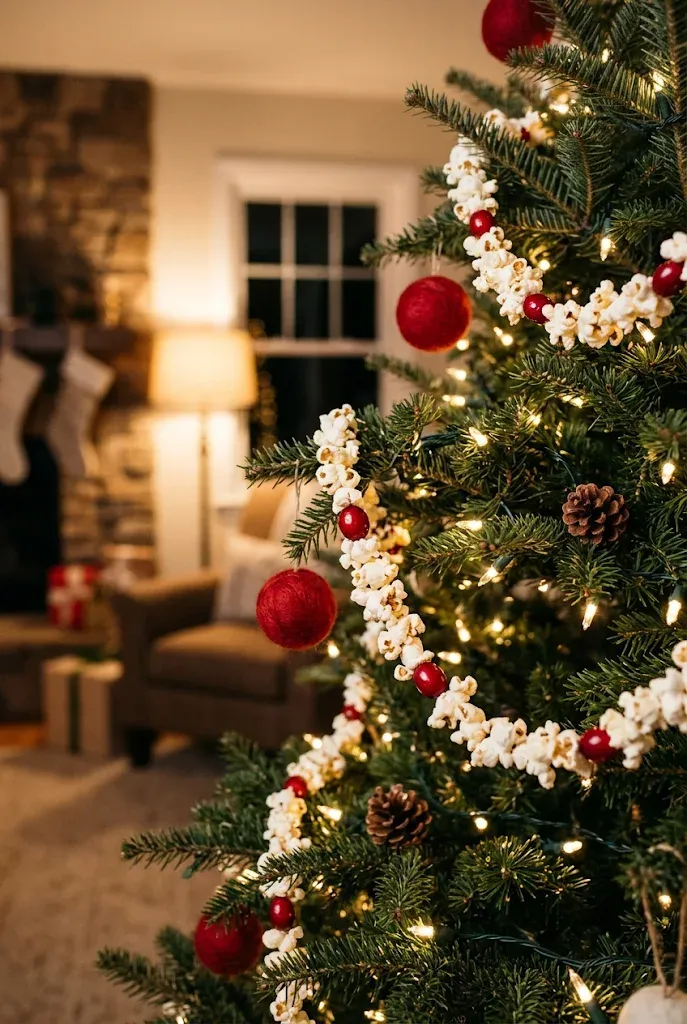
This one is classic, and it works best on a tree or outdoors. Use day-old, air-popped popcorn, which is less likely to crumble, and fresh or thawed cranberries. Thread them onto strong thread or thin string with a blunt needle, alternating in a loose pattern.
Do: Use unsalted, unbuttered popcorn, and keep the garland in a dry spot.
Don’t: Leave it where pets can reach it. Strings of food can tempt animals, and thread is a hazard if swallowed.
The garland is best made the day you hang it, and many people hang it outside afterward for birds, as long as any plastic or wire is removed first.
7. Pinecone and Burlap Ribbon Garland
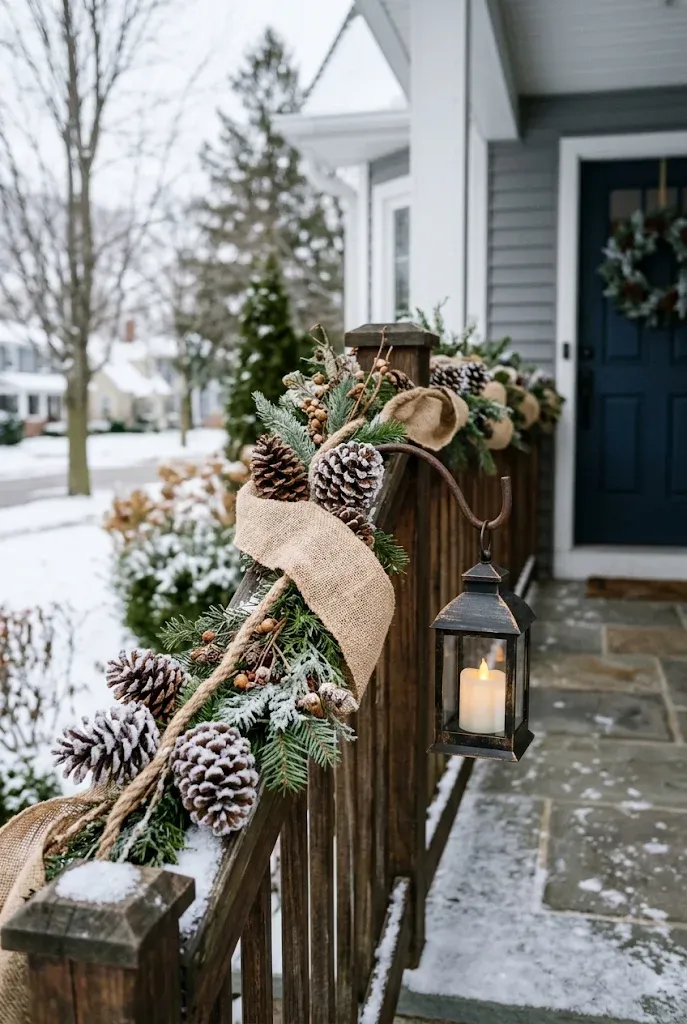
Pinecones give a garland weight and a woodland feel. Bake collected cones on a lined tray at a low temperature for about an hour to dry them and clear out insects, then let them cool. Attach a loop of floral wire around the base of each cone and wire them onto a length of rope. Weave a burlap ribbon around the rope between cones.
For a more finished look, dust the tips of a few cones with white paint for a frosted effect.
8. Patterned Paper Chain Garland
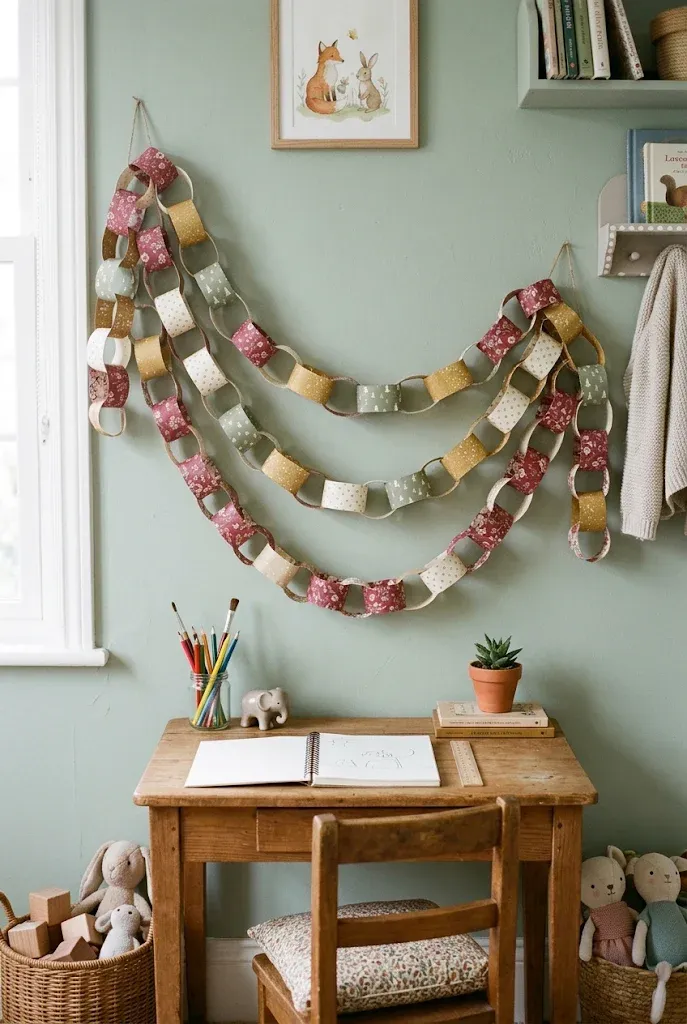
The paper chain is the easiest project here, and a modern color palette makes it look intentional. Cut strips of patterned scrapbook paper about 1 inch by 7 inches. Loop one strip, glue the ends, then thread the next through it and glue. Repeat until it reaches the length you want.
Use three to four coordinated colors, like cranberry, cream, sage, and gold, rather than every holiday shade.
Tips & Tricks
- Use a paper cutter for even strips.
- Glue sticks work fine, but double-sided tape sets instantly.
- Make the loops slightly longer for a looser, more graceful curve.
9. Salt Dough Ornament Garland
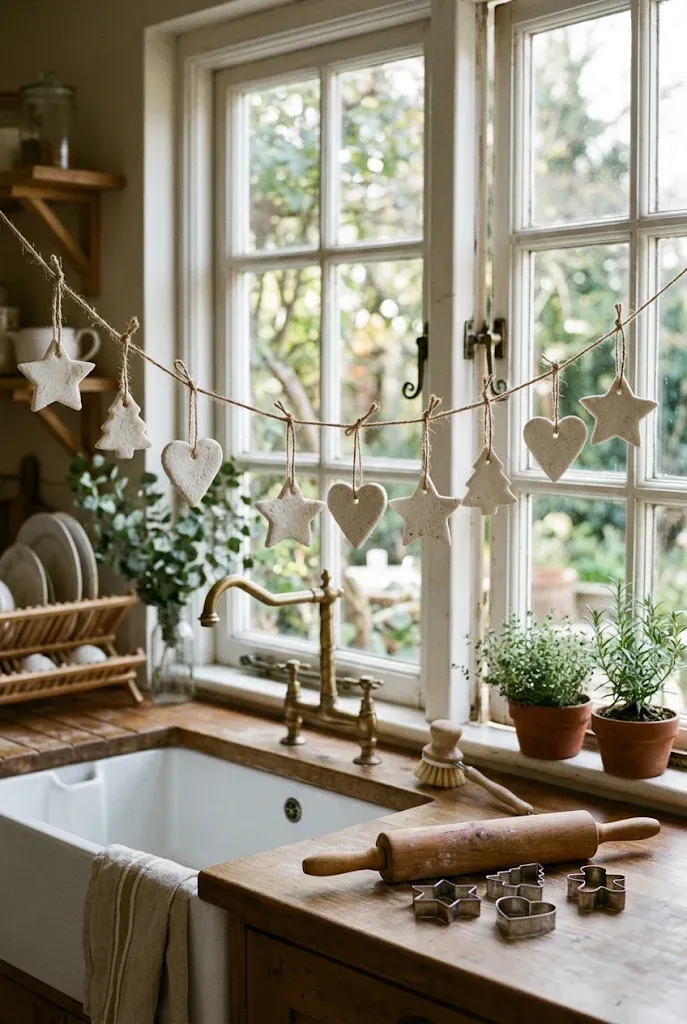
Salt dough shapes make a garland that feels like a keepsake. A common recipe is 2 cups flour, 1 cup salt, and about 1 cup water. Roll the dough to about ¼ inch, cut shapes with cookie cutters, and poke a hole near the top of each. Bake low, around 200°F, until fully hard. Timing varies with thickness, so check them rather than relying on a clock.
Once cool, leave them plain white, or paint them with a thin wash of acrylic. Thread them onto twine with knots between each shape.
Editor’s Note: Salt dough is not edible and can be harmful to pets. Keep finished pieces out of reach.
10. Tulle and Velvet Ribbon Bow Garland
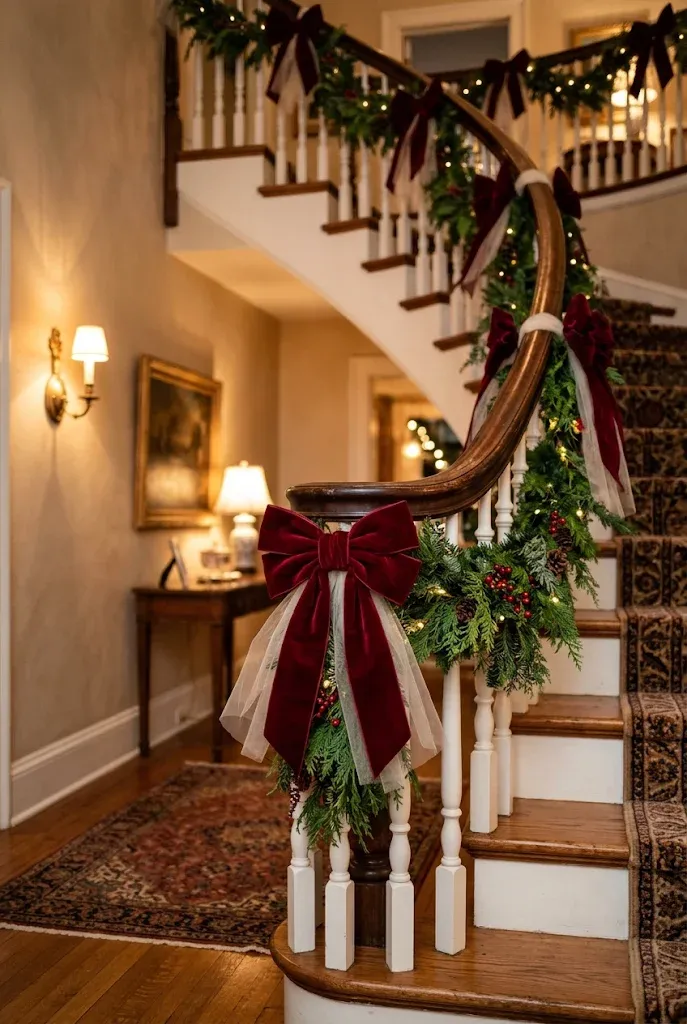
For a staircase banister, a row of oversized bows feels polished without much skill. Cut velvet ribbon into 24–30 inch lengths and tie each into a simple bow, then wire them at intervals onto a length of faux greenery or rope. Add a strip of tulle behind each bow for volume.
Common Mistake: Bows that are too small disappear on a long banister.
Better Approach: Use wide ribbon, at least 2.5 inches, and space bows 18–24 inches apart. Scale matters more than quantity.
11. No-Sew Buffalo Plaid Rag Garland
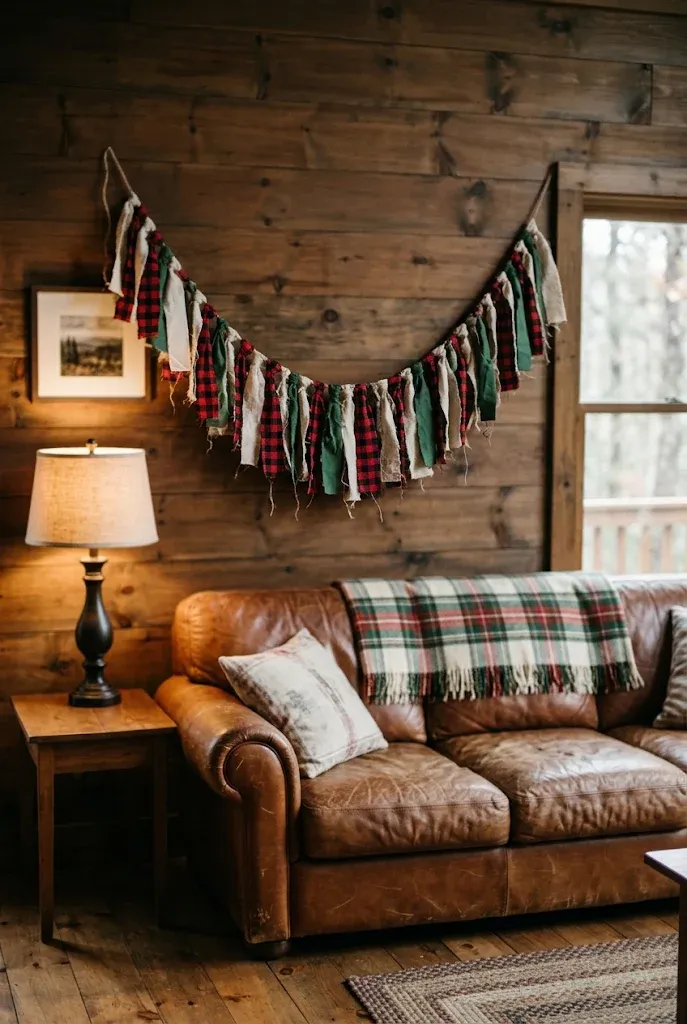
This is a good way to use fabric scraps or old flannel shirts. Tear or cut strips about 1 inch by 8 inches, then knot each one onto a length of twine, pushing the knots tight so the strips fan out. Mix red-and-black buffalo check with cream and solid green for a fuller look.
- Tear fabric along the grain for a frayed, soft edge.
- Alternate colors in a repeating but not rigid pattern.
- Trim ends at an angle for a neat finish.
12. Upgraded Store-Bought Faux Garland
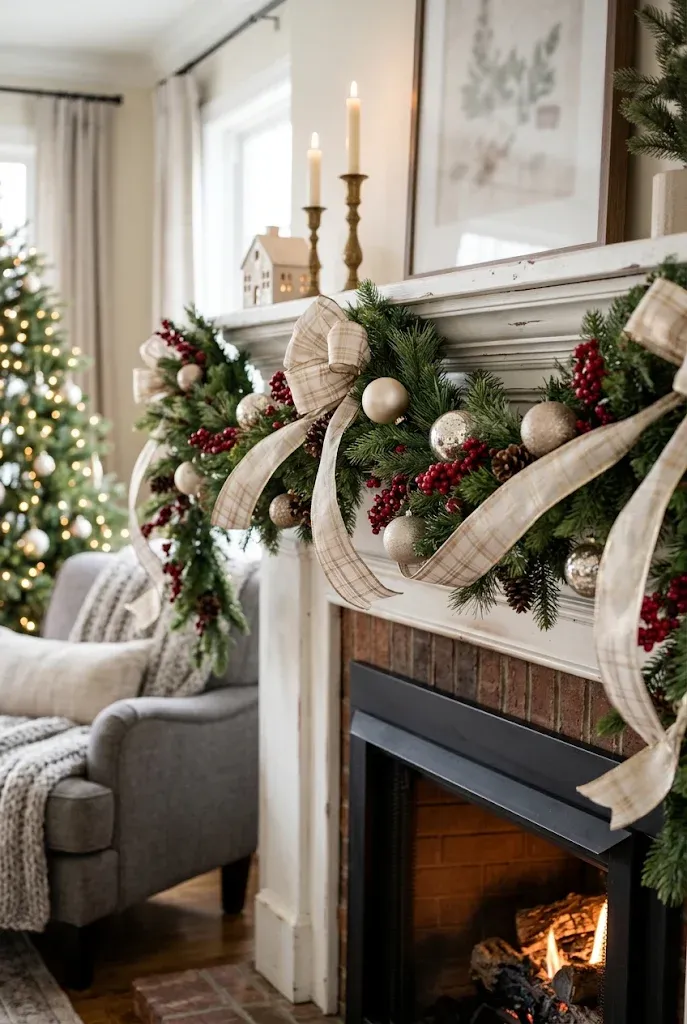
If a plain faux garland is the easiest base, a few additions make it look custom. Fluff each branch outward first, then add layers: berry picks, small pinecones, a few ornaments, and a wide ribbon woven loosely through. Secure picks with floral wire so they stay put.
| Addition | Effect | Best Fit |
|---|---|---|
| Berry picks | Adds color and depth | Traditional, farmhouse |
| Dried florals | Softens the greenery | Neutral, natural |
| Mixed ornaments | Adds sparkle, weight | Formal, glam |
Investment: Moderate, depending on the base garland
Visual Effect: Full, layered, finished
13. Gold-Brushed Magnolia Leaf Garland
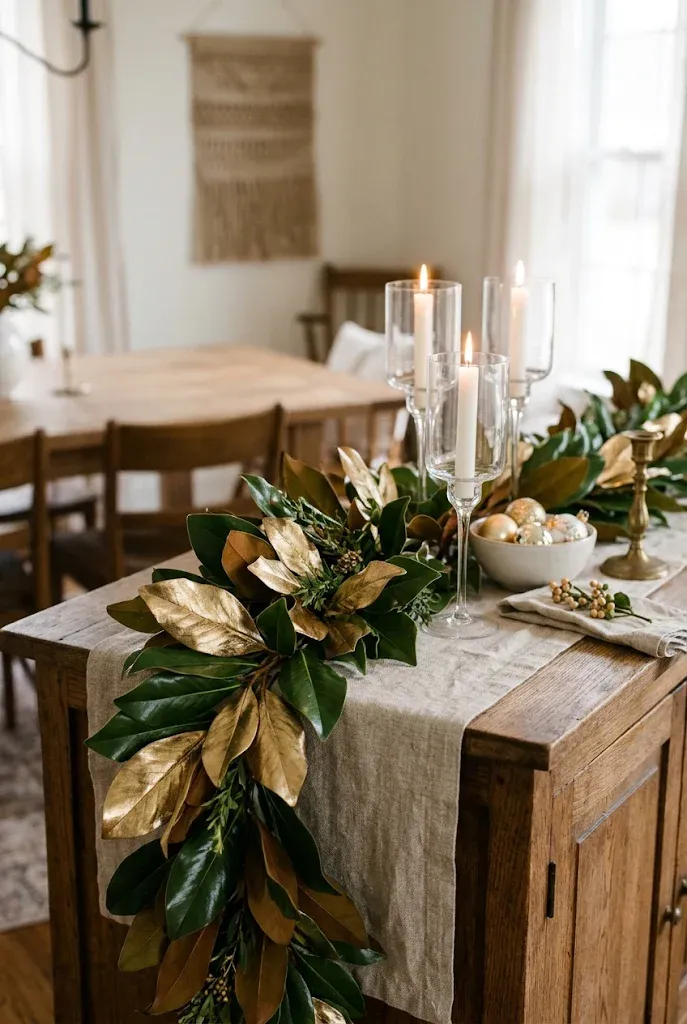
Magnolia leaves have a leathery, slightly glossy surface that takes metallic paint well. Gather leaves, wipe them clean, and brush or spray the tops with gold paint, working outdoors or in a ventilated space. Once dry, glue or wire the leaves onto cord in overlapping pairs, both facing the same direction.
Do: Let the brown undersides show for contrast.
Don’t: Over-coat the leaves. A light, uneven coverage looks more natural than solid gold.
14. Mixed-Finish Ornament Cluster Garland
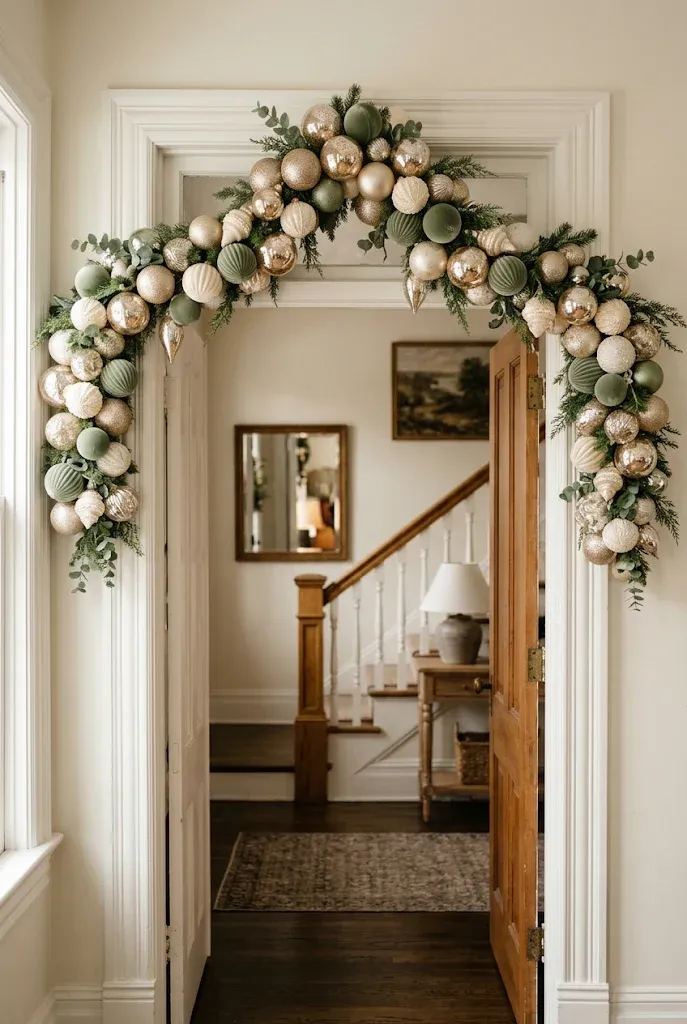
Instead of hanging ornaments on a tree, wire them onto a length of heavy craft wire or a grapevine base. Use shatterproof ornaments in several finishes, like matte, mercury, and glitter, in a tight palette such as champagne, sage, and ivory. Group three or four per cluster and stagger sizes.
- Choose a palette and buy ornaments in two or three sizes.
- Wire the largest ornaments first, spacing them evenly.
- Fill gaps with smaller ornaments and a few sprigs of faux greenery.
15. Coffee Filter Snowflake Garland
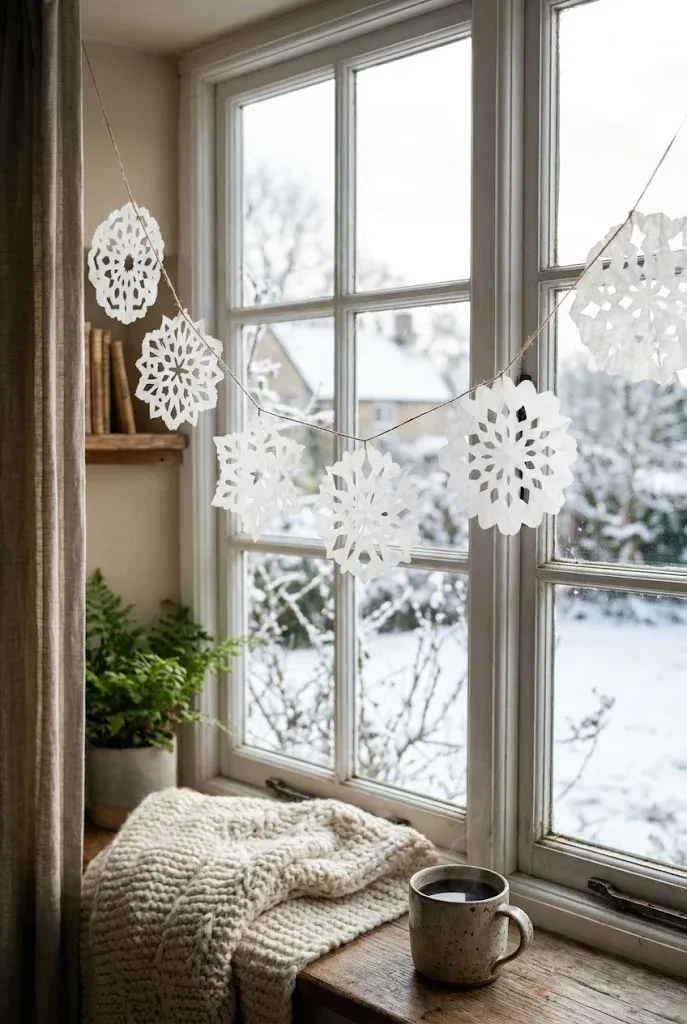
Coffee filters are thin and soft, which makes them a good snowflake material. Fold a filter in half three times into a wedge, snip shapes along the edges, and unfold. Press flat under a book. Attach snowflakes to a length of string with small dabs of glue or tape, overlapping them slightly.
This is a good project for children, and it takes very little time.
Tips & Tricks
- Cut from the folded edges inward for lacier results.
- A light mist of water, then pressing, removes creases.
- Mix large and small snowflakes for visual rhythm.
16. Accordion-Fold Paper Tree Garland
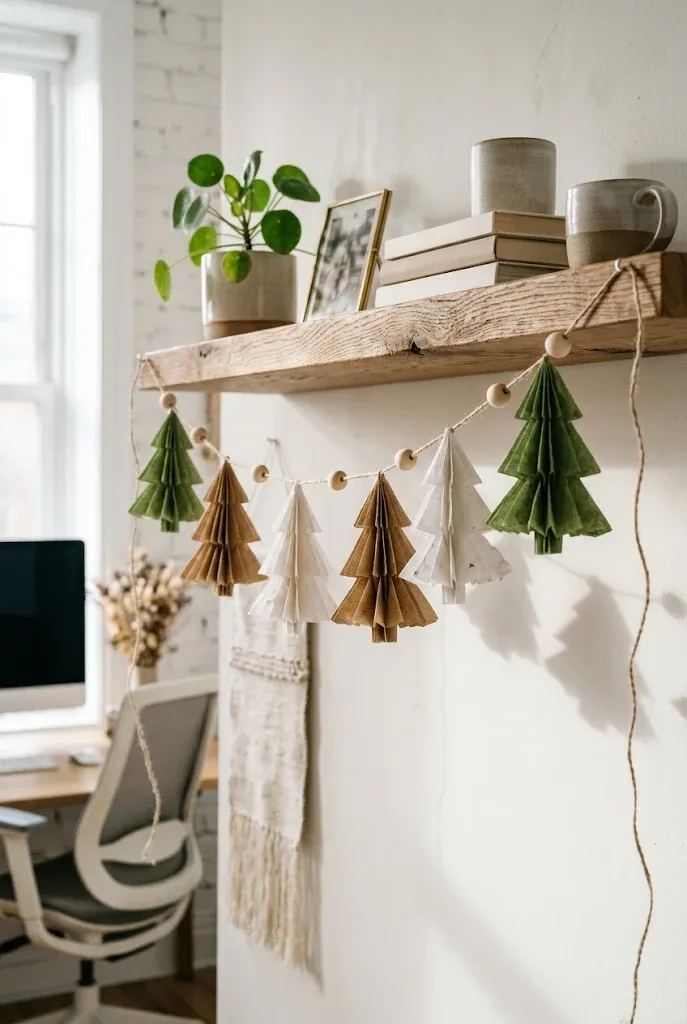
Mini paper trees in patterned papers add a graphic, modern look. Fold a rectangle of paper in an accordion, fan it open, and glue the edges to make a small standing tree shape. Cut a few holes through the base, or tie a thread through the top, then string them along twine, alternating with small wood beads.
Best For: Shelves, narrow mantels, windowsills
Investment: Accessible
Visual Effect: Playful, graphic, modern
17. Snow-Flocked Bottle Brush Tree Garland
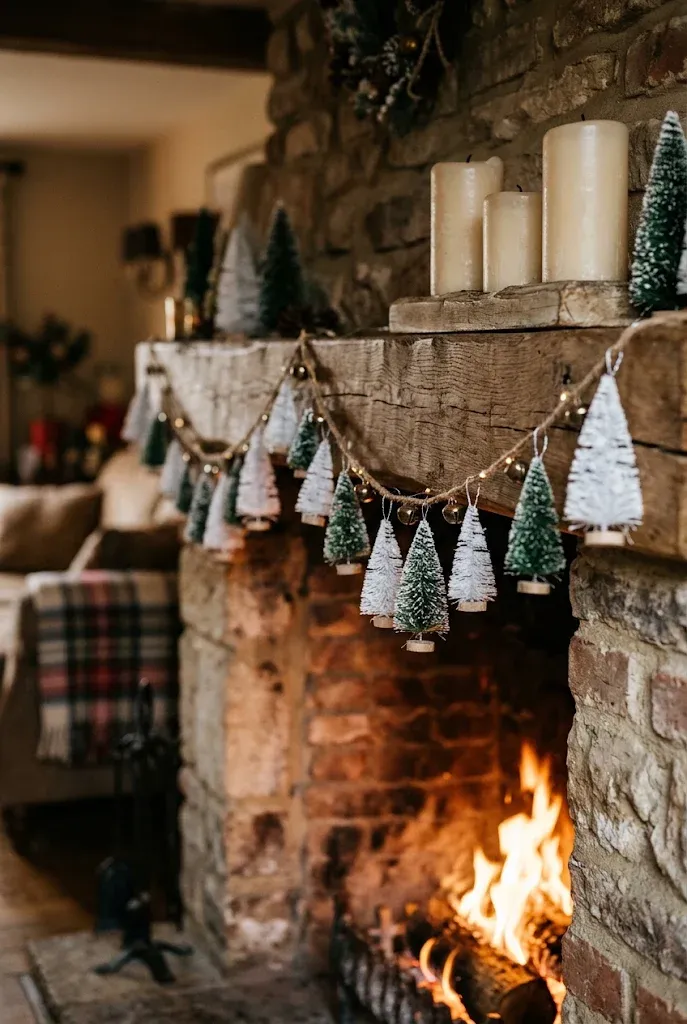
Bottle brush trees are available in many sizes, usually at craft stores or after-holiday sales. Select small ones, about 3–5 inches, and wire each to a length of twine or thin cord by wrapping floral wire around the trunk base. Space them along the cord, mixing frosted white, green, and a few sage or blush tones.
Editor’s Note: Test each tree for stability before hanging. Heavier trees will pull a garland into a sag, so use sturdy cord and support the span with small hooks every few feet.
18. Felt Holly Leaf and Berry Garland
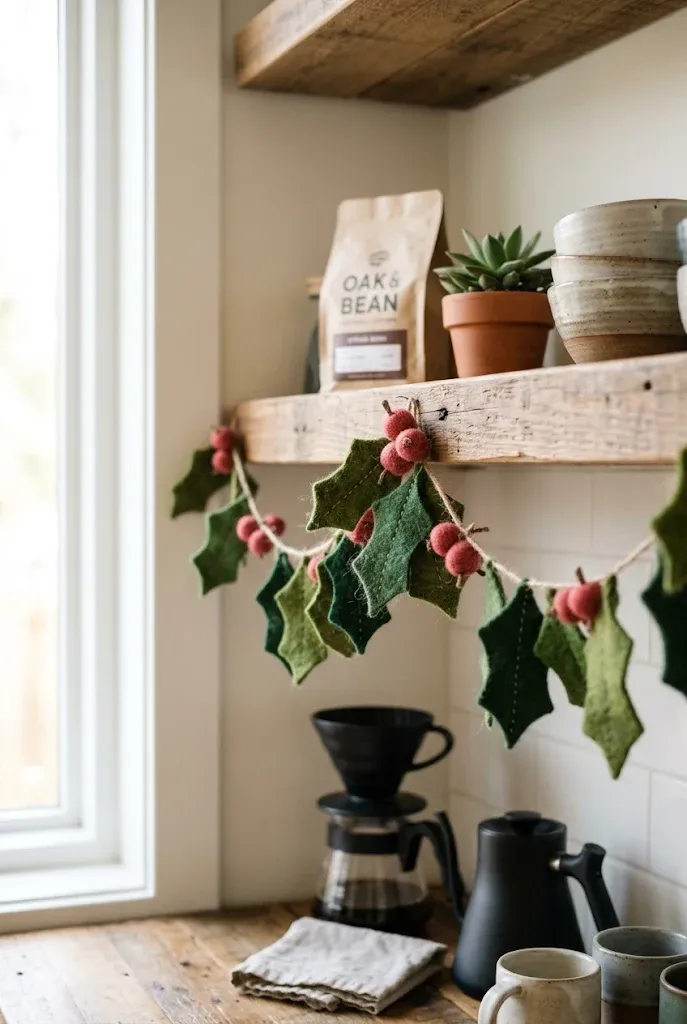
Felt is forgiving, since it doesn’t fray. Cut about 30 holly leaves from green felt using a simple template, and make red berries from small felt circles or pom-poms. Glue or stitch leaves and berries in clusters along a length of thread or thin ribbon.
- Use two shades of green for depth.
- Add a single stitch down the center of each leaf for a vein.
- Space clusters about 4–6 inches apart.
19. Wrapped Peppermint Candy Garland
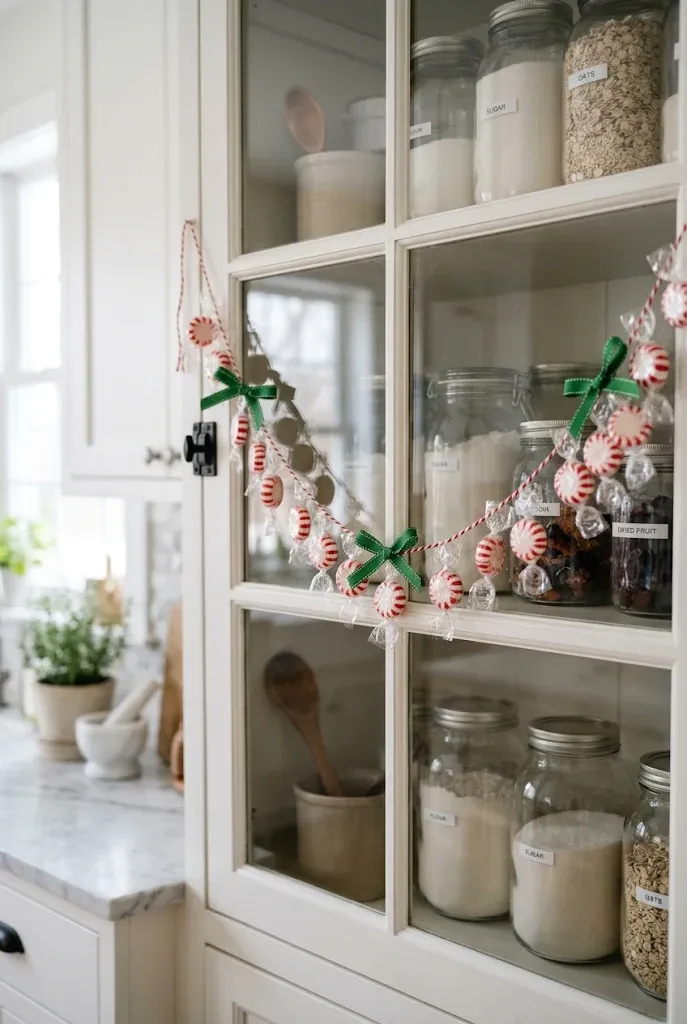
A candy garland is quick, bright, and popular with kids. Choose individually wrapped round mints or hard candies with twisted ends. Tie each twist to a length of ribbon or bakers twine with a double knot, spacing them evenly. Add a few small bows or sprigs of faux greenery at intervals.
Do: Hang it out of reach of small hands, and plan to refresh it if it gets sticky in warm rooms.
20. Twig Star and Twine Garland
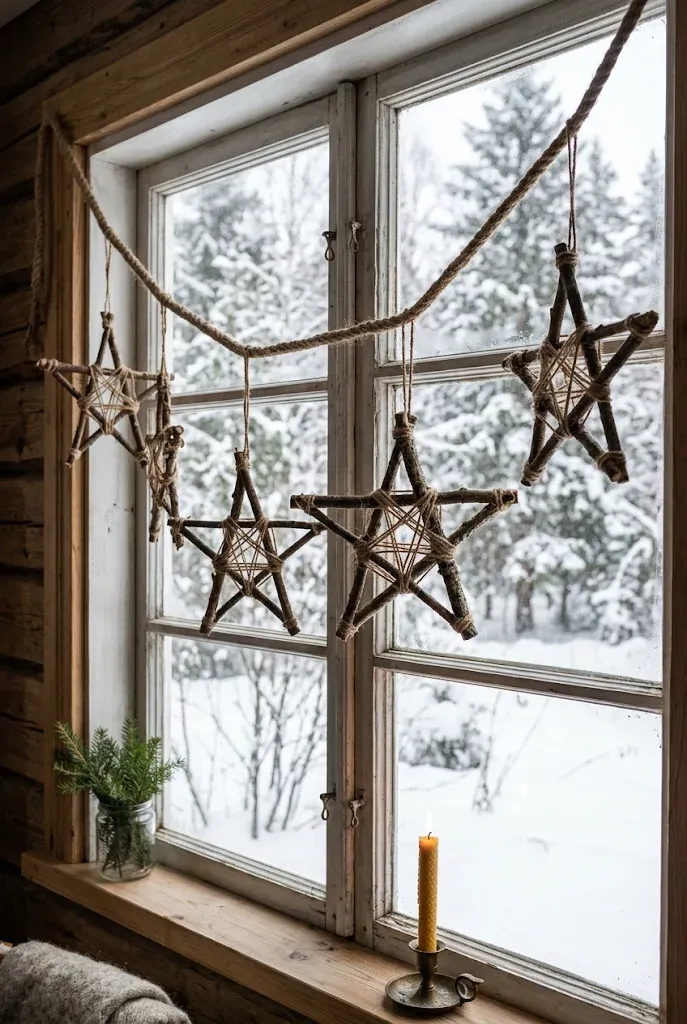
Gathered sticks make a quick, rustic ornament. Collect twigs about ¼ inch thick, break or cut them into five equal pieces, and hot-glue them into a five-pointed star, wrapping each joint with twine. Make a dozen or more, then tie each to a length of twine with extra thread.
Dry the twigs before gluing, since damp wood won’t hold the glue well.
How to Choose Your Starting Garland
Start with the space. A mantel can carry heavier garlands like greenery or bead strands, a window suits lightweight paper, and a banister needs scale. Then choose by time: paper, felt, and pom-pom projects start and finish quickly, while oranges and salt dough need oven time you can spend on a second project.
If you want a first project, the paper star (idea 4) or the pom-pom garland (idea 3) are easy wins.