

Holiday decorating tends to get squeezed into a few busy evenings, usually after work and between errands, which is why a practical list of weekend projects helps. The ideas below rely on materials most American households can find at a craft store, a hardware store, or even in their own backyard. Many can be finished in a single weekend once you allow time for drying or setting. You’ll find wreaths and garlands, tabletop centerpieces, handmade ornaments, and a few outdoor ideas, arranged so you can scan for the styles that suit your rooms. Some projects need little beyond supplies you may already have, while others call for a few better materials. Read each section for the practical details, the common mistakes, and the small adjustments that make a handmade piece look intentional rather than improvised.
1. Build a Full Evergreen Door Wreath with Wired Ribbon
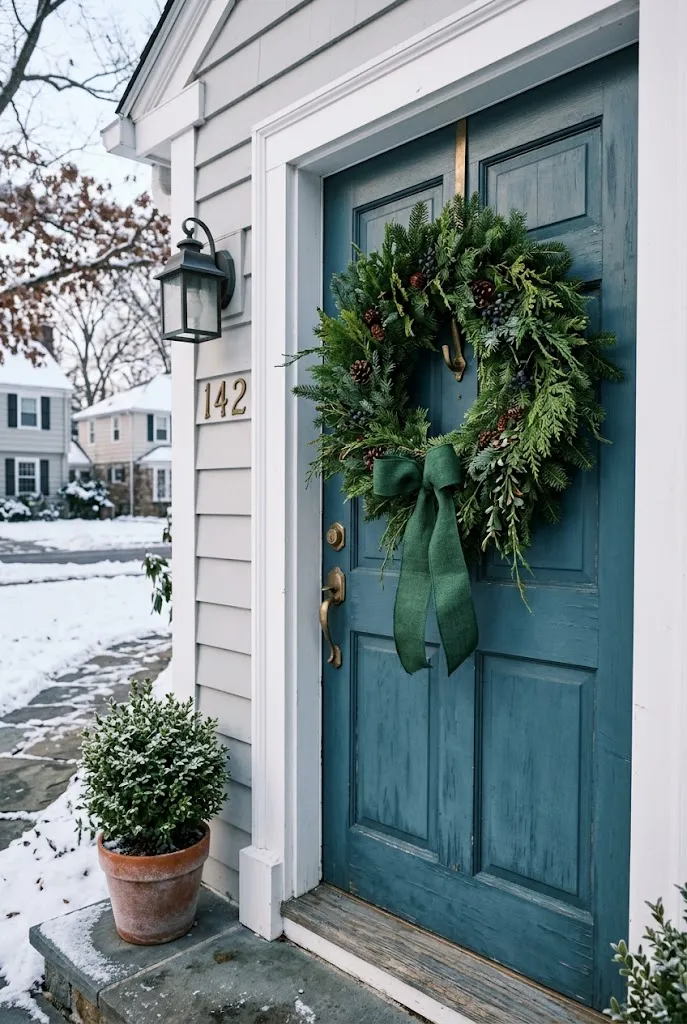
Start with a wire or grapevine wreath form and work in clusters of cut evergreen, such as fir, cedar, or boxwood. Lay the sprigs in the same direction around the circle so the wreath reads as full from the sidewalk. Attach each cluster with florist wire, overlapping the stems so the bases stay hidden. Finish with a wide wired ribbon in a deep green, red, or plaid, looped once at the top and left to trail. Fresh greenery looks lush on a covered porch but dries out quickly in direct sun, so a light misting in dry weather keeps it fresher longer.
Quick Tip: Work your way around the form in small sections rather than building one side fully at a time. This keeps the fullness even all the way around.
2. Create a Pinecone and Berry Centerpiece in a Wooden Bowl
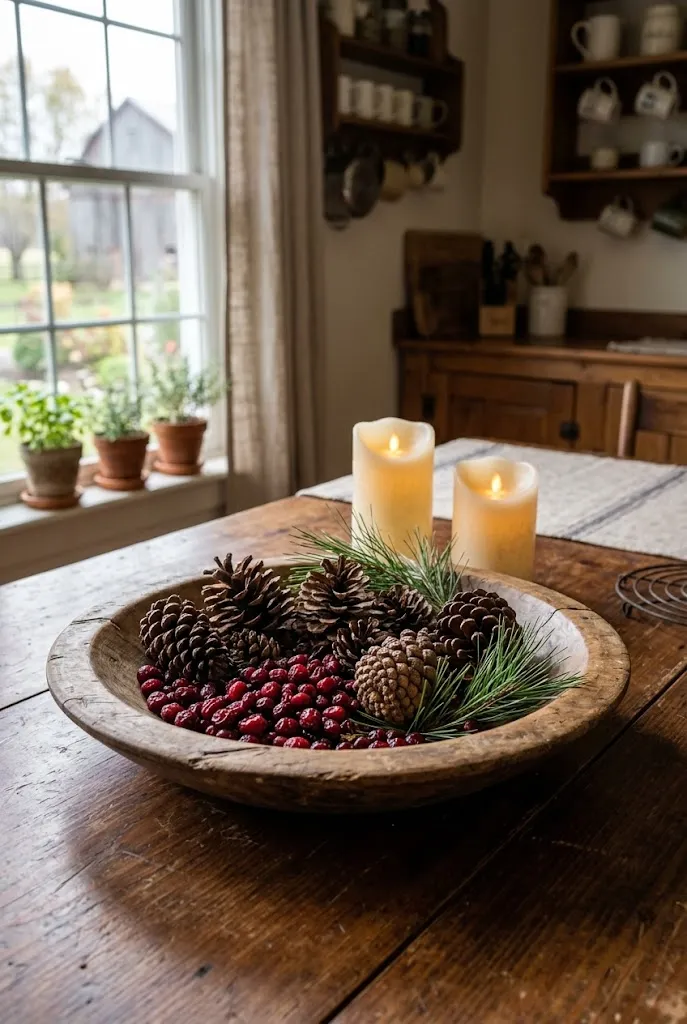
A shallow wooden bowl makes an easy base for a holiday centerpiece. Gather pinecones of varying sizes, brush off dirt and debris, and dry them thoroughly before arranging. Many crafters bake pinecones on a low oven rack to dry them out and reduce any insects, but watch them closely so they don’t scorch. Arrange the largest cones first, then tuck in cranberries or faux berry picks and a few sprigs of greenery. A pair of battery-operated candles at the center adds warmth without the fire risk of real flame.
Editor’s Note: Pinecones shrink and open slightly as they dry, so the arrangement may look fuller a day or two later. Leave room for that shift when you tuck in the smaller pieces.
3. Shape Salt Dough Star Ornaments
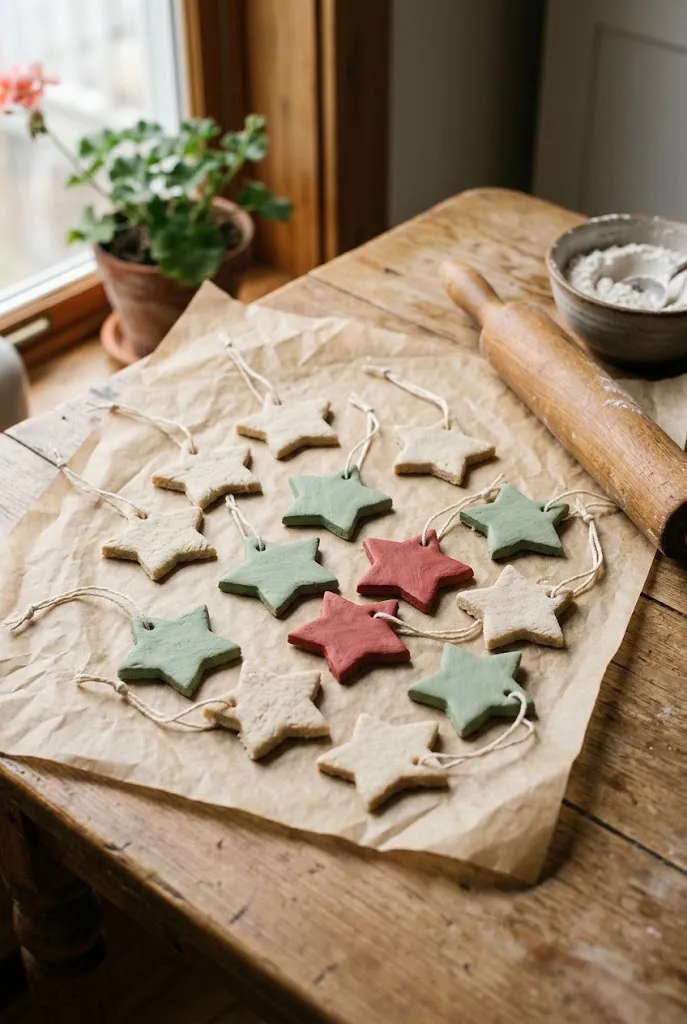
Salt dough is one of the most accessible crafts for holiday decorating, and the ingredients are likely in your pantry. The dough is typically made from flour, salt, and water in roughly equal parts by volume, adding water gradually until it forms a smooth ball.
- Mix about one cup of flour with half a cup of salt, then slowly add roughly half a cup of water until the dough holds together without sticking to your hands.
- Roll it to about a quarter inch thick on a floured surface and cut out star shapes with a cookie cutter.
- Use a straw or skewer to poke a hole near the top of each star for a ribbon, making sure it’s large enough to hold the ribbon after baking.
- Bake on a parchment-lined sheet in a low oven, around 200°F, until fully hard. This usually takes a few hours, so check that the centers are dry before removing them.
- Let them cool completely, then paint and seal. Thread each one with a ribbon loop and hang.
Common Mistake: Baking at a higher temperature to speed things up. The outside hardens while the inside stays soft, and the ornament can crack or puff. A low, slow bake gives a more even result.
4. Make Mason Jar Luminaries with LED Lights
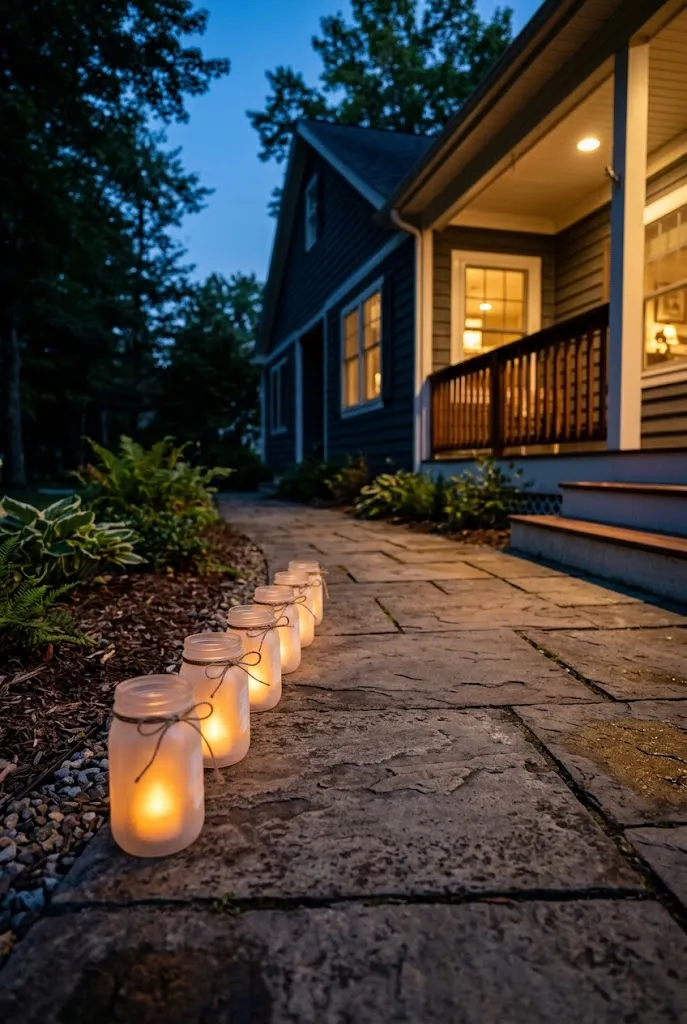
Clean glass mason jars, rinse them, and let them dry completely. Frosted or textured jars diffuse the light more gently than clear ones. Decorate with paint, a stencil, or a strip of holiday-themed fabric tied around the neck. Place a battery-operated LED tea light inside each jar, then line them up along a walkway, porch step, or windowsill. The light glows warmly from the jar and creates a soft pattern on the surrounding surface.
Because the lights are battery-powered, you can leave them out overnight without worrying about a flame, and you can switch them on and off with a button. Set the jars a comfortable distance from doorways so guests don’t step into them.
5. Hang a Burlap and Pine Garland on the Staircase
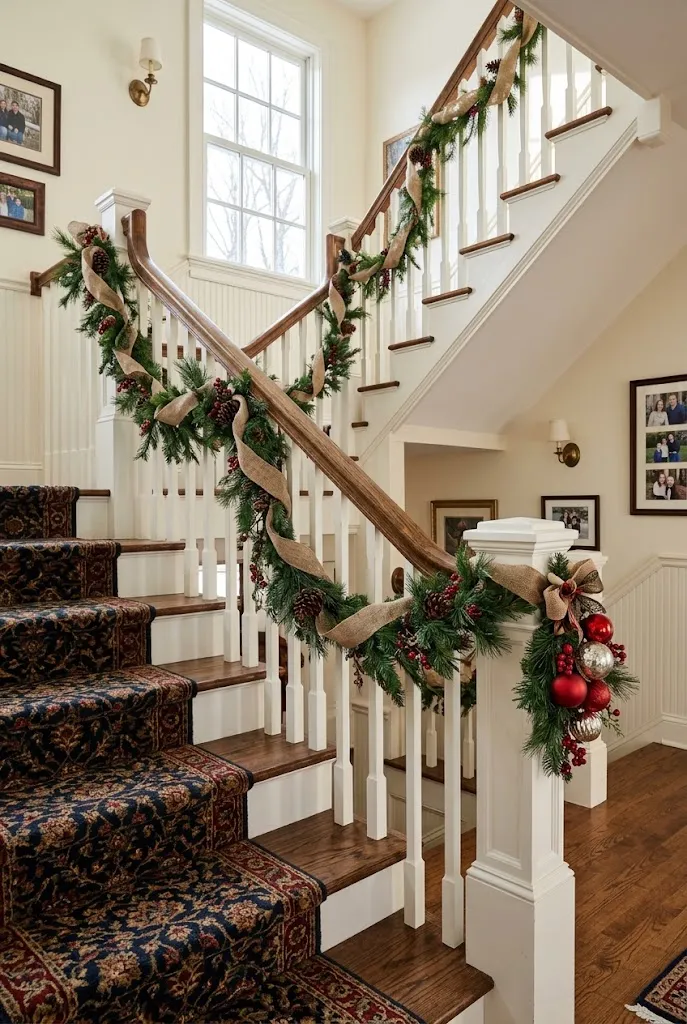
A staircase railing gives you a long, visible line to work with. Start with a length of artificial or fresh garland, then weave in a strand of burlap ribbon so it winds between the greenery. Burlap adds a relaxed, textured contrast to the crisp needles, which suits both farmhouse and more traditional homes.
Attach the garland to each baluster with floral wire or small zip ties, hidden in the greenery where possible. Work from the top step down so the gaps and drape look natural. Leave the garland slightly loose between posts, since a tight, straight line can look stiff. A few small ornaments tucked into the greenery at the newel post make a good finishing touch.
Quick Tip: Measure the length of each railing section before buying garland. Most stairs need more than one run, and it’s easier to plan the joins before you start attaching.
6. Paint Simple Wood Slice Ornaments
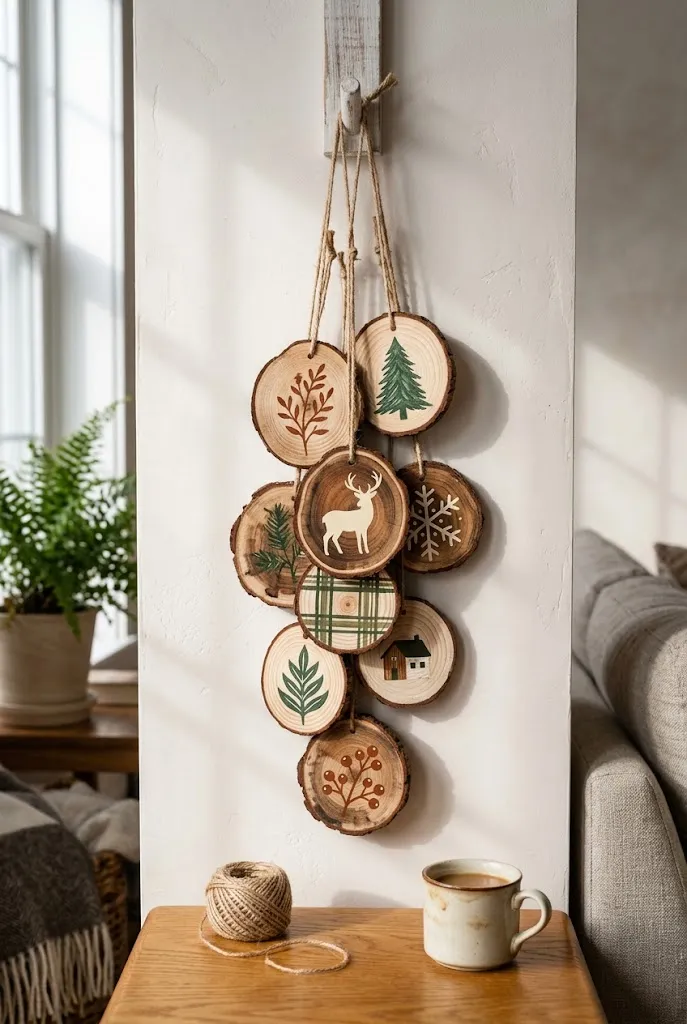
Wood slices from a craft store are inexpensive and take paint well. Sand the surfaces lightly to remove any rough spots, then wipe off the dust. Paint simple shapes such as trees, moons, hearts, or snowflakes using a fine brush and a limited palette of two or three colors. Keep the designs bold and simple, since detailed lines are harder to see from a distance on a tree.
Once the paint dries, seal the slices with a clear coat to protect them from moisture and handling. Attach a loop of twine or ribbon to the back with a small dab of hot glue or a drilled hole, then hang them in clusters.
Do / Don’t:
- Do choose shapes that read clearly at a glance, such as a tree silhouette or a star.
- Don’t paint every slice a different style. A consistent palette makes a group look intentional.
7. Stencil a Rustic Wood Sign with a Holiday Symbol
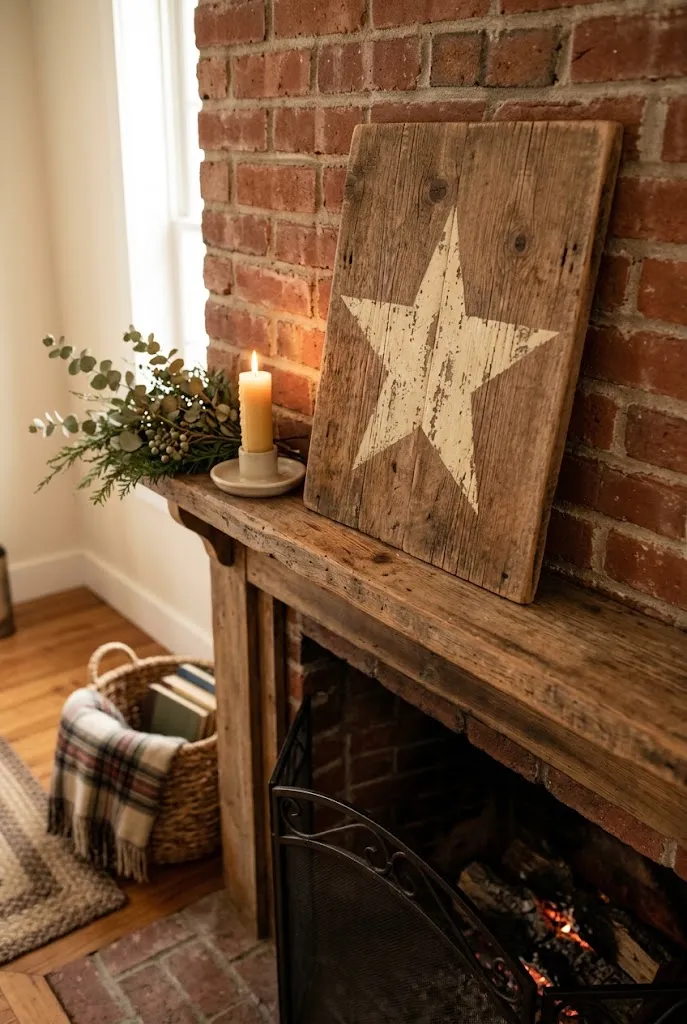
A plain wood board or a reclaimed-look pallet piece can be turned into a seasonal sign with a simple stencil and a layer of paint. Choose a symbol rather than lettering, such as a star, a tree, or a snowflake, which keeps the project easier to execute and more versatile over several years. Tape the stencil firmly, then dab paint through it with a stencil brush rather than dragging the brush, which keeps the paint from bleeding under the edges.
For a weathered look, sand the edges lightly after the paint dries so the wood shows through in places. Lean the sign on a mantel or console, or hang it from a simple hook.
8. Sew Felt Stocking Holders for the Mantel
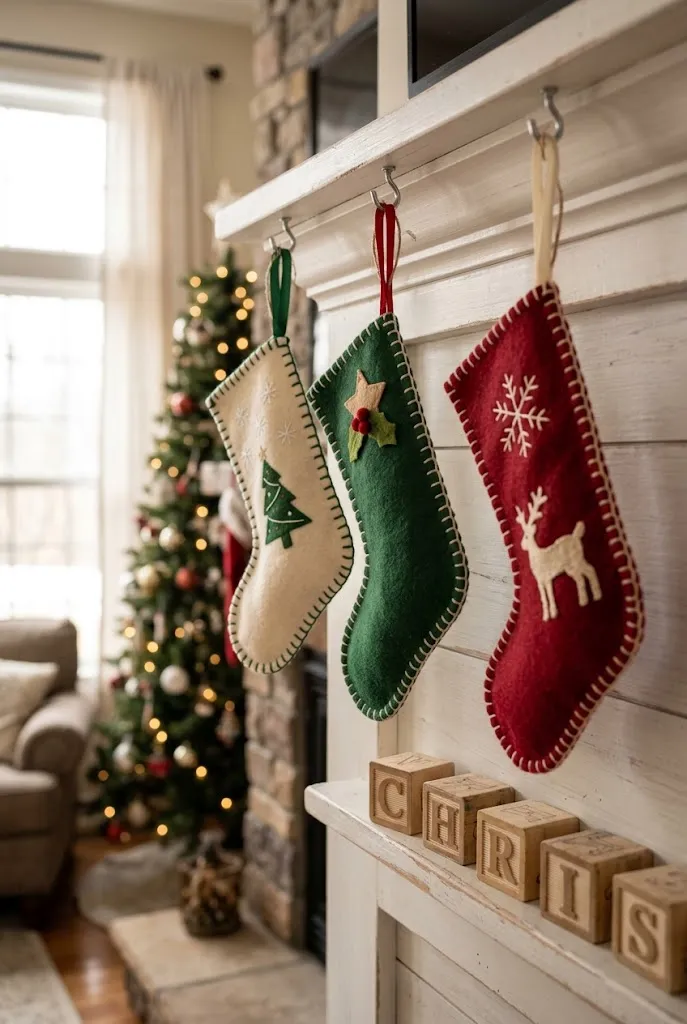
Felt is forgiving for beginners and doesn’t fray, which makes it a good choice for stocking holders. Cut two matching stocking shapes from wool or craft felt, then stitch them together around the edges with a simple running stitch or a blanket stitch in a contrasting thread. A small loop of ribbon at the top lets you hang the holder from a mantel hook or the edge of the mantel itself.
Keep the stitches neat and close together so they hold the felt firmly, especially at the heel and toe where the stocking will pull. Adding a felt cuff in a different color helps the holder look finished and gives you space to write a name in fabric marker or to attach a small appliqué.
Editor’s Note: Felt stretches over time, so stitch the top loop securely and avoid overloading the holder. A slightly smaller holder often hangs more neatly than a large one.
9. Wrap Cardboard Stars in Yarn
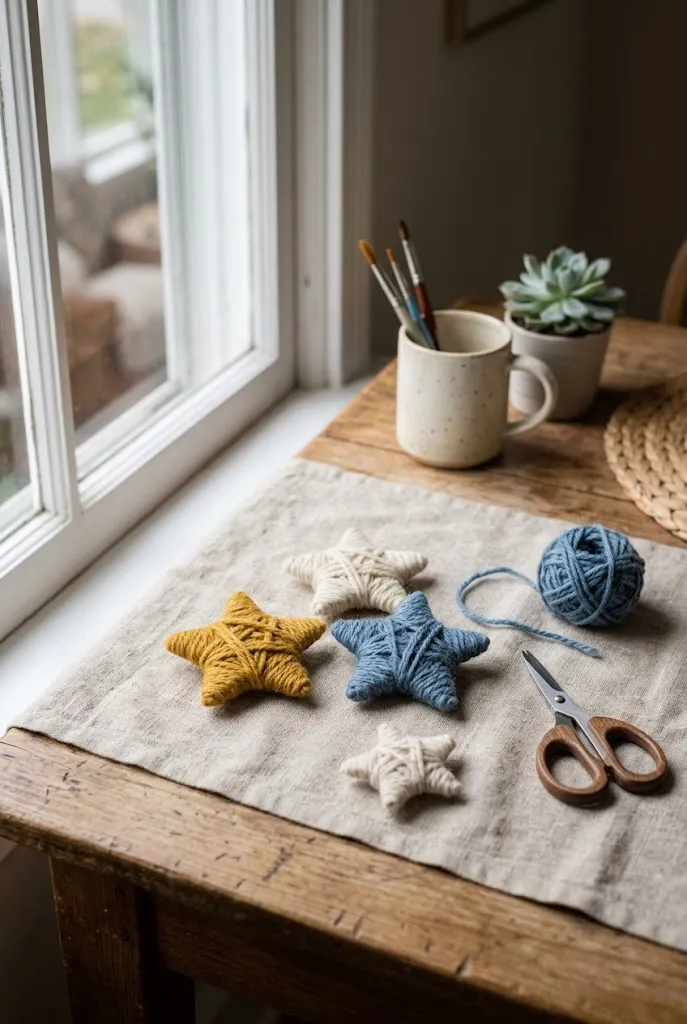
Yarn-wrapped ornaments are a relaxed, textured project that works well with leftover yarn. Cut star shapes from sturdy cardboard, such as the back of a cereal box, then wrap the yarn around the star, covering the cardboard completely. Work in a single color for a clean look, or switch colors every few rounds for a striped effect. Dab glue at the start and finish of each length so the yarn stays put.
The adhesive you choose makes a difference. The table below compares three common options for this kind of project.
| Adhesive | Best Use | Practical Notes |
|---|---|---|
| Hot glue | Quick bonding of yarn ends and ribbon loops | Sets within seconds, so work quickly and keep fingers clear of the tip |
| Tacky glue | Holding yarn and paper to cardboard | Needs longer to dry; allow it to set fully before handling |
| Fabric glue | Attaching ribbon or felt to fabric | Check the bottle for drying and washing guidance |
For yarn-wrapped stars, a small amount of tacky glue applied under each starting and ending point usually gives the cleanest hold.
10. Turn a Vintage Wool Sweater into a Pillow Cover
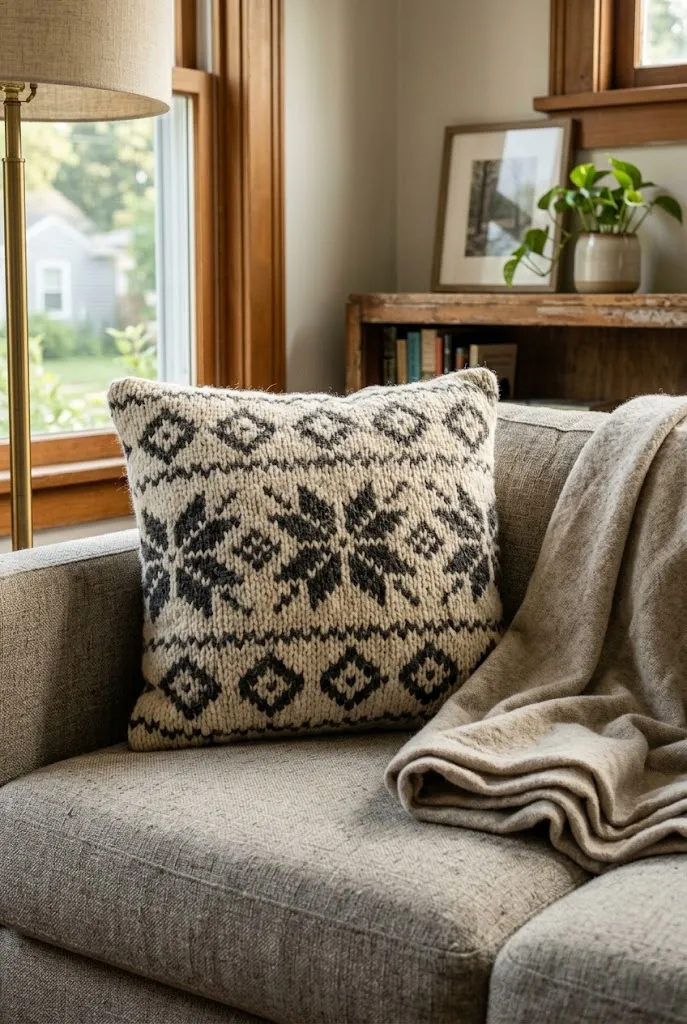
Thrift stores often carry wool sweaters in classic patterns, especially cable knits, fair isle, and nordic designs. Choose one with a pattern you like and a fabric that feels soft and sturdy. Cut the front and back panels to the size of your pillow form, leaving a small seam allowance. Sew the front and back together on three sides, insert the pillow, and close the final edge with a hidden stitch or a zipper.
- Choose a sweater with a tight knit so the seams hold.
- Wash it first, then dry flat so it doesn’t shrink unevenly.
- Keep the pattern centered on the cut panel for a balanced look.
A winter pillow cover like this works on a sofa, a window bench, or a reading chair, and it can remain in use long after the holidays.
11. Make a No-Sew Tree Skirt from a Fabric Remnant
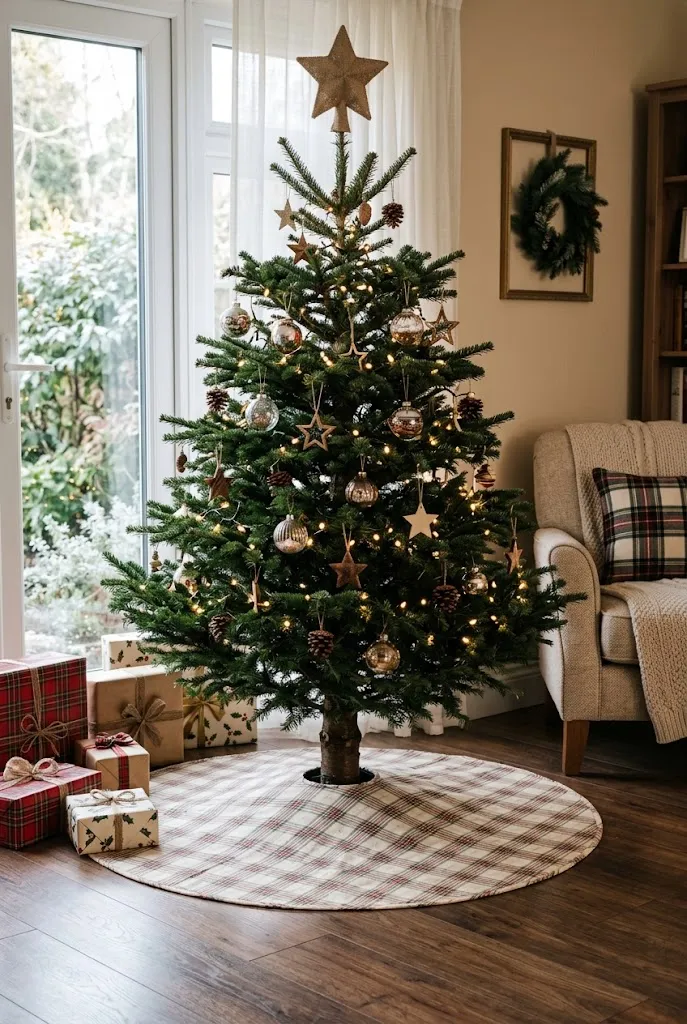
A tree skirt doesn’t need a sewing machine. Choose a fabric remnant or a length of quilting cotton, then cut a circle that’s large enough to cover the base of your tree stand. Make a single cut from the outer edge to the center so the skirt can wrap around the trunk, then cut a small circle at the center for the trunk. Finish the outer edge with a hem tape or a line of fabric glue to prevent fraying.
Because no-sew hems aren’t as durable as stitched ones, this project suits a lighter everyday use or a single season. A cotton plaid or a muted print tends to look more finished than a bright, busy pattern.
Common Mistake: Cutting the center hole too large. A loose opening lets the skirt slide and gather around the base of the tree. Test the fit before gluing the edge.
12. Arrange Bottlebrush Mini Trees on a Wooden Stand
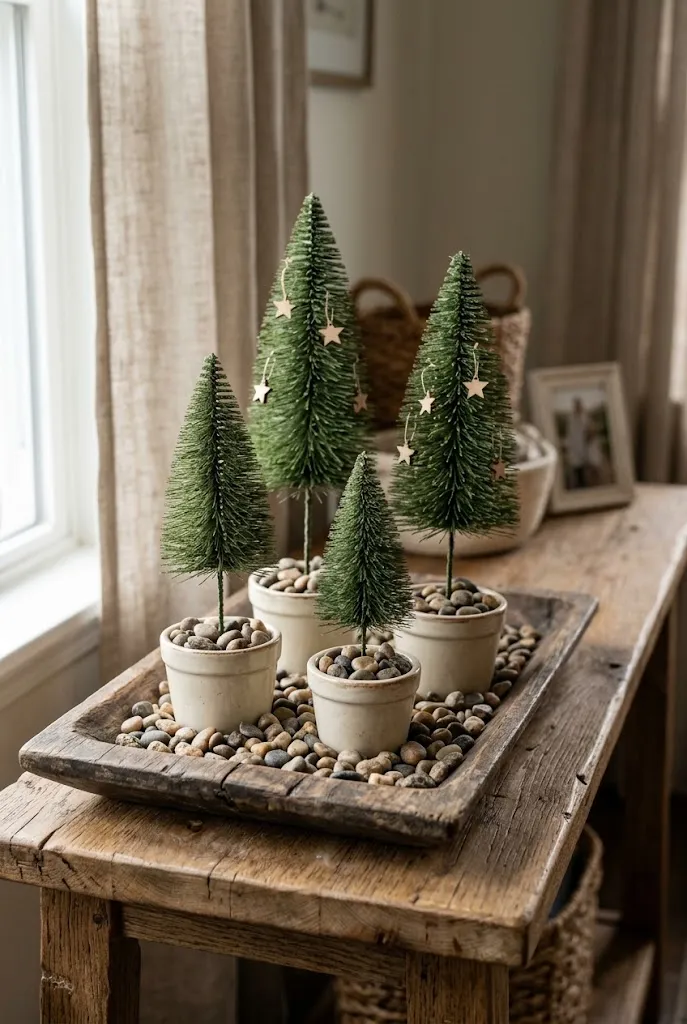
Bottlebrush trees are one of the easiest ways to create a miniature forest on a table or shelf. Buy a set of trees in varied heights, then place each one in a small clay pot, a ceramic cup, or a wooden base. Fill the container with a layer of decorative stones, sand, or dried moss to hold the trunk in place.
Group three to five trees of different heights for the most natural look, and place the tallest one toward the back of the arrangement. A few small wooden stars or tiny glass ornaments hung from the branches add a playful touch without overwhelming the trees.
13. Bundle Cinnamon Sticks for a Mantel or Shelf
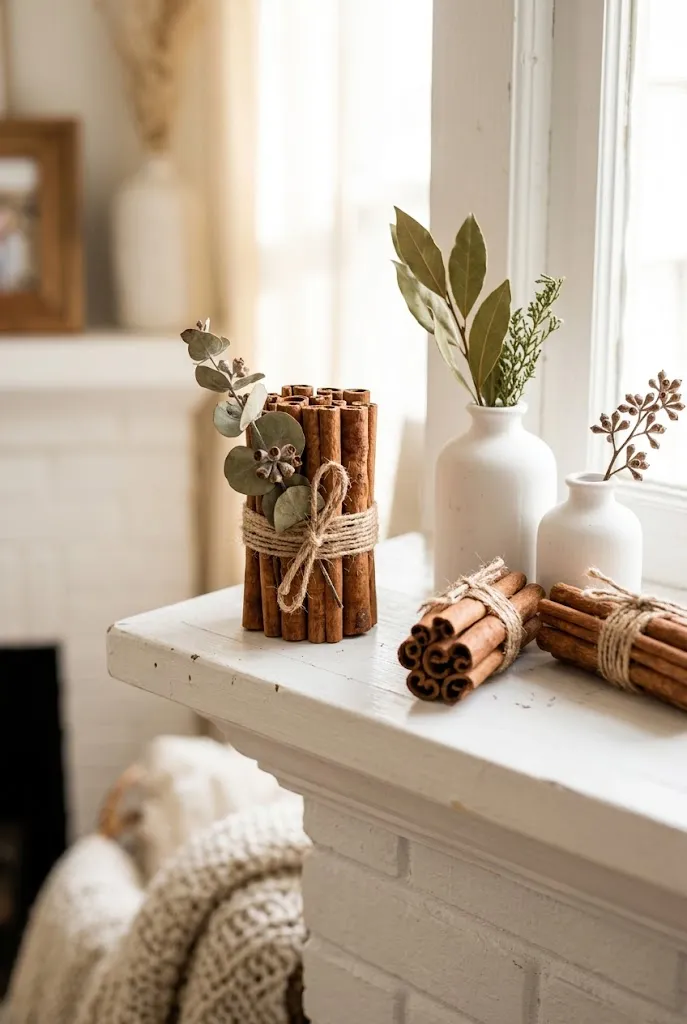
Cinnamon sticks have a warm color and a neat, linear shape that suits a minimal holiday setting. Bundle six to eight sticks together, tie them at the center with natural twine, and trim the ends so they sit evenly. Add a small sprig of greenery or a single dried orange slice tucked under the twine for a bit of color.
Place the bundles in a clear glass vase, a ceramic pitcher, or directly on a tray. They look best in small groups of two or three, arranged at different heights. Keep them away from open flames, since cinnamon sticks are dry and can ignite.
Quick Tip: Wrap the bundle tightly before knotting the twine. A loose bundle tends to shift and spread once you move it.
14. Fold a Paper Star Garland from Kraft Paper
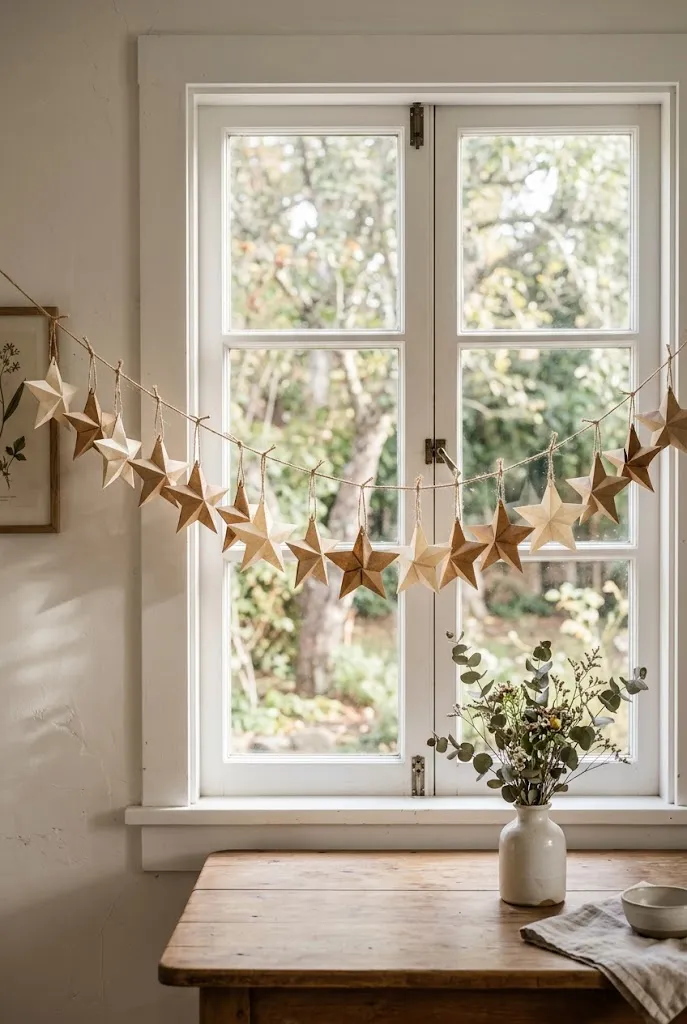
Kraft paper is inexpensive, sturdy, and easy to fold, which makes it a practical choice for a large garland. Cut strips of paper, fold each strip accordion-style, and staple or tape the ends together to form a star. Repeat until you have enough stars for the length you want. String them on a thin cord or twine, spacing them evenly along the line.
The natural brown tone of kraft paper pairs well with greenery, wood, and white ceramics. For a brighter look, add a few sheets of white or red paper between the brown stars. The garland works on a window, along a shelf, or across a wall above a sideboard.
15. Lay a Holiday Table Runner with Greenery and Ribbon
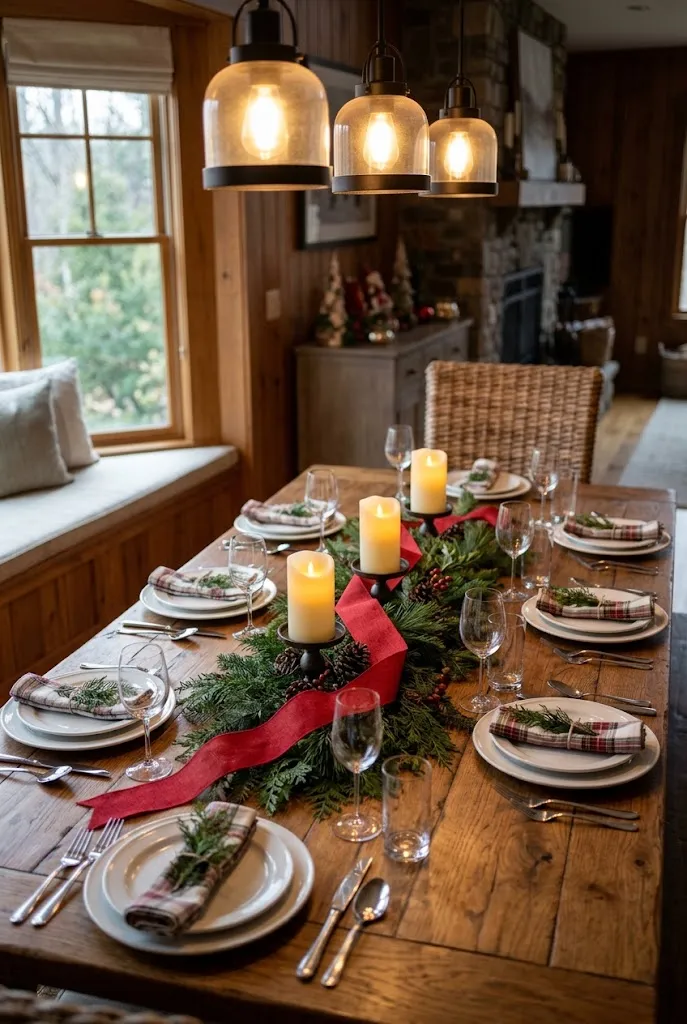
A table runner made from greenery makes a dining table feel festive without requiring a tablecloth. Lay a length of artificial garland or fresh evergreen down the center of the table, then add a wide ribbon that crosses over at intervals. Set battery-operated candles at two or three points along the runner, placing them so they don’t touch the greenery.
Keep the runner low enough that guests can see across the table. This is the sort of detail that makes a dinner setup comfortable as well as attractive. If you use fresh greenery, lay it on a protective towel or a tray so moisture doesn’t reach the wood.
16. Thread Wooden Beads and Tassels into a Shelf Garland
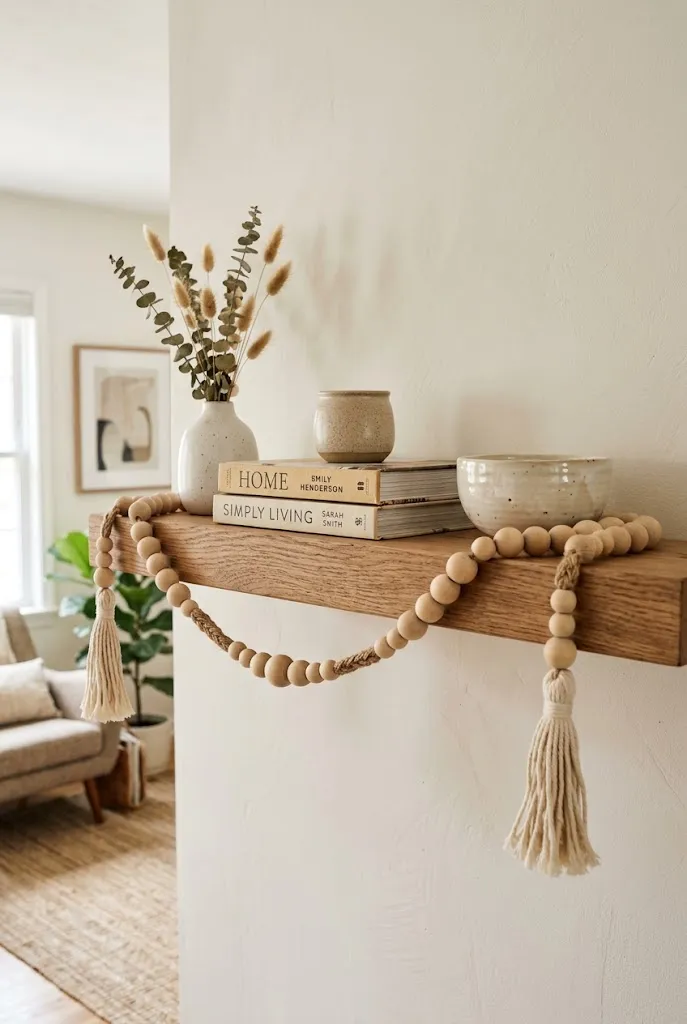
Wooden beads and tassels give you a playful garland with a warm, handmade feel. Thread wooden beads of mixed sizes onto a length of cord, alternating with a few larger round beads or small tassels for variety. Knot the cord between clusters so the beads stay in place and don’t slide together.
Hang the garland along the edge of a shelf or the top of a bookcase so it drapes between small decorative objects. Because the beads are lightweight, you can attach the ends with small adhesive hooks, which keeps the walls intact. The garland pairs well with pale wood tones and cream textiles.
17. Arrange Birch Branches with Glass Ornaments in a Tall Vase
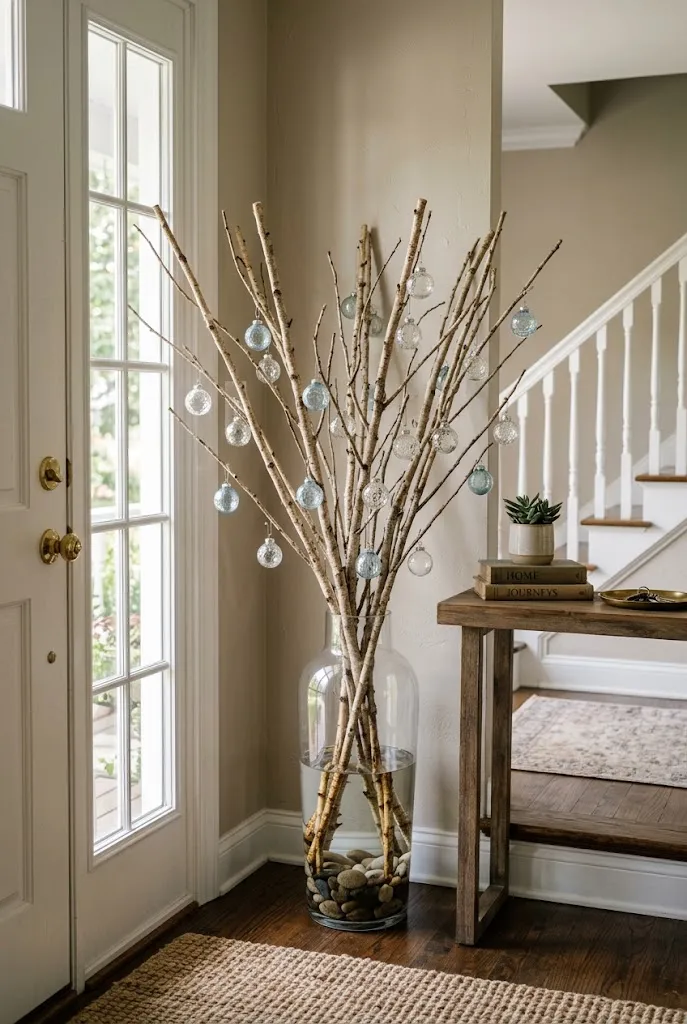
Tall branches in a large vase create height and movement in a corner or entryway. Faux birch branches are a practical choice if you want a clean look that lasts through the season. Cut the branches to fit the vase, then add a few glass ornaments in matching or complementary colors, hanging them from the branches with thin wire or ribbon.
Common Mistake: Placing a heavy arrangement in a light vase, which tips the whole thing over. Fill the base with smooth stones or a weighted insert so the arrangement stays steady.
Better Approach: Choose a vase that is wider at the base than at the top, and add the branches gradually. Balancing the weight low in the vase keeps the arrangement upright and lets the branches fan out naturally.
18. Build a Snowy Scene on a Wood Tray
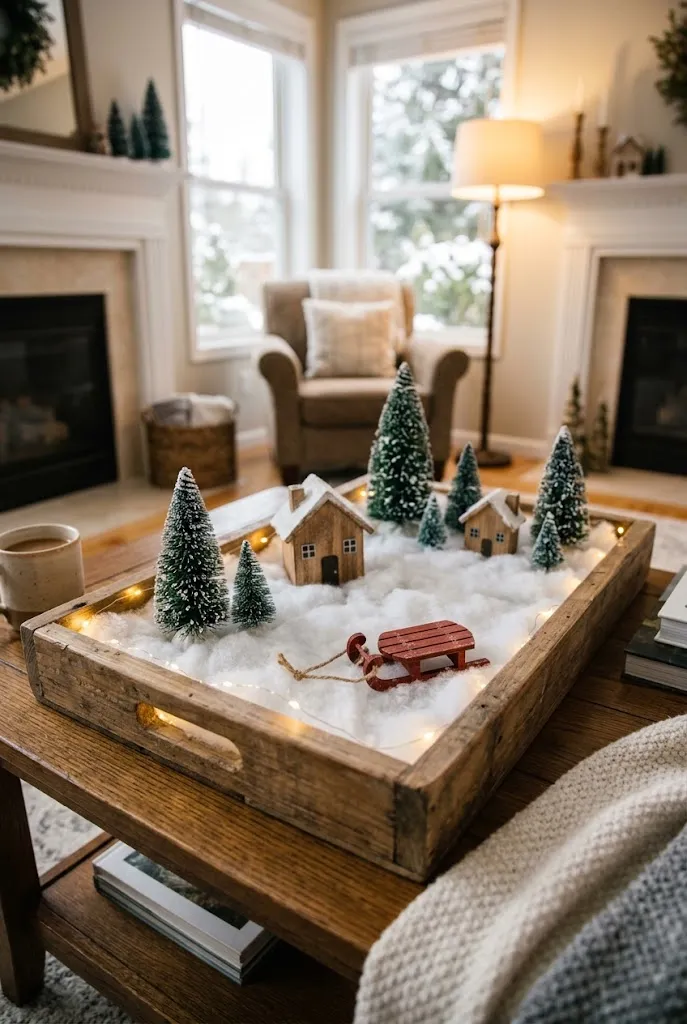
A wood tray gives you a contained space for a winter scene. Spread a layer of cotton batting across the tray to create a snowy base, then arrange small evergreen trees, miniature houses, or wooden figurines on top. Vary the heights and spacing so the scene feels like a small landscape rather than a row of objects. A few glittered pinecones or small battery lights add interest without overwhelming the base.
Choose a tray with raised edges so the batting stays contained. Keep the scene on a low surface, such as a coffee table or sideboard, where it can be seen up close.
19. Stack Wrapped Boxes as a Console Display
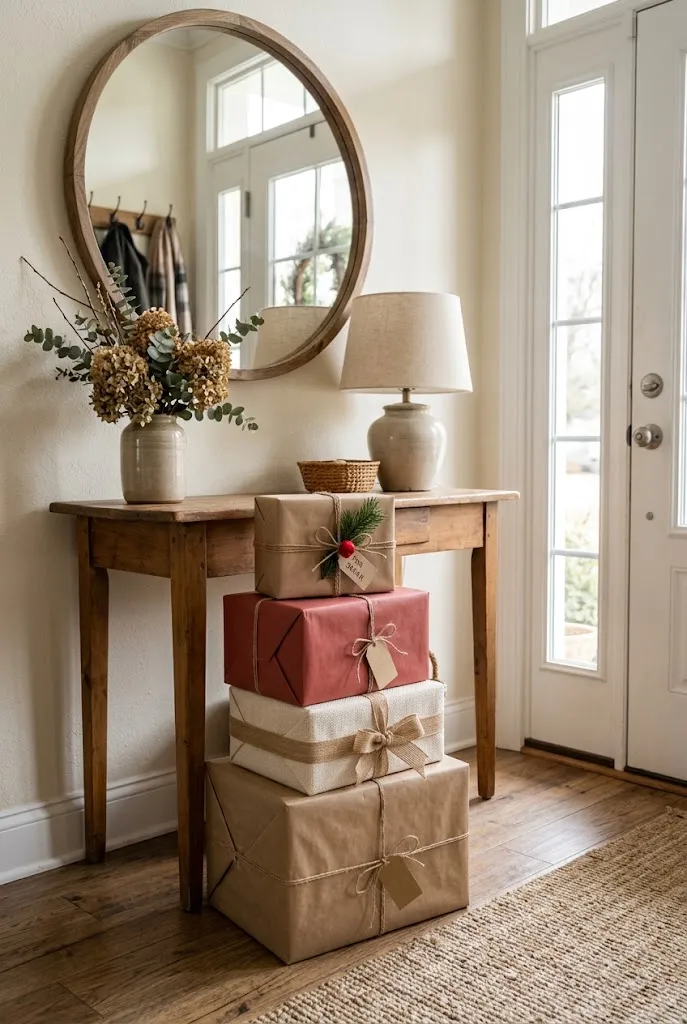
Wrapped boxes don’t have to go under the tree. Wrap three or four boxes in different materials, such as kraft paper, plain fabric, and a patterned wrapping paper, then stack them beside a console or entry bench. Varying the sizes and heights makes the stack look balanced.
Finish each box with ribbon, a sprig of greenery, or a small tag. Keep the palette limited to two or three colors so the stack feels cohesive rather than busy. Place the tallest box at the bottom and the smallest on top to keep the arrangement stable.
20. Paint Terra Cotta Pots as Holiday Planters
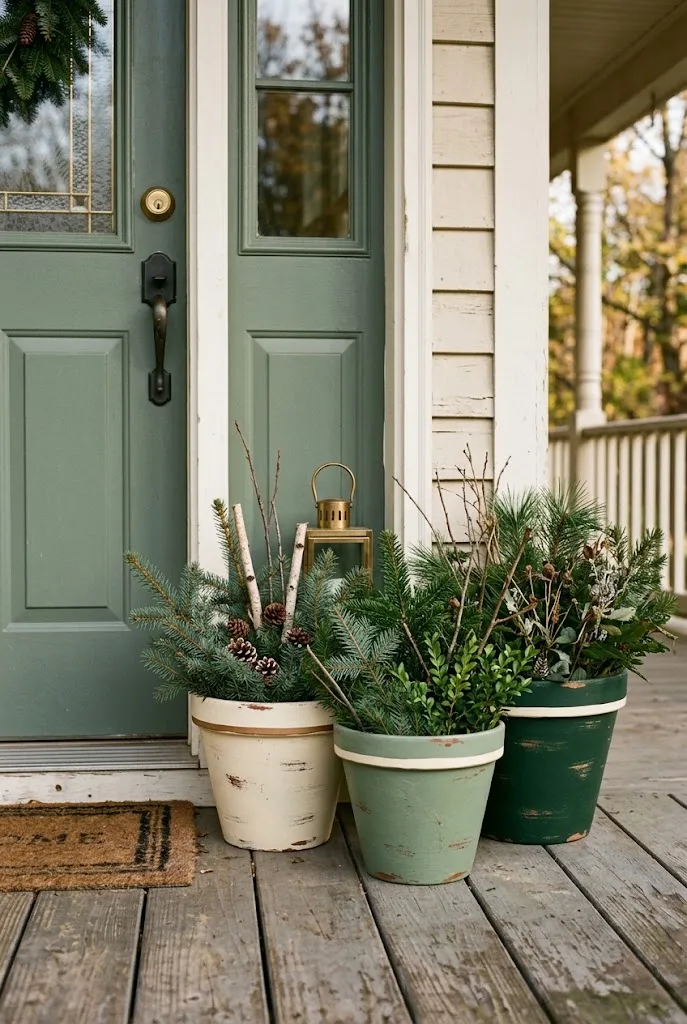
Terra cotta pots are affordable and easy to paint with craft or exterior paint, depending on where you’ll use them. Clean the pots, let them dry, and apply a primer if you want the color to stay even. Paint them in cream, sage, or deep green, then add a stencil or a simple band of contrasting color near the rim.
Once the paint dries, fill the pots with evergreen cuttings, twigs, or a faux arrangement and place them by the front door or along a porch railing.
- Scrub the pots and let them dry fully.
- Apply primer if you want even coverage, then let it set.
- Paint two thin coats, allowing each to dry before the next.
- Add a decorative band or stencil, and seal if the pots will stay outdoors.
- Fill with greenery and place them where they’ll be visible from the street.
21. Sew a Fabric Pocket Advent Calendar Board
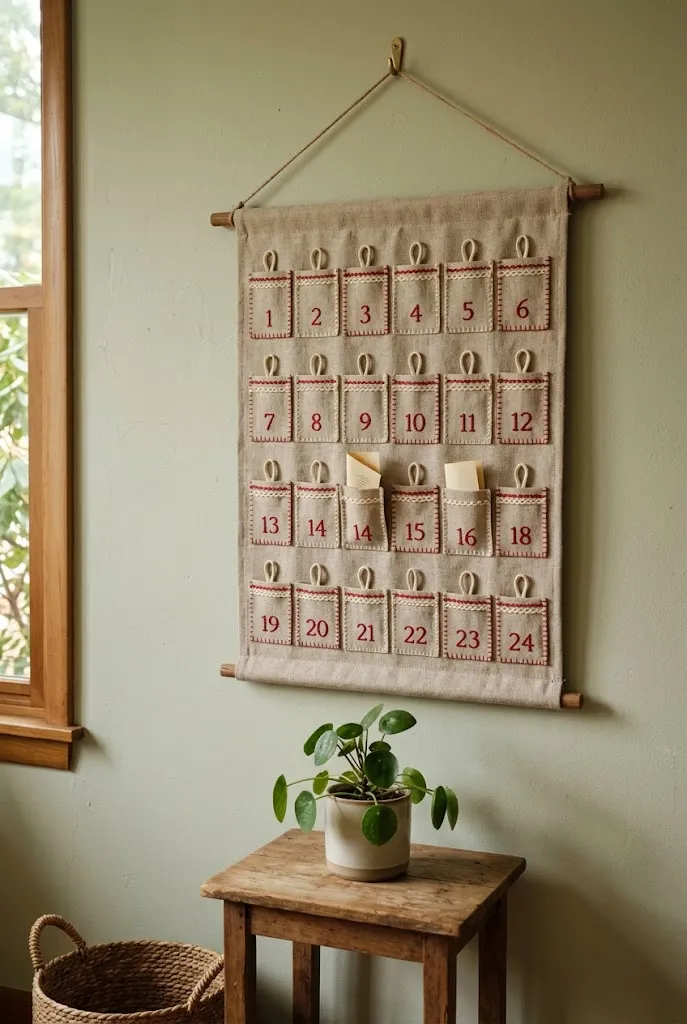
A fabric advent calendar is a practical project that works as decor between the holidays. Start with a sturdy canvas or linen panel, then sew a row of small fabric pockets onto the front, one for each day. Number the pockets with fabric paint or iron-on numbers, and fold a small piece of paper or a treat into each one.
The board can hang on a wall or from a wooden dowel attached at the top. Keep the pockets evenly spaced and the stitching neat, since the board is visible every day. A single color palette, such as natural linen with red accents, gives the calendar a cohesive look.
Editor’s Note: Pre-cut the pockets and check the spacing before stitching. A small measurement error across a row of pockets becomes obvious once the board is hung.
22. Tuck Greenery into a Bookshelf Vignette
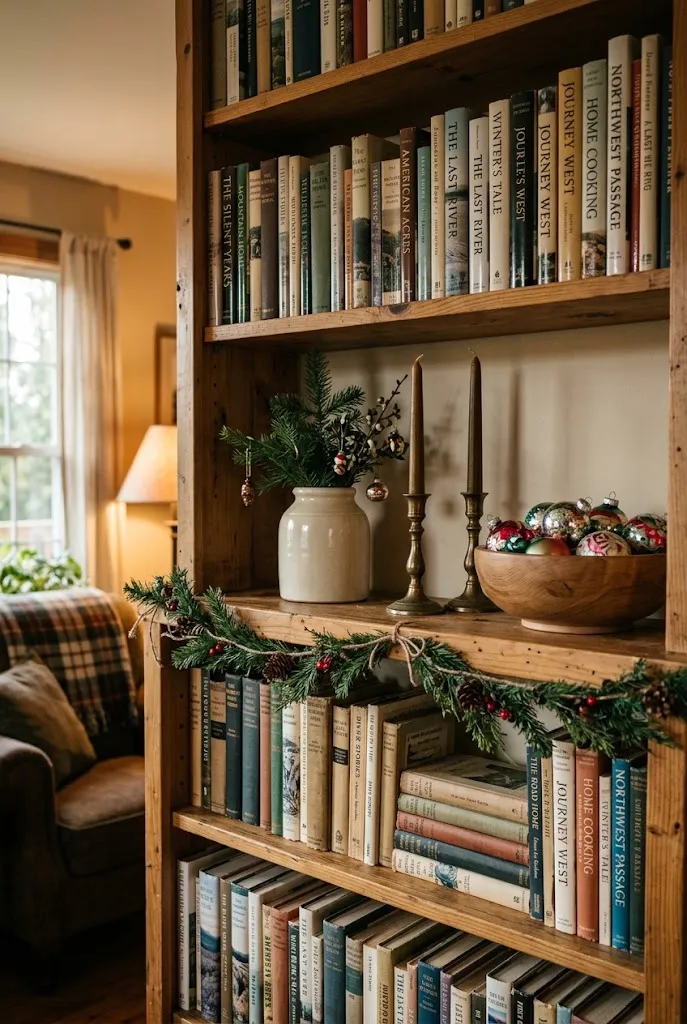
A bookshelf can carry the holidays without taking over the room. Choose a shelf that already holds books and objects, then add a few pieces of greenery between the books and at the ends of the shelf. A small ceramic vase, a wooden bowl of ornaments, or a pair of brass candlesticks adds variety.
Place a sprig or a short garland along the front edge of one shelf, and vary the heights of the stacked books so the arrangement looks layered. Keep the top of the shelf open enough that it still reads as a shelf rather than a display.
23. Lean a Vintage Ladder with Blankets and Ornaments
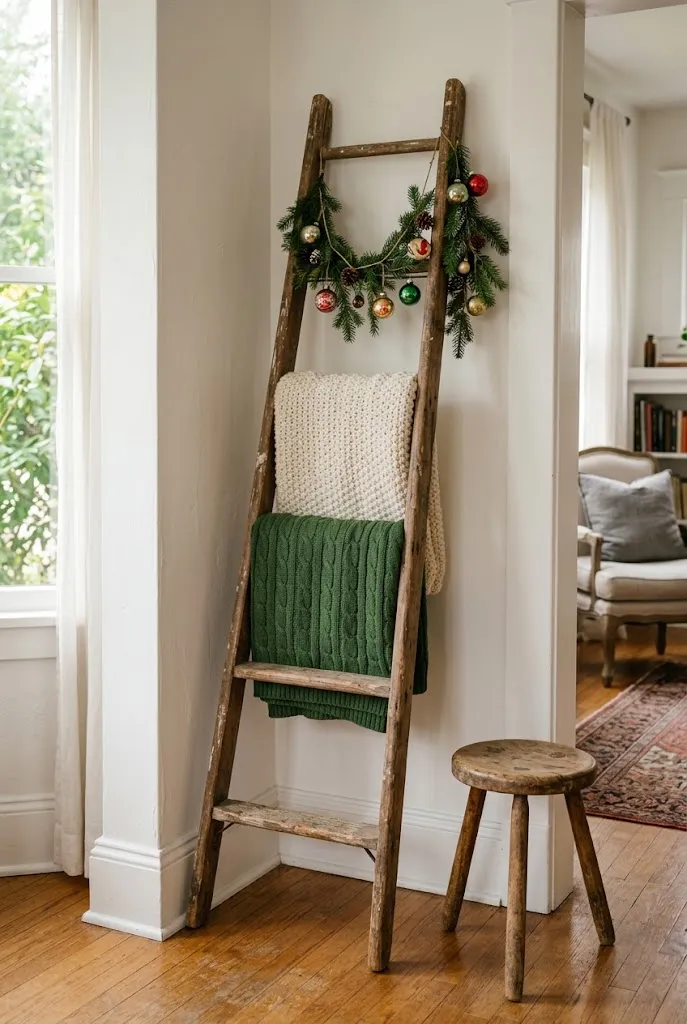
A vintage wooden ladder leaning against a wall is a good way to show off textiles and small decorations at different heights. Drape a folded knit blanket over one rung, add a second throw on a lower rung, and hang a few ornaments or a small garland from the top.
The ladder works best in an open corner or against a plain wall where it has room to stand. Make sure it’s stable and firmly placed, and keep it away from walkways. Choose a few textiles in related colors so the display reads as one vignette.
24. Dry Orange Slices for a Garland
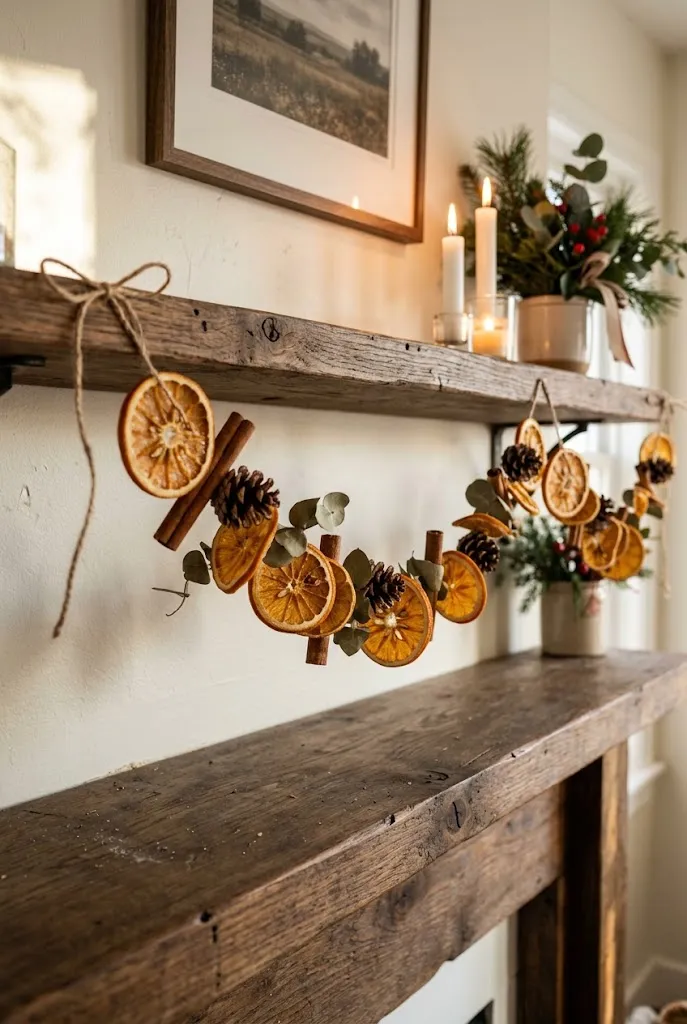
Dried orange slices bring a warm citrus tone and a natural texture to a garland. Slice oranges into thin rounds, about a quarter inch, and pat them dry with paper towels. Lay them on a wire rack set over a baking sheet and dry them in a low oven for several hours, turning them partway through. They are ready when they feel firm and no longer damp.
Thread the dried slices onto twine with a needle, spacing them evenly and adding a few cinnamon sticks or small pinecones between them for variety. Hang the garland in a window or drape it across a mantel. Keep it away from open flames, since dried citrus and cinnamon can ignite.
Quick Tip: Slice the oranges as evenly as possible. Thin, consistent pieces dry at a similar rate and look more intentional on the garland.
25. Cut Coffee Filter Snowflakes for a Window
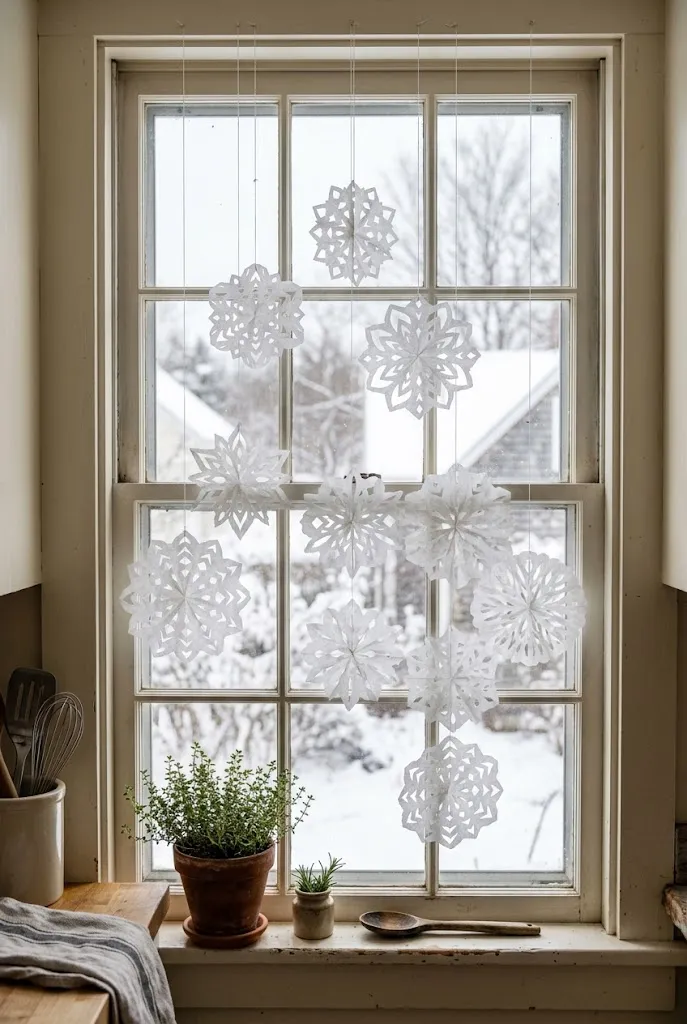
Coffee filters fold into snowflakes easily, and they let light through when hung in a window. Fold a filter into quarters or eighths, then cut small shapes along the folded edges with scissors. Open the filter carefully to reveal the pattern. Hang a few at varying heights, using clear tape or a thread loop, so they catch the light and sway slightly.
Because the filters are thin and light, they’re easy to arrange in a cluster. Use a few sizes to add depth. These snowflakes are a good project for a rainy afternoon, and they cost very little to make.
26. Fill a Glass Cloche with Ornaments and Greenery
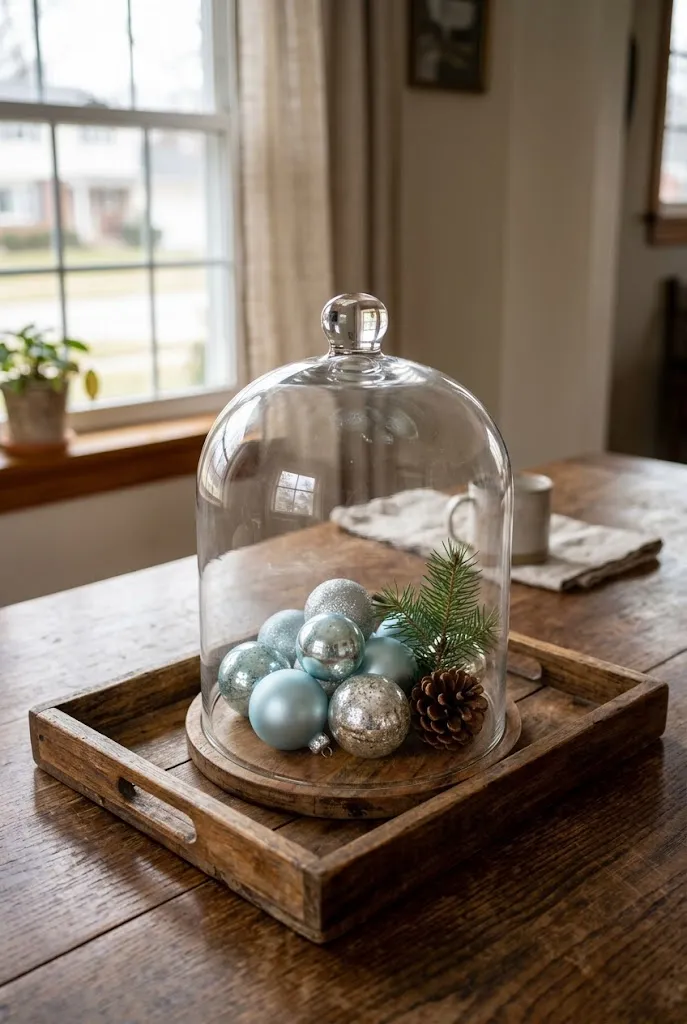
A glass cloche gives a centerpiece a protected, display-case feel. Place a small wooden base or a flat tray on a table, set the cloche over it, and fill the space with a cluster of ornaments in matching colors, a few sprigs of greenery, and perhaps a small pinecone. The cloche keeps dust off the arrangement and frames it neatly.
Thrift stores and kitchen shops often carry glass domes at modest prices. Choose one with a smooth edge and a sturdy base, and keep the arrangement low enough that it doesn’t press against the glass.
Do / Don’t:
- Do group ornaments in one or two colors so they read clearly through the glass.
- Don’t pack the dome so tightly that the greenery crushes or the ornaments can’t be seen.
27. Hang an Ornament Wreath on a Wire Frame
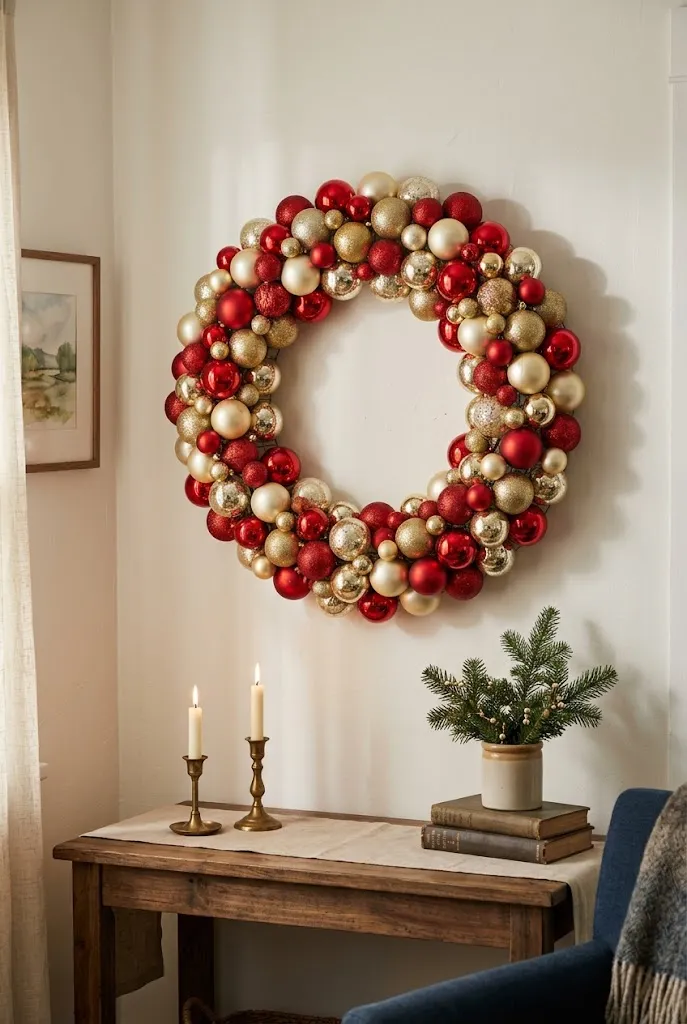
An ornament wreath is a striking piece that works well above a fireplace or on a wall. Start with a wire wreath frame, then attach ornaments to the frame with floral wire, twisting the wire through the cap or loop of each ornament. Alternate sizes and finishes so the wreath has depth, and place a few larger pieces at the top and bottom for balance.
For a home with children or pets, choose shatterproof ornaments, which are sturdier and safer to handle. Keep the color palette limited to two or three shades so the wreath looks cohesive from across the room.
28. Plant a Winter Porch Planter with Berries and Greenery
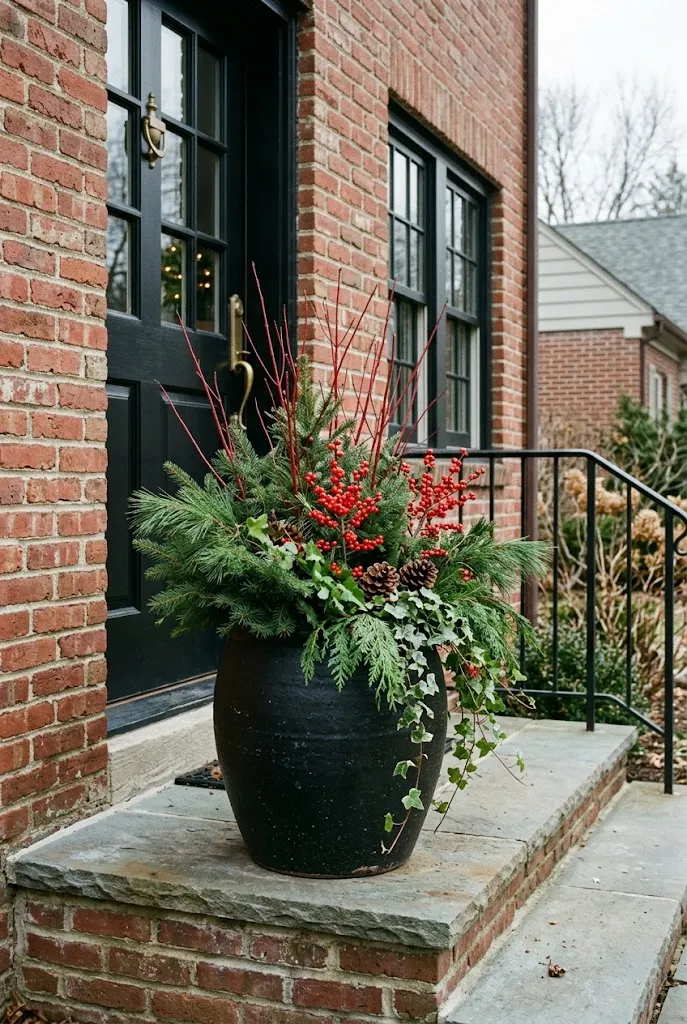
An outdoor planter is a welcoming way to greet guests, and it can hold up through a cold season if you choose the right materials. Fill a large planter with a base of soil or a sturdy foam insert, then add evergreen tips, a few stems of dogwood or red-twig branches, and winter berry clusters. Place the tallest stems at the back and let the trailing greenery spill over the edge.
Choose weather-resistant materials and place the planter where it will be sheltered from strong winds. Fresh greenery lasts longer in cool weather, but it still needs a light watering when the soil feels dry. Keep the planter away from the direct heat of a doorway light if one is nearby.
Common Mistake: Using only decorative picks that can blow away or fade. Mixing fresh greenery with a few durable stems creates a fuller, more stable arrangement.
Where to Start
If you’re short on time, begin with a project that uses materials you already have, such as the salt dough stars, the kraft paper garland, or the coffee filter snowflakes. These take little money and can be finished in an afternoon. If you want a larger impact, a fresh door wreath or a staircase garland covers more visible space and makes the house look decorated from the street.
Think about where you spend the most time during the season. A kitchen table, a mantel, or a bookshelf near a favorite chair may matter more than the front porch. Start with one or two projects in the room you use most, then add a second round the following year. Handmade decorations often look best when they grow in a home over time rather than all at once.